
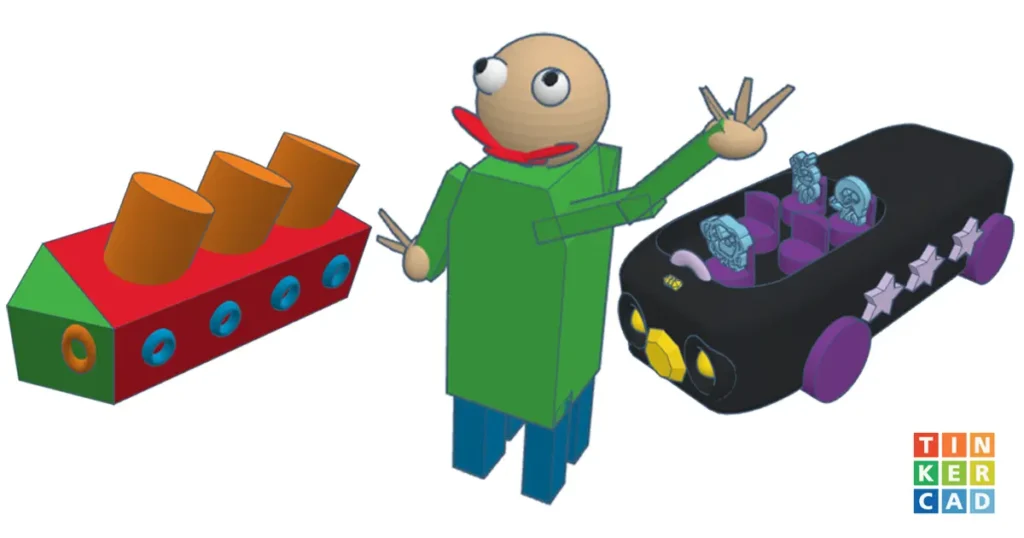
Tinkercad for kids is one of my favorite ways to introduce upper elementary students to 3D design and engineering. Since 2016, I have taught it to hundreds of students in Grades 3 through 5 and refined these lessons through years of classroom experience.
In this guide, I’ll share the sequence I use, beginning with students’ first login and continuing through boats, avatars, and Dream Vehicles. You’ll find classroom management tips, resources, and engaging projects that help students master the core skills of 3D modeling.
What Is Tinkercad?
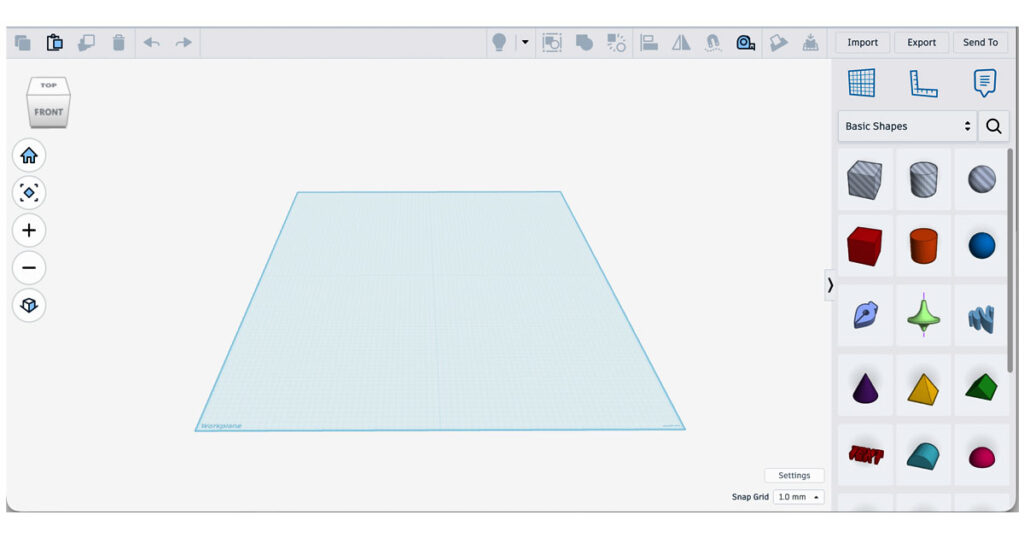
Tinkercad is a free, browser-based design program developed by Autodesk. It allows users to create 3D models, simulate electronic circuits, and explore block-based coding, all from a web browser. This article focuses on Tinkercad’s 3D design workspace, where students learn the fundamentals of three-dimensional modeling using simple geometric shapes.
Why Teach Tinkercad in Elementary School?
Research suggests that developing spatial reasoning during the elementary years supports later success in STEM. Studies have also found that 3D modeling activities help students strengthen those important spatial reasoning skills.
Tinkercad gives elementary students an engaging introduction to engineering, design thinking, and three-dimensional problem-solving. Unlike drawing on paper, students create digital objects that they can rotate, resize, reshape, align, and refine as they work. Every project becomes an opportunity to plan, test ideas, make revisions, and solve problems.
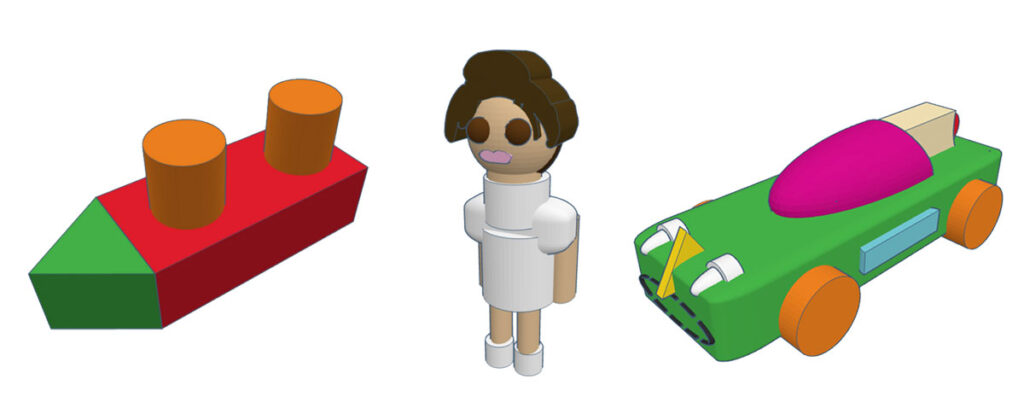
As students build their models, they develop spatial reasoning while strengthening creativity, persistence, and critical thinking. They discover that there is rarely one correct solution to a design problem. Improving a design through multiple revisions is simply part of the engineering process.
One of the biggest misconceptions about teaching Tinkercad is that every project needs to be 3D printed. In my experience, the real learning happens while students are designing, revising, and solving problems on the screen. Students can share their work through screenshots and digital portfolios, making it easy to celebrate learning even when a model is never printed.
In my classroom, only fifth graders print their final Dream Vehicle designs. This keeps the emphasis on learning strong design skills while keeping the printing process manageable. Tinkercad also provides a refreshing change of pace after a semester of coding, animation, and graphic design, making it one of the most engaging units of the school year.
Getting Students Logged In
For many elementary teachers, the biggest challenge isn’t teaching 3D design. It’s getting every student successfully logged into Tinkercad for the first time. Once students have completed that initial login, the process becomes much easier and usually takes only a minute or two at the start of future lessons.
Because third graders have spent years relying on ClassLink QuickCards, I don’t introduce Tinkercad until the second semester. By then, students have already gained experience typing their Google credentials in other applications, making that first Tinkercad login much less frustrating.
My Classroom Login Process
Every school configures Tinkercad a little differently. Student login procedures depend on how accounts are managed and the devices students use.
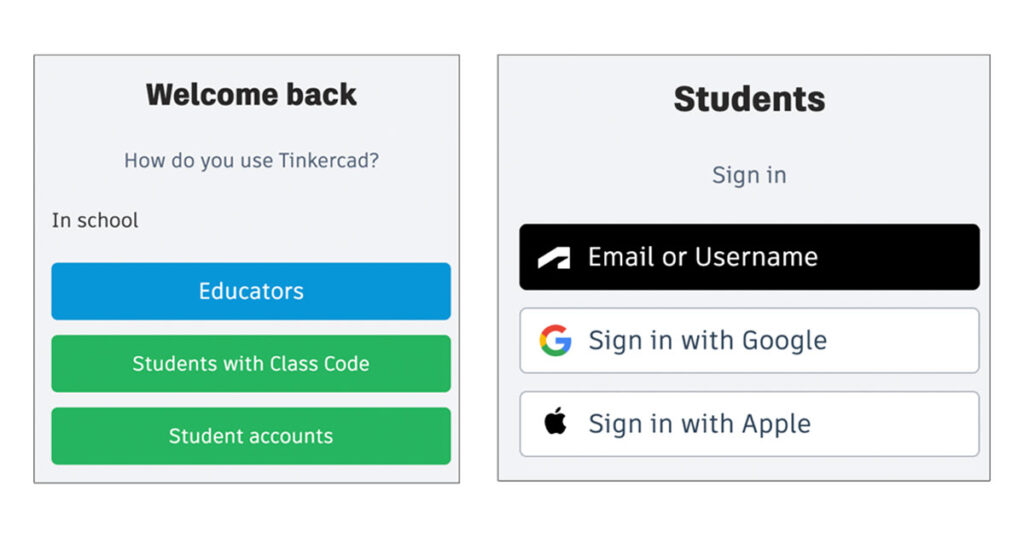
In my classroom, students use desktop PCs running Microsoft Edge. Edge works well for managing student accounts and can automatically sign students out when the browser closes. Our district launches Tinkercad through ClassLink, but QuickCards cannot be used to sign students into Tinkercad on Windows PCs. Instead, students must sign in with their school Google accounts by typing their usernames and passwords.
Free First-Time Tinkercad Login Presentation
To help students through that first login, I use the presentation below with every class:
Download: First-Time Tinkercad Login Presentation (Google Slides – Make a Copy)
Feel free to use, edit, or adapt this presentation for your own school. It was designed to help elementary students successfully complete their first Tinkercad login and introduce a few basic concepts of 3D design.
Note: Every school’s login process is different. The steps in this presentation reflect one school’s setup using a Windows PC lab, Microsoft Edge, ClassLink, and Google accounts. Feel free to modify the slides to match your district’s login procedures, devices, and student accounts.
Common login mistakes usually involve clicking the wrong button between Tinkercad use and the sign-in options.
Lesson 1: Build a Boat in Tinkercad
Every student in my classroom begins with the same project: building a simple boat (technically a ship with two smokestacks). I use this lesson with students in Grades 3 through 5 because it introduces foundational skills and builds toward more advanced work.
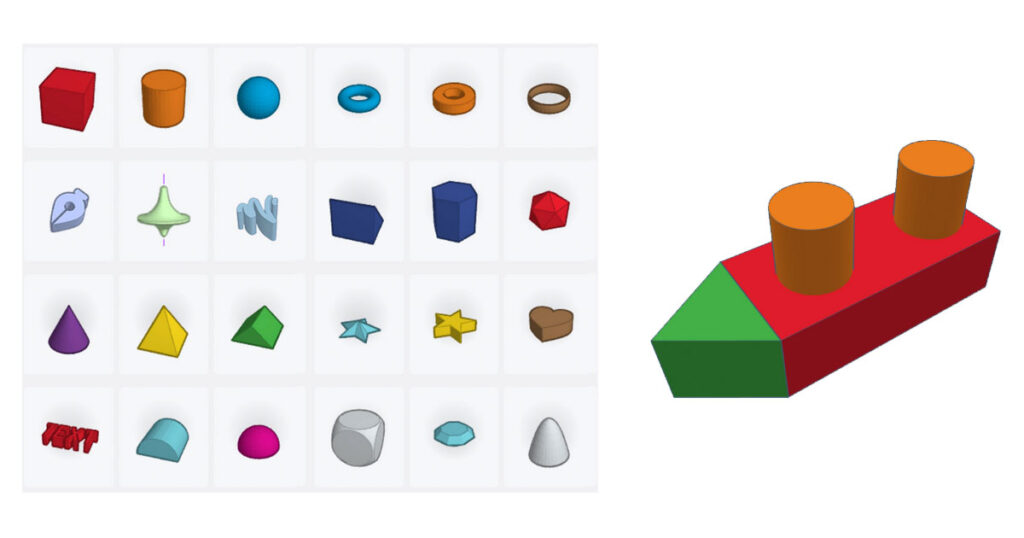
The model is intentionally simple. Students build it using only five basic shapes: one rectangular prism, one triangular prism, and two cylinders. Although the finished project looks straightforward, it teaches students to think in three dimensions and create precise objects that match given dimensions.
As students become more experienced, I encourage them to personalize their boats. Fifth graders often add portholes, smoke, propellers, and other creative details. Students who finish early can convert their ships into sailboats by using holes to carve out the hull. This extra step demonstrates how the lesson extends from basic models to more advanced Tinkercad features.
Why Every Student Starts with a Boat
I start with a boat because almost every student immediately recognizes what they’re building. The model is simple enough that beginners can be successful, but it also gives more experienced students plenty of opportunities to add details and make the design their own.
In Grades 3 and 4, I ask students to match the dimensions shown in the example. This lets me quickly see whether they understand how to resize objects accurately and work with measurements. Precision matters because nearly every future project depends on these same skills.
By fifth grade, students confidently modify their boats with their own ideas while still applying the same core modeling techniques.
Free Tinkercad Boat Lesson Presentation
Before students begin building, I use the Google Slides presentation below to introduce Tinkercad, explain why we’re starting with Basic Shapes, and guide students through the boat challenge. The presentation includes classroom examples, optional videos, lesson goals, extension activities, and teacher notes that provide additional instructional guidance.
Download: Tinkercad Lesson 1: Build a Boat (Google Slides – Make a Copy)
Feel free to use, edit, or adapt this presentation for your own classroom. It was designed for Grades 3–5 but can easily be modified for other grade levels, pacing, or classroom setups.
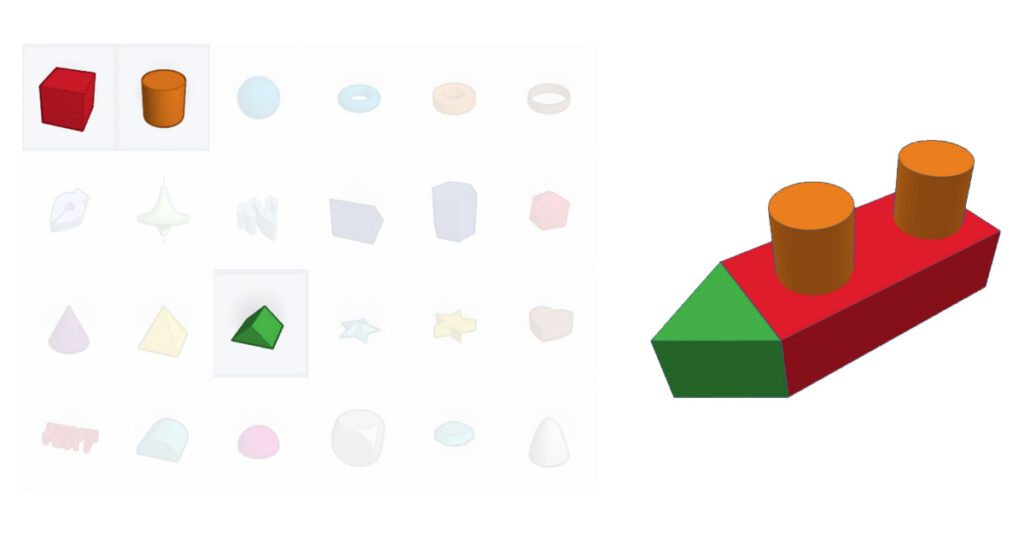
Why I Start with Basic Shapes
Tinkercad includes many shape categories besides Basic Shapes, including hardware, vehicles, machines, people, and decorative objects. While those shapes can make impressive models quickly, I ask students to use only the Basic Shapes category throughout this lesson.
Over the years, I’ve found that students learn more when they build their own models instead of searching for the perfect premade shape. When every object has to be built from simple geometric shapes, students practice the skills they’ll use throughout the rest of the unit: placing, resizing, rotating, aligning, grouping, and using holes.
Otherwise, it’s easy for the shiny object effect to take over. Students spend more time browsing through hundreds of specialized shapes than learning how to build models themselves.
Once students have mastered the fundamentals, I’m happy for them to explore other shape libraries. By then, they’re using those shapes to enhance their designs rather than relying on them to do the work.
Tinkercad Skills Students Practice
Although the boat is a beginner project, it introduces many of the core skills students will use throughout the rest of the unit.
Every student practices:
- Placing objects on the workplane
- Resizing shapes to match specific dimensions
- Rotating shapes accurately
- Comparing their model to a reference design
- Working with measurements in millimeters
Many students also practice:
- Grouping multiple objects into one object
- Aligning objects, especially when positioning the smokestacks and the bow
- Creating holes (e.g., carve out the hull when building a sailboat)
One feature I especially appreciate is Tinkercad’s temporary placement preview. When students drag one shape against another, Tinkercad previews how the two surfaces will align before the incoming shape is placed. This makes it much easier for beginners to position objects accurately and has reduced placement mistakes in my classroom.
The looping animation below demonstrates the feature.
As students move on to later projects, they continue using these same skills while adding new ones, such as grouping, duplicating, and mirroring objects.
Common Student Challenges
The most common difficulty is positioning the triangular bow. Students usually understand that it needs to rotate 90 degrees, but they often grab the wrong rotation handle or accidentally use free rotation instead of fixed-angle rotation. The result can be a bow that is just slightly crooked.
I usually pause the class for a quick demonstration when I see this happening. Once students understand the difference between fixed and free rotation, most can correct the problem on their own. I also remind students that comparing their model to the example is part of the design process.
Optional Short Video Tutorials
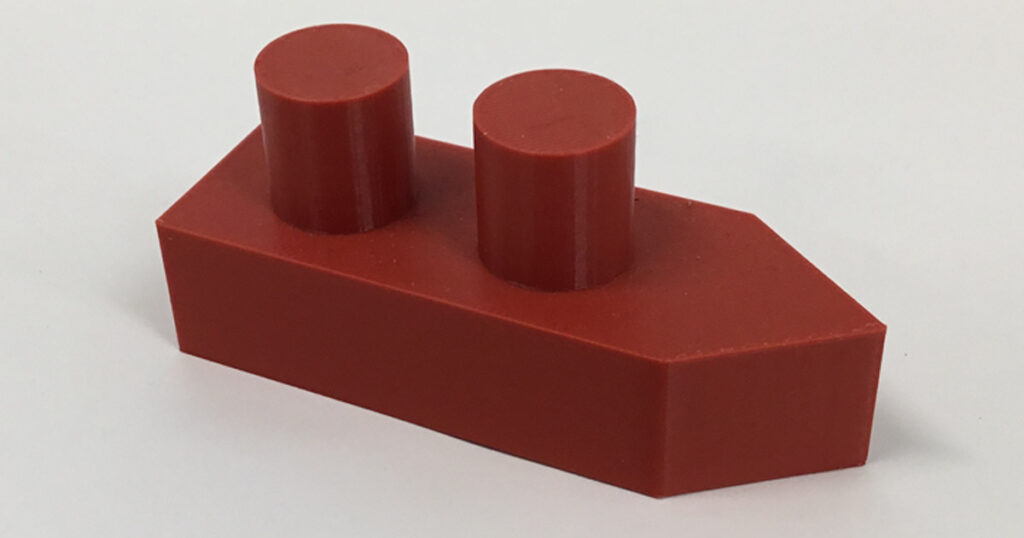
These short videos aren’t step-by-step build tutorials. Instead, they give students a closer look at the finished models so they can pan around them, check dimensions, and compare their work to the example.
I intentionally left the videos without narration. Students can focus on the visual details while I explain what’s happening live during class. Sometimes I even invite a student who has already mastered the technique to explain what they’re noticing as the video plays. Later, students can revisit the same videos independently whenever they want to compare their models or check a detail.
▶ Basic Boat Reference Model (0:36)
▶ Rotate and align the bow correctly (1:02)
▶ Pan around and check dimensions for the sailboat (0:30)
Assessing Student Learning
I don’t use a formal rubric for this first project. Instead, I spend most of the lesson circulating around the room, observing students as they resize, rotate, align, and position shapes. Their questions and completed boats quickly show me who is ready to move on and who needs additional support.
To encourage independence, every student also has access to my Tinkercad Shortcuts & Mouse Moves reference sheet. Rather than reteaching the same keyboard shortcuts and mouse movements over and over, I simply direct students to the handout when they need a reminder. This helps them rely on the reference instead of waiting for me, allowing me to spend more time helping students with design decisions and problem-solving. The handout summarizes common keyboard shortcuts, mouse controls, object editing, and workspace navigation in a single page.
Download: Tinkercad Shortcuts & Mouse Moves for PC (PDF)
Lesson 2: Design an Avatar in Tinkercad
After learning the basics of Tinkercad in the boat lesson, students are ready to create something much more personal. In this lesson, students design an avatar using only Tinkercad’s Basic Shapes while practicing grouping, aligning objects, and creating holes.
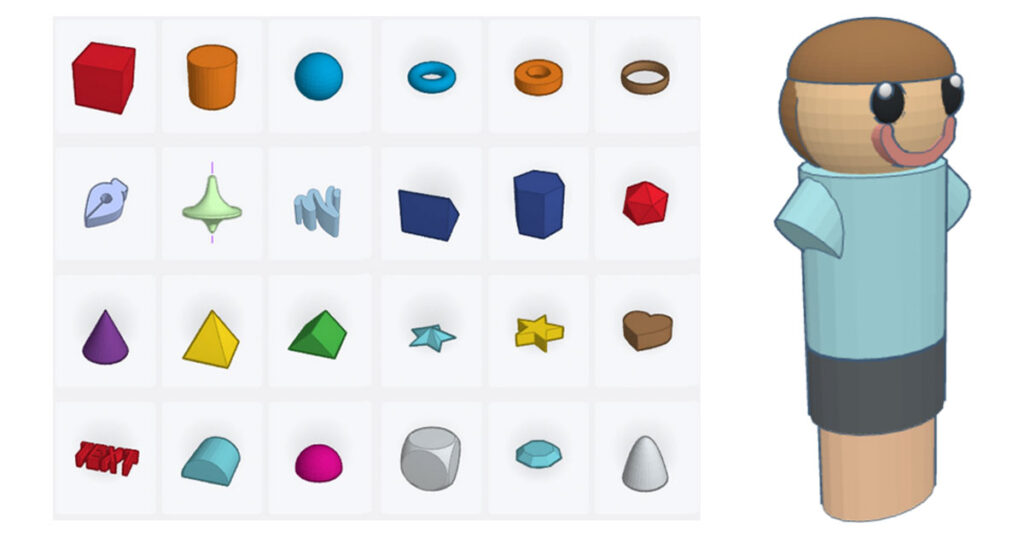
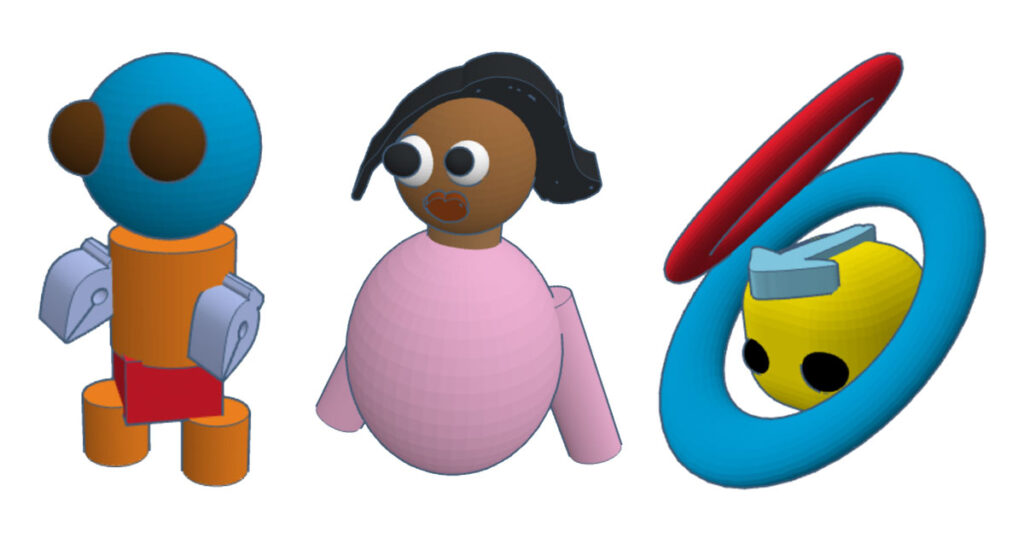
Some students create realistic self-portraits, while others invent robots, superheroes, fantasy creatures, or completely original characters. Every student begins with the same collection of Basic Shapes, yet every avatar is unique.
Why I Teach Avatars in Grades 3 and 4
Students first complete this lesson in third grade. When they reach fourth grade, I encourage them to continue developing the same avatar whenever possible. Most students make a copy of last year’s design before experimenting with new ideas and more advanced Tinkercad skills. Others choose to begin again with a completely new character. Both approaches are successful because students are applying what they’ve learned while growing as 3D designers.
Free Tinkercad Avatar Lesson Presentation
Before students begin designing, I use the Google Slides presentation below to introduce the avatar challenge, explore how simple geometric shapes can become original characters, and review the Basic Shapes students will use throughout the lesson. The presentation also includes student examples, teacher examples, short geometry review questions, lesson goals, and teacher notes.
Download: Tinkercad Lesson 2: Design an Avatar (Google Slides – Make a Copy)
Feel free to use, edit, or adapt this presentation for your own classroom. It was designed for Grades 3–4 but can easily be modified for different grade levels, pacing, or classroom needs.
Your Avatar Doesn’t Have to Look Like You
Although students may choose to model themselves, it’s completely optional. Some carefully recreate their own hairstyles or glasses, while others design imaginary creatures, robots, superheroes, or fantasy characters. The goal is to practice 3D modeling skills and make thoughtful design decisions, not create an exact likeness.
Choose the Size That Fits Your Design
Students decide how much of the character to build. Some create only a head, while others add a neck and torso, build from the waist up, or design a complete full-body character. More advanced students sometimes create several avatars on the same workplane to compare different ideas or build an entire cast of characters.
Tinkercad Skills Students Practice
Students continue practicing the skills introduced in the boat lesson while adding several important new ones. During this lesson, students learn to:
- Group multiple shapes into a single object
- Align facial features and other body parts
- Create holes to add details or remove material
- Duplicate shapes and mirror them to create symmetrical features
- Resize and position shapes with greater precision
- Combine Basic Shapes to create original characters
Students are still using only Basic Shapes. The creativity comes from how those shapes are combined rather than searching and searching through shape libraries.
Learning to Solve Design Problems
The short animation below demonstrates one example of this kind of multistep design thinking.
Building a realistic face isn’t just about making an eye. Students first create the eye, position it on the head, duplicate it, and then carefully nudge the copy into place with the arrow keys.
As students work through these steps, they begin recognizing patterns they can use throughout Tinkercad. More advanced students may even group an eyeball and pupil before duplicating them, making it easier to position matching eyes accurately. These processes require planning, spatial reasoning, and a surprising amount of problem-solving.
At some point, many students stop asking, “What tool do I use?” and begin asking, “How can I use what I’ve already built?” That’s an important shift. Students start recognizing that the same sequence of steps can solve many different design problems. That kind of thinking carries into every project they build afterward.
Lesson 3: Design a Dream Vehicle in Tinkercad
The Dream Vehicle project is the final Tinkercad lesson for my fifth graders and begins in March, giving me enough time to print selected models before the end of the school year. By this point, students are comfortable using Basic Shapes, grouping, alignment, holes, duplication, and the other skills introduced in the previous lessons. Instead of teaching new tools, I give students a more open-ended design challenge and let their creativity take over.
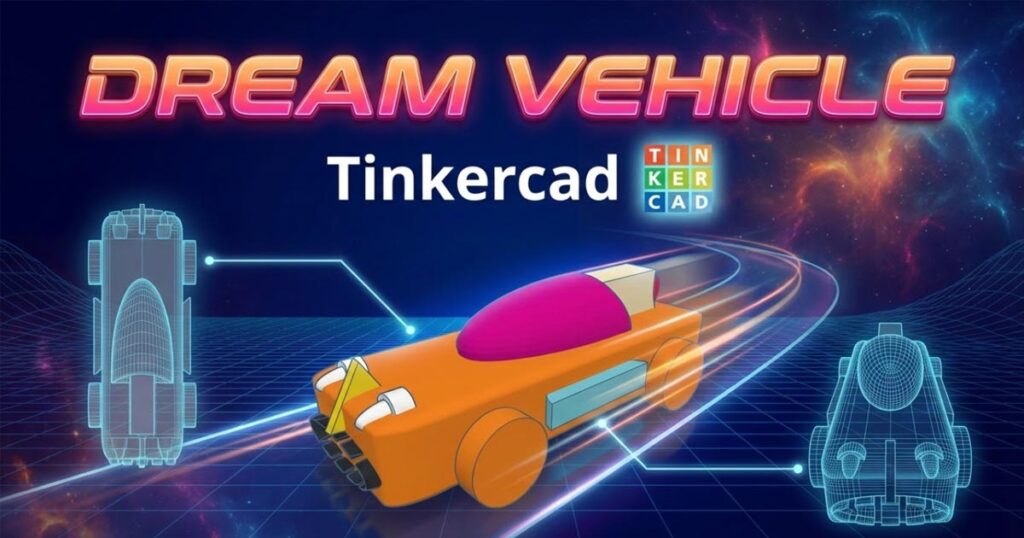
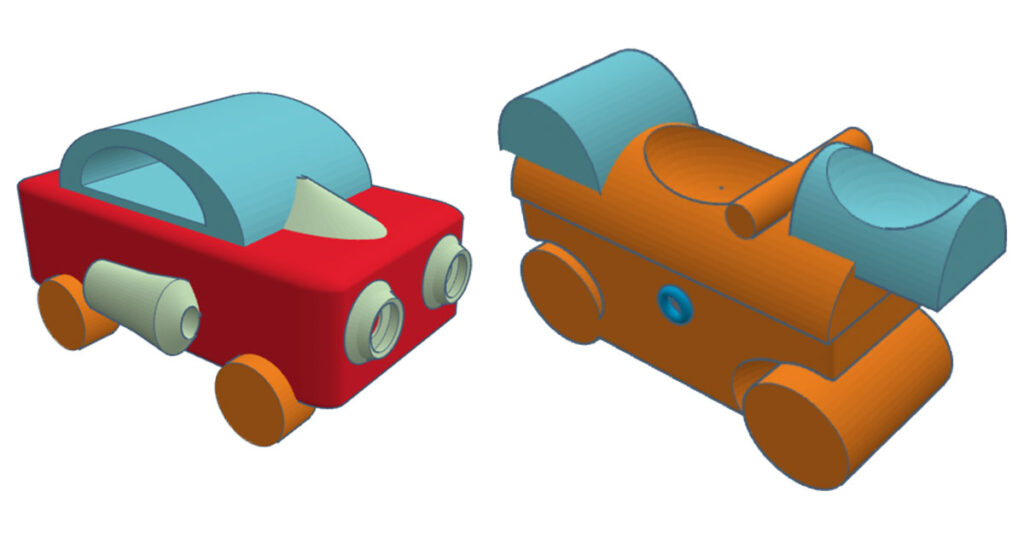
Most students create vehicles with wheels, but that’s not a requirement. Flying machines, submarines, futuristic transports, fantasy vehicles, and other imaginative ideas are all welcome. The only expectation is that students design with 3D printing in mind, even if they ultimately choose not to print their model.
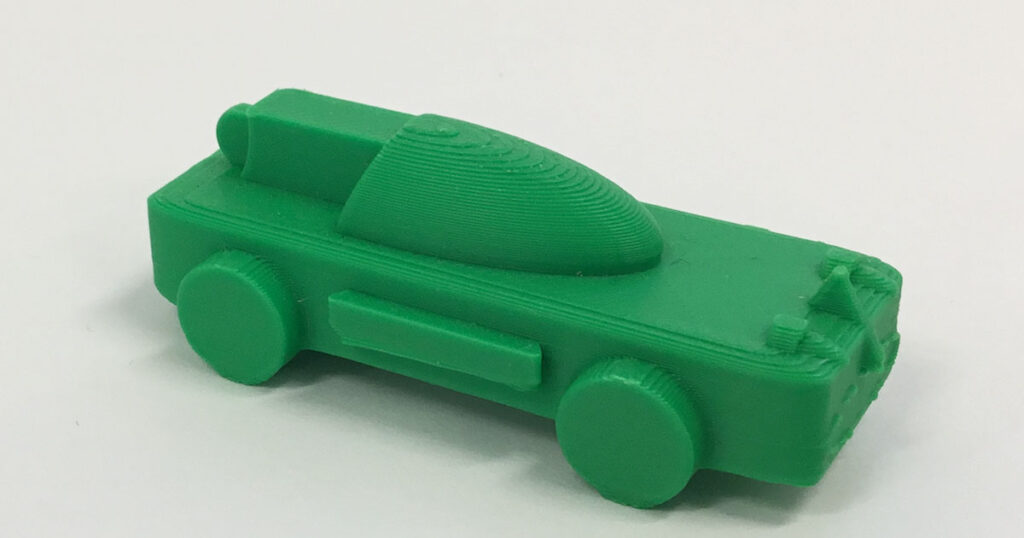
I print several vehicles at a time on a Bambu Lab printer, and students also capture screenshots of their finished designs for their digital portfolios. Even students who decide not to print still have a polished digital model they can showcase during student-led conferences or share with their families.
Free Tinkercad Dream Vehicle Lesson Presentation
Before students begin designing, I use the Google Slides presentation below to introduce the Dream Vehicle challenge, showcase student examples, review the printable design guidelines, and discuss how to prepare models for successful 3D printing. The presentation also includes teacher notes and several quick review questions that reinforce concepts from the Boat and Avatar lessons.
Download: Tinkercad Lesson 3: Design a Dream Vehicle (Google Slides – Make a Copy)
Feel free to use, edit, or adapt this presentation for your own classroom. Although I created it for fifth grade, it can easily be modified for different grade levels, classroom workflows, or 3D printers.
Unlike the previous lessons, this presentation is intentionally brief. By this point, students already know the Tinkercad tools and are ready to spend most of their class time designing, revising, and solving problems independently.
Free Tinkercad 3D Printing Checklist
During independent work time, I often display the silent checklist below on a continuous loop on my SMART Board. Rather than stopping the entire class to review the printing requirements, students can look up, compare their designs to the checklist, and continue working.
If a student seems off track, I’ll often ask them to spend about a minute watching the checklist before making changes to their design. Many questions are answered without interrupting the lesson, allowing me to continue helping individual students while everyone else keeps designing.
Feel free to use, edit, or adapt these resources for your own classroom.
▶ Watch: Tinkercad 3D Printing Checklist (SMART Board Loop)
Tip: To play the video continuously during independent work time, right-click the YouTube video and select Loop.
Tinkercad 3D Printing Checklist (SMART Board Loop) (Google Slides – Make a Copy)
Tinkercad 3D Printing Checklist (MP4 – View or Download )
Students Design for 3D Printing
Although printing is optional, every student designs as if the model will eventually be printed. Designing with real-world constraints encourages students to think beyond what looks good on the screen. They begin considering whether their design could actually be manufactured, an important part of engineering and product design.
Before submitting, students review the following checklist:
- Vehicle sits flat on the workplane
- Vehicle stands without tipping
- Vehicle length between 60–80 mm
- Minimum part thickness of about 3 mm (thicker is better)
- Avoid parts that stick out too far (for example, large wings)
- No floating or disconnected parts
- Group all objects before submitting
Even students who choose not to print benefit from following these guidelines. Their models are stronger, more realistic, and better prepared for future 3D printing if they decide to revisit the project later.
Plan Your 3D Printing Workflow
If you plan to print student designs, test your submission process well before introducing the project. I originally had students export STL files and upload them through a Google Form, which made it easy to organize and track more than 100 print jobs. Later, district security policies blocked STL files, so I had to locate each student’s design individually in Tinkercad and export every file myself.
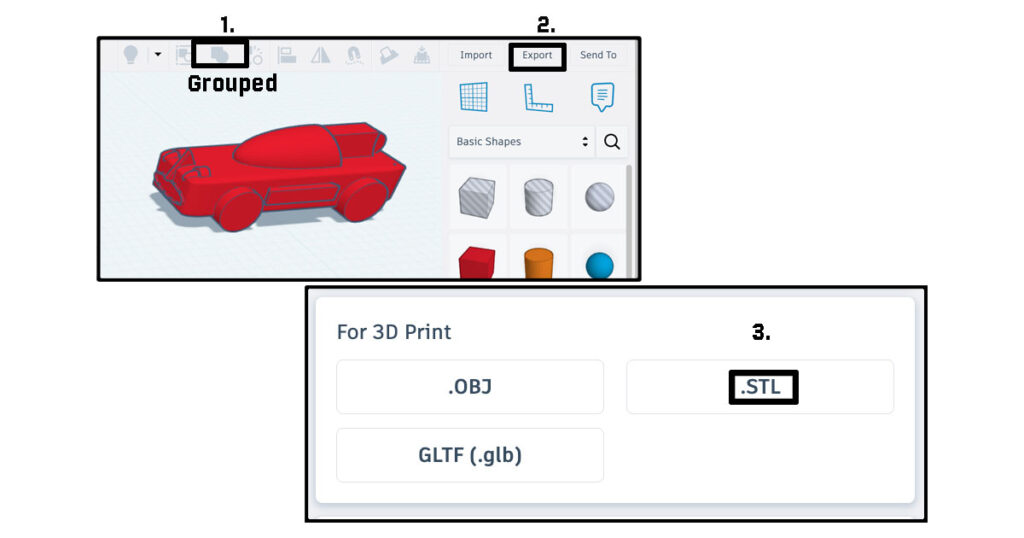
Every school has different security settings, browser policies, and device restrictions. Before starting the project, verify that students can export STL files and decide exactly how they will submit their designs. A little planning can save hours of frustration later.
If you’ll be exporting models from student accounts, consider having students change their Tinkercad display names to their real names before beginning the project. It makes locating designs much faster when it’s time to print.
Managing Student 3D Print Jobs
Printing student work is rewarding, but it also requires patience and flexibility. Even with a reliable printer, expect occasional failed prints, clogged nozzles, disconnected parts, or designs that need small revisions before they’ll print successfully. With more than 100 fifth-grade projects, I usually print only a few models at a time over several weeks.
Sometimes I ask students to revise their models before printing. Other times, if the fix is something simple like deleting a tiny floating object or thickening a fragile part, I’ll correct it myself so the print queue keeps moving. Seeing a digital design become a physical object gives students a different perspective on the design process.
Celebrating Student Designs
Whether a vehicle is printed or not, every student finishes the unit with something worth sharing. Students capture screenshots of their completed designs for their digital portfolios, where they can explain their design decisions and showcase their creativity during student-led conferences or when sharing their work with family members.
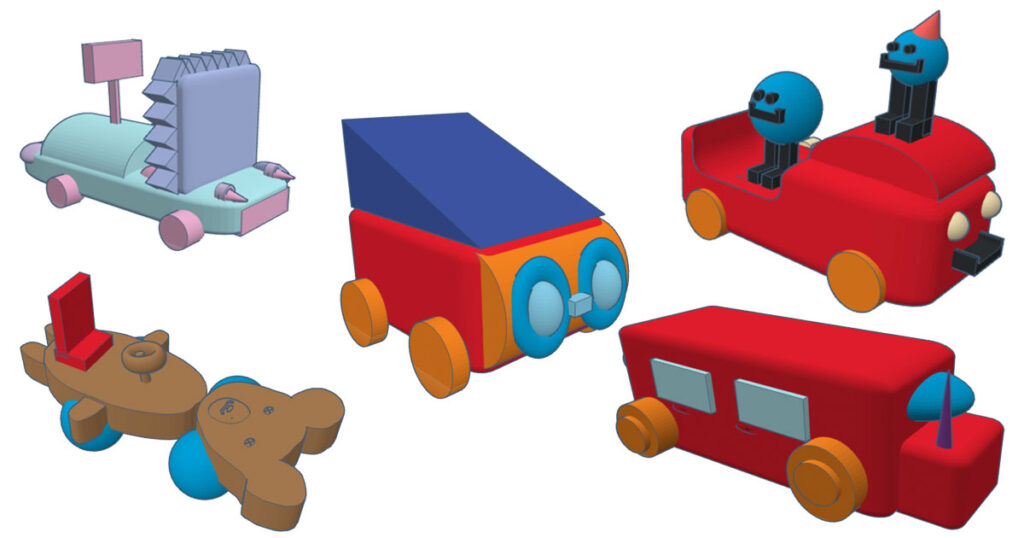
By the end of the unit, students have learned much more than how to use Tinkercad. They’ve learned to reason through three-dimensional design problems, revise ideas that don’t work the first time, and persist when they encounter setbacks.
What I try to communicate, and what I value most, is seeing students become more confident problem solvers. They learn that setbacks are a normal part of the design process and become more willing to experiment, make revisions, consult with peers, and recognize that good design usually develops through many small improvements rather than one perfect idea.
Additional Tinkercad Resources
The free classroom resources below are also available on my STEM Teaching Tools page, where I organize STEM lessons, presentations, classroom downloads, and teacher resources in one place.
- First-Time Tinkercad Login Presentation (Google Slides)
- Tinkercad Lesson 1: Build a Boat (Google Slides)
- Tinkercad Lesson 2: Design an Avatar (Google Slides)
- Tinkercad Lesson 3: Design a Dream Vehicle (Google Slides)
- Tinkercad 3D Printing Checklist (Google Slides)
- Tinkercad 3D Printing Checklist (SMART Board Loop) (MP4 Video)
- Download: Tinkercad Shortcuts & Mouse Moves for PC (PDF)
Google Slides resources automatically prompt you to make an editable copy.
Continue Learning with Tinkercad
As students become more comfortable with Tinkercad, these additional classroom projects extend their learning through engineering, simulation, and long-term design challenges.
KEVA Block Challenge: Hands-On STEM with Tinkercad
This engineering challenge combines hands-on KEVA block construction with Tinkercad’s Sim Lab to help students explore forces, motion, structural design, and iterative testing. Students first model and test ideas digitally, then apply what they learn using real KEVA blocks and a ping-pong ball. It’s an engaging way to connect computer simulation with hands-on engineering and the design process.
MYP Digital Design
Designed for Grade 6 and above, this six-week design unit guides students through inventing a robot that solves a real-world problem in Lima, Peru. The project blends engineering, creative writing, art, cultural connections, and the design cycle into a long-term STEM experience. Students who wish to do so can also prepare their designs for 3D printing.
Final Thoughts
Whether students are designing a simple boat, creating an avatar, building a dream vehicle, or tackling more advanced engineering projects, Tinkercad allows them to think creatively, solve problems, and revise their ideas through design. My hope is that these free classroom resources help make it easier for both new and experienced teachers to bring meaningful STEM learning into their classrooms.