MYP Design Cycle Template

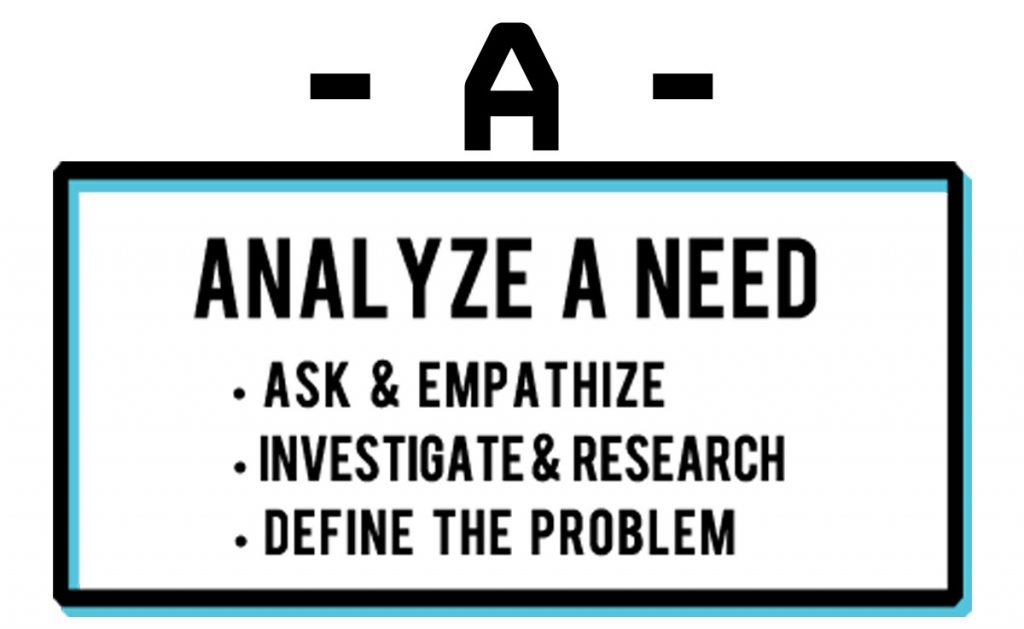
MYP Design Cycle Summary in Four Criteria with A, B, C, and D Template Icons

An MYP Design Cycle Template helps students and teachers navigate the four criteria of the design cycle: Inquiring and Analyzing, Developing Ideas, Creating the Solution, and Evaluating. This straightforward resource simplifies the process for new teachers and students by providing essential tools for success in MYP Design projects.

Unlike the official IB unit planner, which focuses on curriculum and teacher reflection, an MYP Design Cycle Template is student-centered. It serves as a practical guide, offering actionable steps and examples to help students understand and apply design concepts effectively.

What is an MYP Design Cycle Template

An MYP Design Cycle template can also be called an MYP Design template. I don’t think it’s an official International Baccalaureate (IB) term. An MYP unit planner is a more official document or a collection of documents. My view of an MYP Design Cycle template is that it is more student-focused than an MYP unit planner.

The MYP Design Cycle Template for Criterion A is based on the Water Tank Engineering unit. It provides materials to help students inquire and analyze effectively while exploring this engaging design scenario. Teachers can use this template to guide students through Criterion A of the MYP Design Cycle, offering everything needed to start teaching immediately.

What is an MYP Unit Planner

I understand the MYP unit planner to be more of a curriculum planner and guide for the teacher as compared to the MYP Design Cycle template. It is intended to promote critical teacher reflection that leads to more effective teaching and learning. The unit planner is the lesson information you pass on from teacher to teacher and store and access in student information systems such as ManageBac. An MYP unit planner can be wordy! An MYP Design Cycle template would probably have more student-actionable resources and be more MYP Design Cycle specific in terms of criteria and strands.

MYP Design Unit Planner Elements

The Evaluating MYP Unit Planners document from the IB specifies the elements of a unit planner for the MYP. According to this publication, these thirteen items should be established before evaluating the unit (e.g., for IB certification purposes). Here they are verbatim:

  • Name of the teacher(s)
  • MYP subject group and the specific discipline (If the unit is part of an integrated course, note which subjects or disciplines are integrated. For modular courses, indicate which discipline the module addresses.)
  • Unit title (a topic, question, content requirement or big idea)
  • Approximate number of guided learning hours (total)
  • Key concept
  • Related concept(s)
  • Global context and specific exploration
  • Subject-group objectives and specific relevant strands
  • Task-specific clarification (description of how teachers helped students understand the criteria and level descriptors)
  • Content that specifies topics and/or local or national standards
  • Learning experiences/teaching strategies, differentiation, formative assessment
  • Resources
  • Reflections developed before, during and after teaching

The subject group in our case is MYP Design. The request for differentiation and teaching strategies makes this document certainly feel teacher-specific. A unit planner should document interdisciplinary learning, which may not be an explicit part of a teacher’s MYP Design template.

Teachers should reference and discuss unit planner areas such as key concepts, related concepts, and global contexts with students. These elements strengthen learning by creating meaningful connections. In my experience, teachers typically do not assess these areas directly within the MYP Design Cycle criteria. However, they can integrate them into Criterion A and Criterion D, where research and evaluation naturally align.

MYP Design Cycle Template. MYP Design Criteria A, B, C, and D
MYP Design Criteria A, B, C, and D

MYP Design Template Examples

Many schools and teachers share their MYP Design resources online. The folks at the Nanjing International School have shared 21 pdf documents that cover the entire MYP Design Cycle. These comprehensive student documents have user-friendly layouts. The questions are arranged in tables with an easy-to-read font and logical spaces for replies. Some of the documents have side-bar guidance that’s easy to reference for many types of design problems.

Parts of an MYP Design Cycle Template

I prefer the minimum amount of information when I inherit a design unit. For me, an overly elaborate MYP unit plan can be too much to think about and hold me back (see analysis paralysis). It’s been helpful for me to ask this question: What are the minimum resources teachers need to start to teach an MYP Unit effectively? With this question, I am focusing on a Year 1 class:

Students need to know how to be successful in MYP Design. So, while it may not be a part of a template, the MYP Design Grading Rubric should be communicated (from the IB Guide, modified versions).

These template materials may evolve differently for different teachers. Every unit I have taught in MYP Design has been passed on to me from other teachers, but not necessarily via a unit planner. I usually knew the scenario first, but it may not have been in a standardized GRASPS format.

Constructing a Performance Task Scenario Using GRASPS

The G.R.A.S.P.S. is a handy task scenario that frames the problem to be solved and establishes the key details for project-based learning. The GRASPS outlines the design scenario in six parts:

  • Goal or problem
  • Role of the student
  • Audience (or client) to serve
  • Situation description
  • Product to be made
  • Standards and criteria for success

Understanding by Design (UbD) authors Grant Wiggins and Jay McTighe offer multiple examples of GRASPS scenarios. Here are four (pages 1-4, © Wiggins & McTighe 2008):

  • Health and Nutrition (2nd Grade)
  • Health and Nutrition (3rd – 8th Grade?)
  • Math (8th – 12th Grade?)
  • Social Studies (8th – 12th Grade?)

The GRASPS scenarios with question marks indicate estimates for the grade levels.

A free MYP Design Cycle Template of the GRASPS is on page 5 of the Wiggins and McTighe resource. When building an MYP unit use the prompts to develop each part of the GRASPS for the scenario of the design problem.

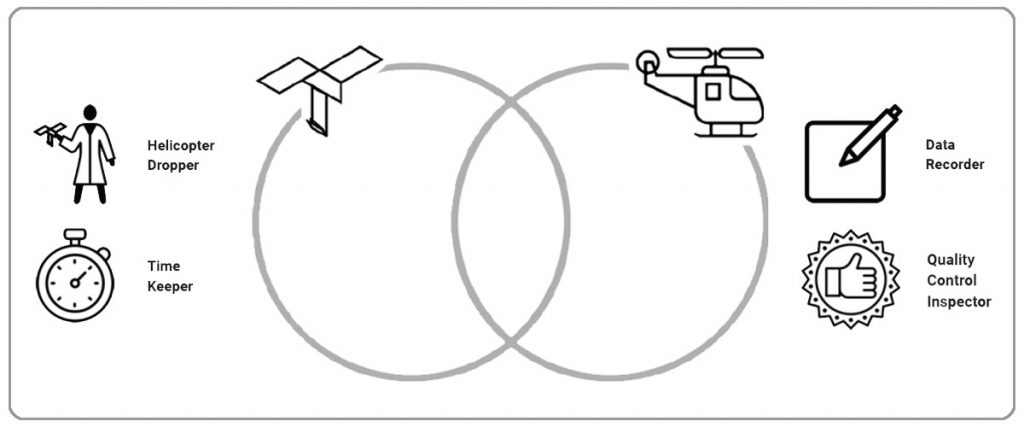
Try to keep the GRASPS to one page. It helps them be an at-a-glance resource for students. I’ve found that printing the page and gluing it to cardboard as a table reference works great for students. Also, consider developing and presenting the GRASPS with helpful graphics in a slide presentation for greater understanding. Here’s an illustrated GRASPS example for the paper helicopter tradeoff problem:

The graphics used for the illustrated GRASPS of the paper helicopter tradeoff problem were from public domain sources: openclipart.com and publicdomainvectors.org. I made the paper helicopter graphic with Adobe Photoshop (which was probably not the fastest way).

GRASPS – Standards and Criteria for Success

For the MYP in Criterion B, design specifications are established. The MYP Design Guide defines design specifications as the “conditions, requirements, and restrictions with which a design must comply.” A best practice I want to get better at is to include two or three of the essential design specifications in the Standards and Criteria for Success of the GRASPS. The most critical would be those that are the least non-negotiable and important to the design’s success.

MYP Design Criteria

The creation of an MYP Design Cycle Template probably starts with the GRASPS. It’s a logical starting point. The GRASPS outlines the problem scenario for the teacher and the students, so this choice makes sense.

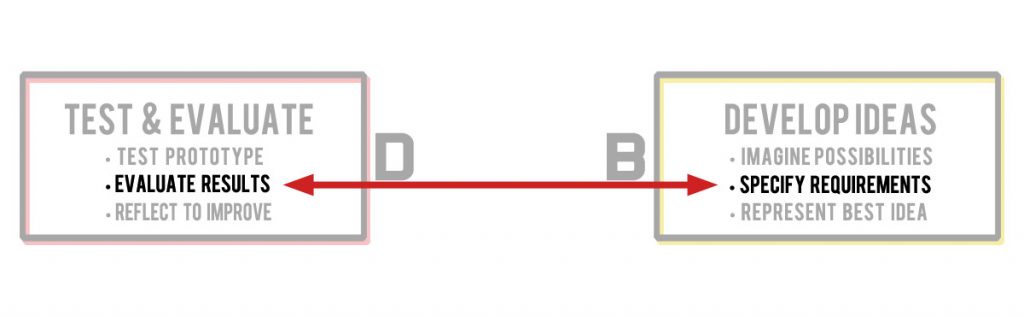
The criteria usually evolve as they are taught if they are not already developed. So, Criterion A is written first, then B, then C, and finally D. I have found that during each school year, I tweak each criterion as I go based on students’ needs and, well, unforeseen schedule changes. All 16 strands must be addressed at least twice in each year according to the MYP Design Guide. When students complete all 16 strands in all four criteria for a unit, this comprehensive collection of student design thinking is referred to as an MYP Folder.

What is CRAP Design?

What should an MYP Design Cycle template for a criterion look like? It should be set up using good design principles. In other words, it should look like CRAP. What is CRAP? Good visual design is CRAP (developed by Robin Williams).

Communication and multimedia consultant Carl Kwan outlines these principles clearly and succinctly via four short instructional videos:

Use all four of these design fundamentals to help your criterion documents be as visually accessible as possible for your students. Is CRAP just for teachers? Of course not! Students need to practice using CRAP to make their designs as intuitive as possible for their client/audience.

A Google Doc Template for MYP Design

Set up your students’ criteria documents using sound design principles. What kind of document should it be? A Google Slide, Google Doc, Word doc, other? Google Slides and Google Docs deploy smoothly via Google Classroom (choose “make a copy for each student”).

Google Slides does offer easy layout options, especially with graphic placement, but I find the items can accidentally shift or be deleted. Younger students are more prone to losing a text box, for example. I usually use a Google Doc for each criterion document in the MYP Design template. Although it may take longer to configure than a Google Slide, formatting tends not to get lost. Teachers can set up Docs to appear intuitive for students (e.g., capture student responses via tables).

MYP Design Cycle Template – Criterion A Example

CRAP design principles help students understand the purpose of each criterion document and where and how to demonstrate their knowledge and understanding. Here are some CRAP design principles to consider when making the criterion documents.

Contrast in Document Design

I prefer black text on a lighter background (both are the default in a Google Doc). Font and color characteristics can highlight significant differences. Where to respond and where not to respond must be evident to students as well. For example, contrasts within a criterion document should distinguish between questions and answers. What are some helpful distinctions that are doable in a Google Doc?

  • font type and size in title-subtitle hierarchies
  • font color versus background-color
  • font type and size between questions and answers
  • color differences between question row and answer row

Check out the pdf example of the Criterion A Document from the Water Tank Engineering with Newspaper unit. Here’s a screenshot highlighting the font used for the student’s answer.

MYP Design Criterion A Document Question Using CRAP Principles

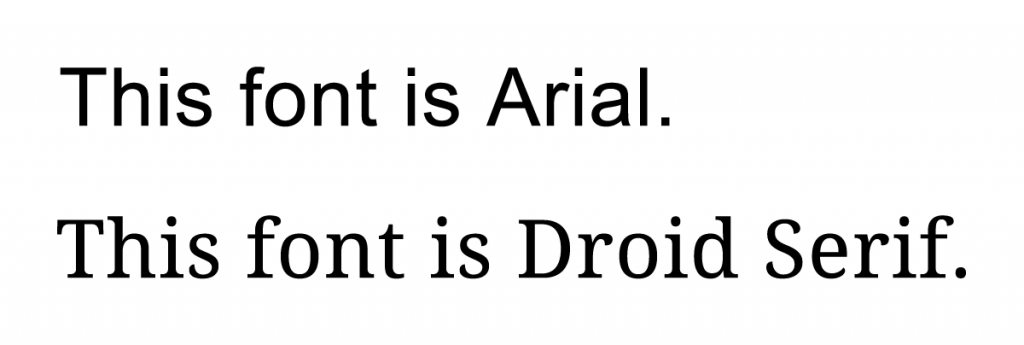
San Serif and Serif fonts contrast nicely. I usually use the Arial Font for the questions (the default Google Doc font) and Droid Serif as the student response font. It’s easy to forget to set up the answer row’s font differently from the question row.

MYP Design Cycle Template. Font choice matters for layout.
Different Fonts to Distinguish between Questions and Answers

Repetition in Document Design

Repeat the fonts and font sizes based on their role. For example, most of the time, I use the Arial Font size 11 for questions and Droid Serif size 12 for student answers. The Courier New font works for headings and subheadings. Too many fonts, though, can lead to a visual overload. Use the minimal amount to differentiate and be consistent about each font’s role.

Alignment in Document Design

Other than the main title, its subtitle(s), and main graphic, center alignment of content should be avoided. Strand numbering (e.g., A.1, A.2, A.3) should align vertically. Left alignment of content works best since English is read from left to right. With content left-aligned, the starting point is always consistent and familiar.

Proximity in Document Design

What should be close together? Stuff that is alike. Questions should be adjacent to answer spaces, which is standard practice. Related content is clustered together (e.g., curated web links in Strand A.3 – Analyze Existing Products for Engineering a Paper Water Tank). As students fill in their answers, tables may split across pages, which may mess up proximity a bit.

Visual Understanding – What Else?

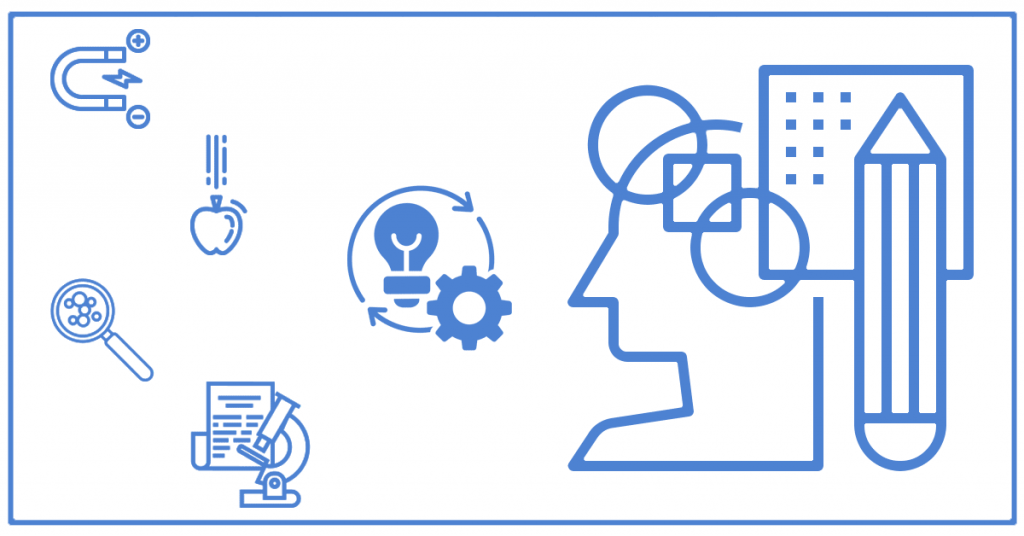
Consider adding a graphic near the main title that immediately communicates the document’s intent. Visuals are beneficial for all students, especially for English Language Learners. Peruse the Noun Project’s database of icons for ideas. Criterion A is associated with research, so what graphical elements make sense?

MYP Design Cycle Template. MYP Design Criterion A - Inquiring and Analyzing
MYP Design Graphic Criterion A – Inquiring and Analyzing

MYP Design Cycle Template – Criterion A Example Download

Download an editable Criterion A example from the Engineering a Paper Water Tank Unit. This Google Document can be modified to fit your unit. It is color-coded to match the cornflower blue (hex value #3ac5d6) of Criterion A in the MYP Design Cycle. Replace the newspaper-related graphic with the generic Criterion A graphic.

MYP Design Cycle Template Summary

The MYP Design Cycle Template for Criterion A empowers teachers and students to focus on inquiry and analysis in a clear, structured way. Simplifying complex processes and providing practical tools help educators guide students through meaningful design challenges. Whether you’re new to MYP Design or refining your approach, this template offers a solid foundation to build.

Ready to start? Download the free MYP Design Cycle Template and explore how it can transform your teaching. Inspire your students to solve real-world problems with confidence and creativity.

MYP Design Project Ideas from Science

Science to Design

Get started with MYP Design! If you have a science or STEAM background and are new to MYP Design, this post should help you understand how to develop MYP design project ideas from science. The information targets upper elementary and middle school teachers, but higher grade levels can benefit as well.

Many teachers who teach MYP Design for the first time, need ideas. If you inherit units from a previous teacher, you may want to use these MYP Design project ideas. If you want to feel more ownership and investment in the teaching, you may want to develop your own units, but it takes time to develop lessons. Science teachers can harness their knowledge of setting up experiments to teach MYP Design (e.g., engineering a paper water tank).

A background in science provides teachers with solid skills to teach MYP Design. Science teachers have lots of experience following a process (scientific method), gathering data, and evaluating results–these skills help with the design process. Although science and design are not the same, they share similarities.

What is MYP Design?

MYP stands for Middle Years Program and is part of the International Baccalaureate’s (IB) educational program. The IB’s goal is to foster curious, informed, self-confident, and caring students.

In the MYP Design Program, students have a chance to explore and learn more about design principles and design thinking. Through MYP Design lessons, students have the chance to use design thinking to develop their own projects.

To create a design project, students first target a problem and research it. They then brainstorm ideas by using a creative tool such as a brainstorming exercise or inspiration from things around them. Next, students choose their best idea and visualize their design concept on paper or digitally on a computer. Students also create a mockup or prototype of their designs to best determine how it could solve the problem and possibly how it would actually work in the real world. Finally, students evaluate the success of their solutions.

MYP Design Cycle Image - 4 parts, 16 strands
MYP Design Cycle (slightly modified in Developing Ideas for Year 1, Grade 6 Students)
Image Credit: http://anwatindesign.weebly.com/

What are the 4 Steps of the MYP Design Cycle?

The MYP Design Cycle uses four logical steps (called “criterion”) to guide students through the entire design process. Each criterion has four parts called “strands.” The cycle can be repeated to improve upon the solution to the problem. The four MYP Design Cycle Criteria are:

How Do I Teach MYP Design?

The design projects for MYP are a great way to implement a variety of design skills. With these projects, students have the opportunity to apply what they have learned in the MYP curriculum. Students achieve a greater understanding of how design can be used as a tool to communicate ideas that solve problems.

Some student MYP Design project topics could be:

Scientific Method vs Design Process

If you are using MYP Design project ideas from science, it’s important to compare and contrast the scientific method and the design process. The scientific method is a process of developing knowledge about our world. It is based on empirical evidence and involves testing hypotheses to come to conclusions. The design process, on the other hand, can be more like an art form than the scientific method. MYP Design includes coming up with all kinds of ideas and making prototypes of these ideas before deciding which ones are worth pursuing further.

Within the MYP Design Cycle steps, students and teachers can use different methods for designing products or services. These methods include but are not limited to: the scientific method, brainstorming, and rapid prototyping. Most designers would agree that there are pros and cons for each of these methods.

How is the Design Process Different from the Scientific Method?

Designers use a process that can be different from the scientific method. They are guided by the methods of design thinking (which parallels the steps in the MYP Design Cycle) in order to create solutions that are useful for an individual or group of people. Design could solve a problem for plants or animals too.

Designs are almost always subjective in nature. Maybe because what is considered a problem-to-be-solved is determined by the eye of the beholder! Designs need to be tested against design specifications and these requirements could be subjective as well. Scientists, using the scientific method, make great efforts to control certain variables to look for accurate cause and effect relationships between other variables.

How is the Design Process Similar to Scientific Inquiry?

MYP Design is a process of creating and exploring possibilities to solve a problem. It’s also a process of making decisions based on research and evidence and then testing those decisions to see if they work sufficiently.

Designers often leverage the scientific method as a metaphor for design. The scientific method is a set of steps that scientists take to explore and test their ideas about our physical world. They observe, hypothesize, experiment, analyze data, and then draw conclusions. These steps are not always followed in the same order or with the same emphasis when using design thinking.

MYP Design Project Idea from Science

An easy fit for an MYP design project developed from a science experiment would fall into the category of engineering design. This means the science experiment to reference should be in the area of physical science for a smooth connection to design.

A typical MYP unit lasts about six weeks. The KIS International School reports that their MYP units can span from four to ten weeks long. Unit length should be kept in mind if you’re going to conduct the scientific experiment within the steps of the MYP Design Cycle. Even if you’re not new to MYP Design, the process from beginning to end can seem long, especially for students new to design (e.g., grade 6).

A science experiment fits well into Criterion A – Inquiring and Analyzing. Specifically, in the second strand of this criterion, students in MYP Design identify and prioritize the research needed to solve the problem. Here, students can use the data from a physical science experiment as their research. If time allows, students can conduct the full experiment. Criterion A does benefit from hands-on experience, and a hands-on experiment here would probably improve student engagement in this inquiry and analysis phase.

Examples of a Physical Science Experiment

Physical science experiments can be expensive and time-consuming. But there are some low-budget, quick experiments that can yield valuable results. Easy-to-do, low-budget experiments can be done at home or in a classroom with simple materials and minimal equipment. They require very little cost and time to complete and they provide valuable information about how the world works in ways that may not have been thought about before.

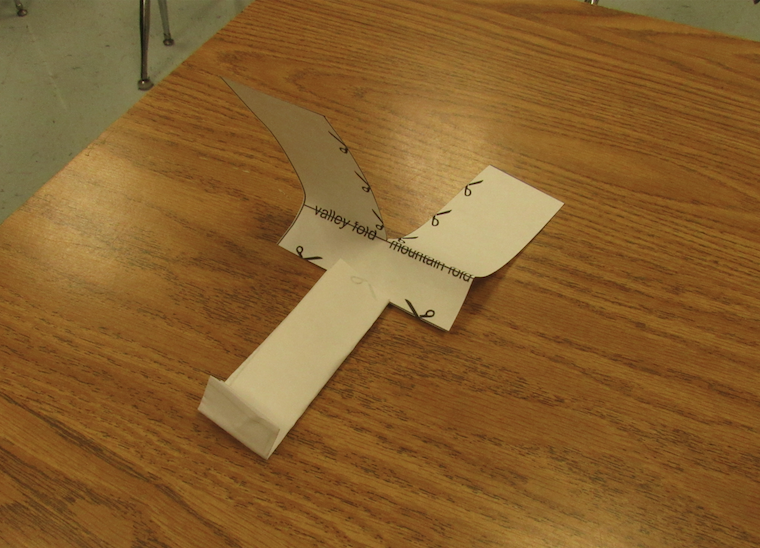
MYP design project ideas with paper helicopter design - 3D Model and 2D Template
Paper Helicopter – 3D Model and 2D Template

The Paper Helicopter Experiment is a good example of a simple, inexpensive science experiment that can be done at home or school. In this example, the researcher is looking at the cause and effect relationship between the helicopter blade length and the time aloft. The specific scientific inquiry question is:

Does changing the blade-length-to-body-height ratio of a paper helicopter affect how long it stays in the air?

MYP Design Cycle Example

An MYP Design unit that can be most easily developed from a science experiment would be based around an engineering design problem. Many engineering scenarios center around efficiencies and tradeoffs. Tradeoffs involve giving up one desired quality in exchange for another desired quality. In other words, tradeoffs tend to offset each other, and a balance between competing and desired design characteristics should try to be achieved.

A typical engineering problem is to build something as strong as possible with the least amount of materials, such as a bridge. Ideally, successful engineering solutions solve problems completely (i.e., meet all the design specifications) with minimal resources.

City bridge photo from FOCA Stock, public domain, https://focastock.com/
City Bridge

The paper helicopter experiment tests blade length’s effect on drop time. An MYP Design unit should benefit from the knowledge gained in this experiment and extend naturally into an engineering design problem. The concept of tradeoffs can help frame the design problems.

MYP Design Problem

The MYP design scenario example developed from a science experiment should provide students with an authentic design experience and offer a productive struggle with tradeoffs. By requiring two design specifications that set targets for a paper helicopter’s flight time and drop accuracy, this experience can be achieved.

MYP Design projects center around a problem to be solved. The problem is essentially the goal. The engineering design problem for a paper helicopter would be to create a prototype that reliably:

  • Stays aloft for as long as possible (i.e., drops slowly)

– AND –

  • Descends as straight down as possible (i.e., lands accurately)

The key term here is “reliably.” Can these two goals be achieved over and over consistently? Multiple trials for each helicopter would be needed during the evaluation phase to ensure the data are truly representing the results.

Typically, some students will be able to create a helicopter that descends very slowly–probably with a design that tends to have longer blades and a shorter tail. This slow-descending model tends to be unpredictable and can veer off course during any trial. A longer-tailed and shorter-bladed paper helicopter will descend predictable straight down, but sacrifice time aloft to do so. Helicopters with more than two blades are sometimes explored as well.

MYP Design Scenario

A simple MYP Design project ideas for the paper helicopter tradeoff problem could look like this:

  • Goal – To create a paper helicopter prototype that reliably: 1) Stays aloft for as long as possible (i.e., drops slowly); and 2) descends as straight down as possible (i.e., lands accurately).
  • Role – You (the student) are training to be a junior aeronautical engineer at NASA working on terraforming Mars.
  • Audience – Your NASA bosses are evaluating your helicopter engineering skills to help deliver important technology safely to Mars.
  • Situation – Expensive, essential, and delicate technology is needed at a precise location on Mars to begin terraforming. Only a specially designed helicopter can complete this mission. One that both descends slowly and accurately.
  • Product – A paper helicopter prototype shall be made from an entire one-half piece of letter paper. The paper to be used measures 5.5 by 8.5 inches (14 by 21.6 centimeters).
  • Standards for Success – The paper helicopter prototype shall stay aloft as long as possible and descend as straight down as possible.

Download the illustrated version of the GRASPS as slides:

If you want flight data as a reference, download student trial data generated during Criterion A. These student-generated data come with paper helicopter activity questions:

MYP Design Lesson – An Introduction to the Design Cycle

If your class is just getting started with MYP Design, then consider spending one week going through the four criteria of the MYP Design Cycle as a warm-up to longer units. Here’s an outline of how to become familiar with the Paper Helicopter Design Tradeoff Problem:

  • Criterion A – Discuss the who, what, and why of the GRASPS: What are you making? Who is it for? Why are you making it? There’s almost too much information online about paper helicopters, so consider making a curated set of links to focus students’ research on the design problem. Consider some hands-on investigation as well with paper helicopters.
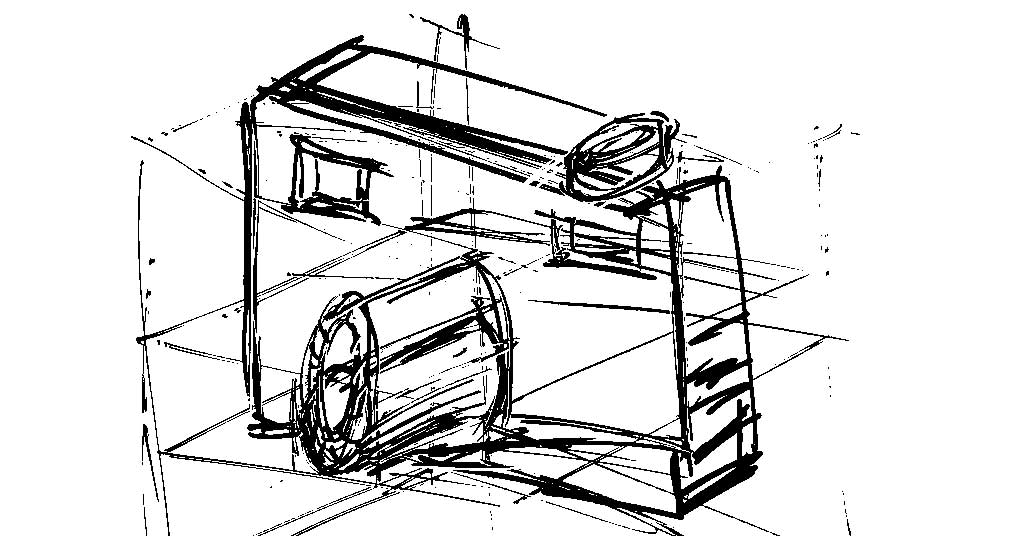
  • Criterion B – Brainstorm as many solutions as possible to meet the standards for success (essential design specifications). Sketch and annotate the best idea.
  • Criterion C – Creating the Solution – In groups, have students choose the best idea and build one prototype per group for official testing.
  • Criterion D – Test each group’s prototype as many times as possible. Gather drop-time data and target accuracy data for each trial. Summarize the data for each group (e.g., mean and standard deviation). Use the data to evaluate how each helicopter performed in terms of drop time and accuracy.

If possible, repeat the process, using the data from Criterion D to inform the inquiry and analysis in Criterion A.

Another short example of MYP Design with an engineering focus is the Paper Airplane Design, Data, and Discovery post. This mini-unit takes about one week to complete (three classes of about one hour).

MYP Design Testing Methods

The MYP Design Teacher Support Material resource was developed to assist with the 2014 MYP Design Guide. It classifies testing methods conducted in Criterion D into five areas:

  • Expert Appraisal
  • Field Trial
  • Performance Testing
  • User Observation
  • User Trials

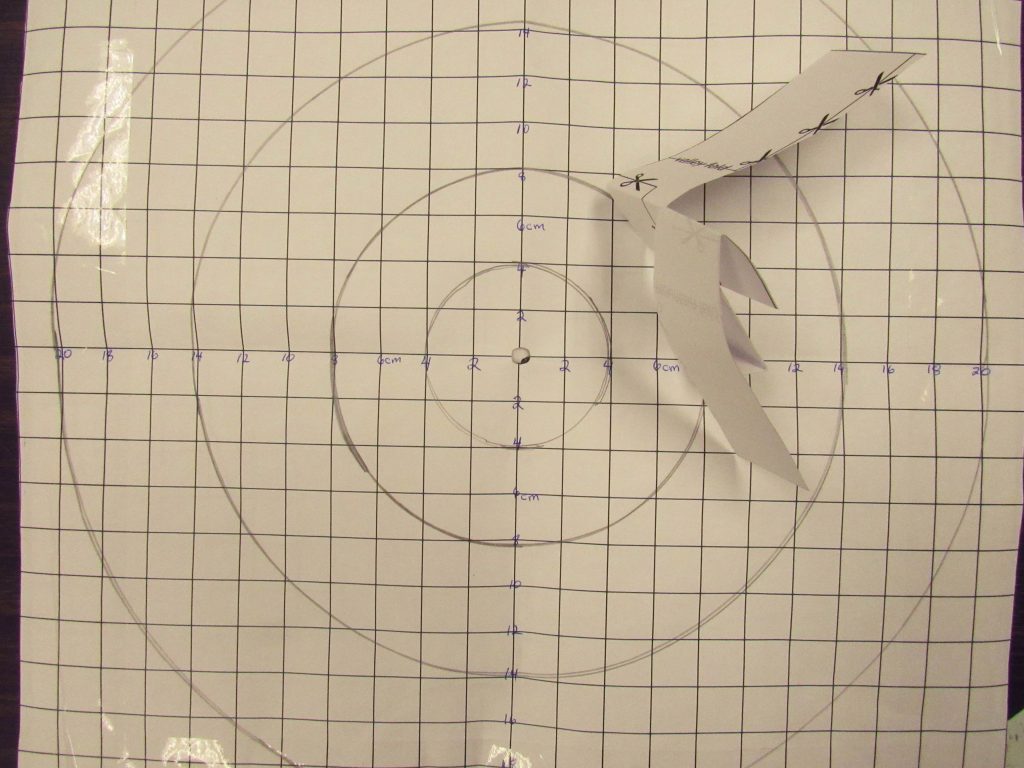
For the Paper Helicopter Design Tradeoff problem, performance testing is needed to properly evaluate the success of the solution. Set up the launching areas and calculate flight times as described in the Paper Helicopter Experiment. Accuracy can be measured with a centered target combined with a 1 cm grid overlay placed on the floor.

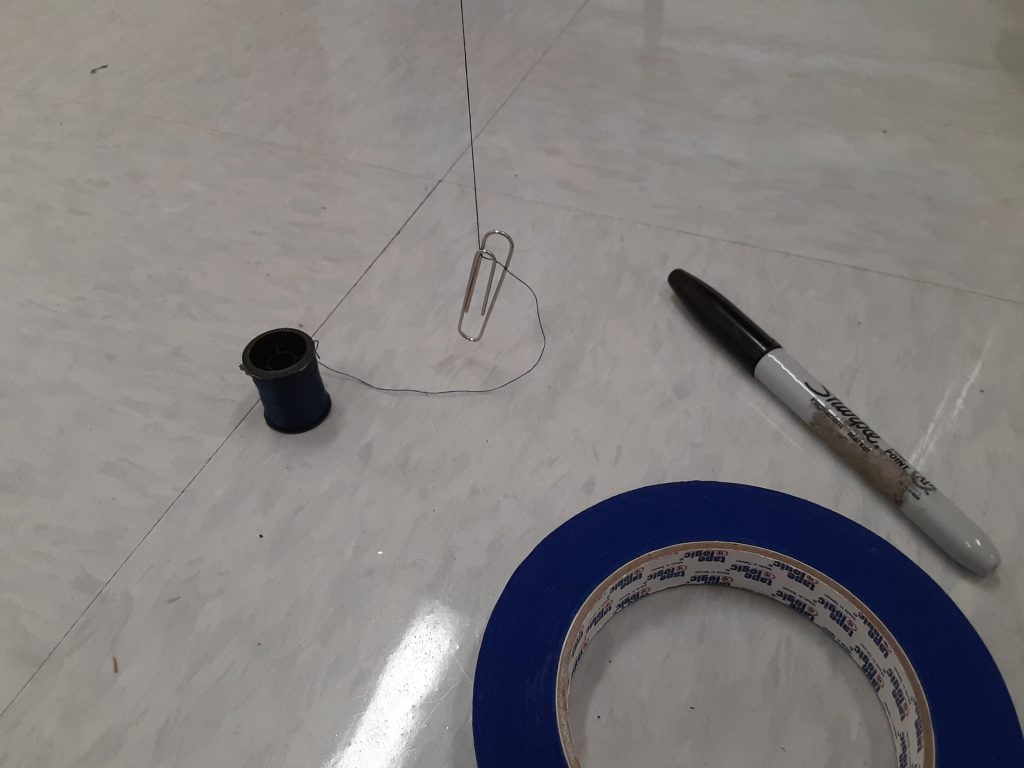
To accurately place the target below the launch point, hang a mass (e.g., paperclip) on a thread from the ceiling to directly above the floor, then mark the floor. This mark will be the center of your target. The eventual drop height of 200 cm works well to test for the optimal relationship between blade length and accuracy.

If you want to convert the time aloft and accuracy into one metric, make sure you’re not dividing by zero. For example, if we define the tradeoff metric to be flight time divided by accuracy, then accuracy can never be zero. In this case, accuracy should be defined as the furthest part of the helicopter to the target’s center. The higher the tradeoff metric, the more successful the design.

MYP Design Lesson – Full-length Unit

A full-length, six-week-long MYP design lesson is possible with the paper helicopter. Covering every strand will allow you to go deep into the process on a very low budget. A full-length design unit may feel process heavy and can seem to require a lot of writing. If you can find other forms of how students can show what they know (e.g., vlog) and your MYP program coordinator allows it, consider these options for students to communicate their thinking as you go through the design cycle.

MYP Design Word Cloud
Show What You Know! MYP Design Word Cloud

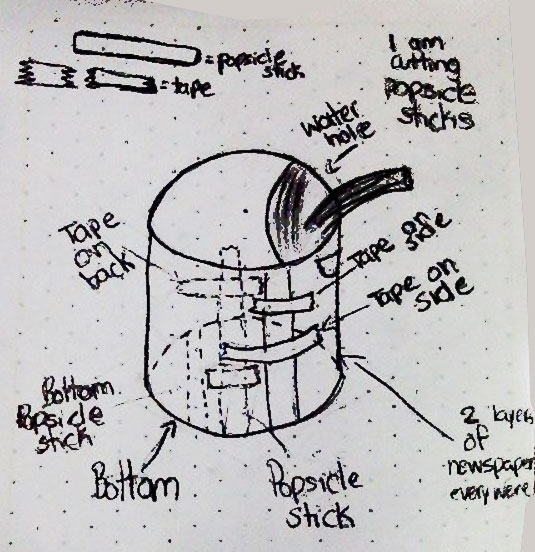
One MYP Design example that is a full-length unit and is engineering-focused is the paper water tank. The paper water tank design problem requires students to build a water tank from a minimum amount of newspaper, Popsicle™ sticks, and tape to hold 200 mL of water for three minutes.

This MYP design unit covers each of the 16 strands of the MYP Design Cycle and is a model for a full-length MYP design unit. In addition, Criteria A, B, C, and D can serve as templates for an engineering-based MYP design lesson such as the paper water tank.

There are additional elements to a full MYP Design lesson that help students go deeper into understanding. Also, at some point, your school’s ​​MYP program coordinator will probably require you to create and document an MYP unit, which can be referred to as an MYP unit planner. These broader elements will probably need to be documented in the planner. Global contexts, key concepts, and a statement of inquiry are the interrelated specific elements to add relevance for students in an MYP unit.

Global Contexts

These contexts help teachers reference real-world examples outside of the classroom. The MYP Design Guide lists six global contexts:

  • identities and relationships
  • orientation in space and time
  • personal and cultural expression
  • scientific and technical innovation
  • globalization and sustainability
  • fairness and development

Key Concepts

In MYP Design, the key concepts are communication, communities, development, and systems. These four broad categories of concepts represent one-fourth (16 total) of all of the key concepts in the MYP Program. According to the MYP Design Guide, “Key concepts provide a framework for design, informing units of work and helping to organize teaching and learning.”

Statement of Inquiry

The statement of inquiry attempts to capture the importance of the lesson succinctly. The design problem is derived from the statement of inquiry and presents the essence of the project. The MYP Design Guide (2014-15) explains: “Statements of inquiry set conceptual understanding in a global context in order to frame classroom inquiry and direct purposeful learning.”

The statement of inquiry should come across as timeless and universally transferable. In other words, the concept put forward should feel essential for all learners and worth knowing in general. Factual, conceptual, and debatable questions help students explore and understand the statement of inquiry. These questions can be part of the inquiry and analysis in Criterion A.

Adding Context to the Paper Helicopter Design Tradeoff Problem

For the Paper Helicopter Design Tradeoff Problem, the MYP Design elements would be:

  • Global Context – Scientific and Technical Innovation
  • Key Concept – Systems (interacting components where a tradeoff must be found to achieve the goal)
  • Statement of Inquiry – Engineers adjust a design’s characteristics to optimize performance

MYP Design Assessment Criteria

If you are new to MYP Design, assessment is not done on an A-F or 0-100 scale. The assessed curriculum in the MYP spans from an achievement level of one up to eight. Each criterion (A through D) has its own set of level descriptors. See the Assessment Criteria Overview section in the MYP Design Guide for more information.

My former school decided to modify the MYP assessment scale to be from one to seven. Check out my post, MYP Design Assessment Criteria Modified, to learn more and for a set of concise MYP Design Assessment rubrics.

MYP Design Project Ideas Summary

In conclusion, MYP Design project ideas from science can be an excellent starting point! MYP Design units center around the MYP Design Cycle and can focus on any problem. Quantifiable problems based on physical experiments naturally lend themselves to a design process and are a great place to start.

Teachers new to MYP Design can leverage their knowledge of physical science experiments to familiarize themselves with the design process. Both design and science seek to uncover knowledge through a deliberate process. Science uses controlled experiments to evaluate relationships between phenomena. Design aims to create solutions to problems from engineering to all aspects of society.

Final Thoughts on MYP Design Project Ideas from Science

MYP Design is easier to teach when you start with science. Simple experiments, such as a paper helicopter drop, can evolve into fun design challenges that help students learn to think, plan, build, and improve. These projects are ideal for upper elementary and middle school students, providing them with practical opportunities to apply the MYP Design Cycle and solve real-world problems.

Try These MYP Design Project Resources in Your Class

Try this STEM helicopter challenge!

These free downloads have everything you need to run the paper helicopter project:

Paper Helicopter GRASPS Challenge (PDF)

Student Trial Data for the Experiment (PDF)

Print them out, follow the steps, and launch a low-budget design unit your students will love!

Paper Helicopter Experiment

This post uses affiliate links that may earn VistaThink a commission at no additional cost to you. Read more in the Private Policy. Thanks for your support!

A paper helicopter experiment is a fantastic hands-on, and low-budget way for students to explore cause and effect relationships in experimental design. These models offer teachers easy STEM activities with paper and generate authentic data in the classroom. In fact, there are so many paper helicopter materials, lessons, and instructions online, it’s hard to know where to start!

Paper Helicopter - 3D Model and 2D Template
Paper Helicopter – 3D Model and 2D Template

Simple quantifiable scenarios can be examined and several criteria for success can be defined and explored. Paper helicopters provide educators with easy-to-do experiments to help students learn the scientific method.

The ASTC Science World Society concisely explains the many levels of inquiry teachers can offer students when conducting paper helicopter experiments. These levels of investigation range from more structured to less structured which suits various grade levels and abilities.

Paper helicopter lessons with more structure would generally target lower grade levels. More open assignments are suitable for independent students at the higher grade levels where the teacher acts as a facilitator. Teachers of all experience levels can take advantage of the learning opportunities provided by experimenting with paper helicopters.

Paper Helicopter Lesson Outline

The specific paper helicopter lesson outlined in this blog post targets students in upper elementary and middle school. It can be extended above and below these grade levels as well. This lesson covers methods of data gathering and provides teachers with easy-to-use activity resources.

This paper helicopter experiment is a simple introduction to experimental design and will target this testable science question:

Does changing the blade length of a paper helicopter affect how long it stays in the air? (Keep reading, however, this question needs a bit of clarification.)

The NGSS Standards do apply! Examples:

  • 3-5-ETS1-3 Engineering DesignPlan and conduct an investigation collaboratively to produce data to serve as the basis for evidence, using fair tests in which variables are controlled and the number of trials considered.
  • MS-ETS1-2 Engineering DesignEvaluate competing design solutions using a systematic process to determine how well they meet the criteria and constraints of the problem.

How Does a Helicopter Work?

In basic terms, an actual helicopter is a type of aircraft that creates lift (an upward force of air) with horizontally spinning rotor blades. These rotor blades are sometimes referred to as simply rotors or blades.

Blue Police Helicopter

The physics of paper helicopters are different from real helicopters. Traditional paper helicopters do not use a power source to spin their blades and create lift. These models are typically created with two blades and dropped from a fixed height and spin as they descend.

Paper helicopters spin because of the earth’s gravity, lift, and configuration of the rotors. When dropped, the helicopter’s mass experiences gravity, and it naturally falls to the floor which causes paper blades to bend slightly upward due to lift. The lift force of the air pushes on each of the blades equally but in opposite directions, horizontally and vertically. As a result of the horizontal equal, opposite, and offset forces, the helicopter spins around as it descends.

The helicopter descends due to unbalanced forces: The weight of the helicopters is greater than the lift force of air.

2BrokeScientists studied the airflow around a helicopter and found that there were high-pressure areas under the blades. This high pressure results in equal and opposite opposing forces that cause the spin.

The Physics of Paper Helicopters – Autorotation (4:53)

Framing the analysis in terms of Newton’s Third Law of Motion, a pair of equal and opposite forces acting horizontally under each blade and on the body of the paper helicopter cause rotation.

Simple Paper Helicopter

A simple paper helicopter can be made easily at home or school. Multipurpose U.S. letter-size printer paper (8.5 x 11 inches, 21.6 x 27.9 cm) works well for the model. The design is simple to make with only a few cuts and folds, and its parts can be easily adjusted to examine changes regarding flight behavior. To conduct the paper helicopter experiment, we should know the parts first!

Paper Helicopter Parts

The paper helicopter parts are similar to a real helicopter’s parts. The common paper helicopter with two blades has four major parts:

Blades – These two parts are identical rectangles arranged vertically at the top of the helicopter. These parts are sometimes called rotors, blades, rotor blades, wings, or even propellers. The blades provide the lift and are factors that cause the helicopter to spin. The width of the two blades together equals the width of the paper template used to make the helicopter. The thickness of the blades is one layer of paper.

Body – The top of the body of the paper helicopter connects to the blades. The body shape is a rectangle and is perpendicular to the blades. It is located between the blades and the tail. It is as wide as the paper template used to make the helicopter. The thickness of the body is one layer of paper.

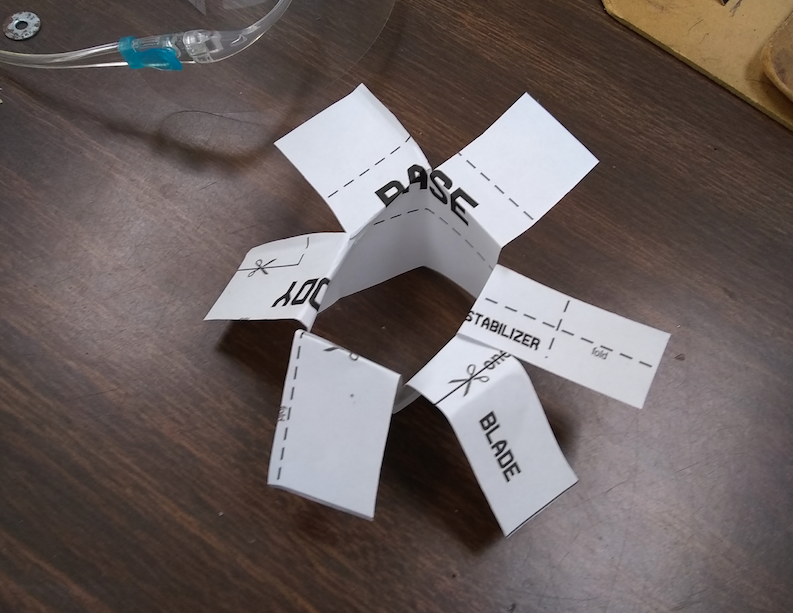
3D and 2D Animated Paper Helicopter with Labeled Parts: Blades, Body, Tail, and Stabilizer
3D and 2D Animated Paper Helicopter with Labeled Parts

Tail – The top of the tail connects to the bottom of the body. The thickness of the tail is three layers of paper. The width of the paper helicopter tail is one-third the width of the template. The tail provides the paper helicopter flight stability.

Stabilizer – The stabilizer is essentially the bottom tip of the tail. A horizontal fold in the tail creates the stabilizer. This fold also provides the paper helicopter flight stability by shifting the model’s center of mass downward.

Independent, Dependent, and Controlled Variables

The paper helicopter experiment requires that you control some variables, change others, and look for cause and effect. A variable is a characteristic or quantity that can be measured or counted in an experiment. Most experiments for this age group account for three kinds of variables: independent, dependent, and controlled.

Independent variables are manipulated by the researcher. These variables are changed and studied to determine if they are the cause in a cause-and-effect relationship. Independent variables are not influenced by other variables. Sometimes independent variables are not manipulated by the researcher but monitored to see how their changes may affect other variables. For example, time (seconds, days, years) is an independent variable that can be tracked to see how it may affect other variables (e.g., the growth of a plant).

Dependent variables are what researchers observe, measure, or count in an experiment. Changes in dependent variables depend on various influences. Independent variables are factors that may change a dependent variable.

Why are Variables Important in an Experiment?

That’s the point of an experiment: To find out what may or may not influence a dependent variable! These types of variables are the “effect” in a cause-and-effect relationship.

Controlled variables are variables that the researcher does not allow to change. The variables are maintained to be constant so that they do not influence any of the dependent variables. Variables that are kept the same for every measurement and test in an experiment, ensure that the dependent variables produce data that are as accurate as possible.

Knowing variables’ roles helps researchers be systematic with their observations, accurately collect relevant data, and be logical with their scientific thinking.

How Do You Make a Paper Helicopter Fall Slower?

A common problem to examine is how to make a paper helicopter fall slower. In other words, many paper helicopter designers want to know how to make a paper helicopter that stays in the air the longest. A simple two-rotor paper helicopter is a good design choice to study this common problem.

The researcher can manipulate any of the four helicopter parts to determine what factors affect the flight time of a paper helicopter. By adjusting a part of the helicopter, researchers are manipulating the independent variable to determine if this change affects the time the helicopter stays in the air (time in the air is the dependent variable). Parts of the helicopter that do not change from a standard model to an adjusted model, are considered control variables.

Paper Helicopter Variables

To ensure that testing is fair so that cause-and-effect data are a reliable source of information, the three types of paper helicopter variables need to be defined. For our paper helicopter experiment example, the independent, dependent, and controlled variables are identified as follows.

Independent Variables:

  • blade length (which changes the body height)
  • body height (which changes when the rotor blade length is adjusted)

Dependent Variable:

  • time aloft

Controlled Variables (Helicopter Parts):

  • rotor blade width and thickness
  • body width and thickness
  • tail length, width, and thickness
  • stabilizer length, width and thickness

Controlled Variables (Materials and Conditions):

  • paper size and mass
  • paper type
  • drop height
  • drop start time

From a persnickety perspective, there are more variables to control like the angle between the blades and the body. This should be 90 degrees by the way. How deep you go as far as what variables are controlled–what you look at–depends on the students’ age group and experience.

By taking into account the types of variables in an experiment, our actually scientific inquiry question for the paper helicopter experiment is:

Does changing the blade-length-to-body-height ratio
of a paper helicopter affect how long it stays in the air?

It’s important to note that since paper helicopters easily offer many cause-and-effect relationships to explore, students may eagerly start changing parts of the helicopter to see what happens–how flight changes. Once students get their hands on a template, without focused guidance, teachers may see many different configurations, and helicopters being thrown up into the air.

The time to be creative with designs to more freely explore flight dynamics is after a procedural scientific experiment is conducted.

Paper Helicopter Experiment Considerations

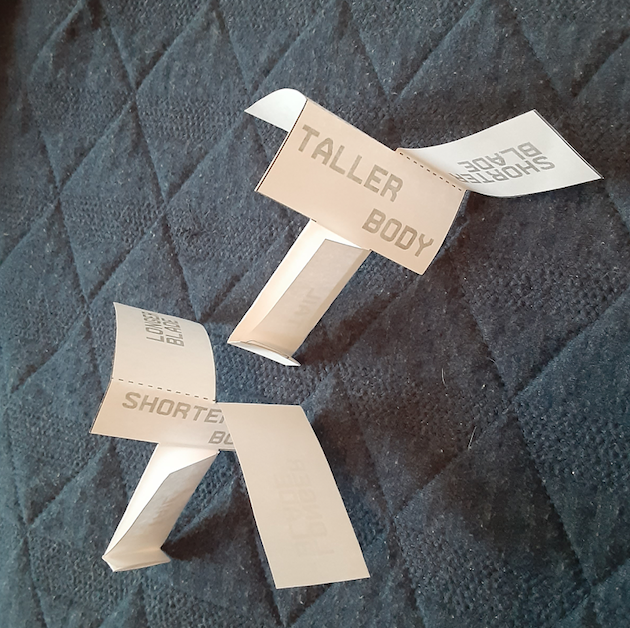
If you are conducting the paper helicopter experiment in a classroom, you will need to set up a testing area. Two paper helicopter models are needed as well to explore how to make a paper helicopter fall slower. It may be easiest to refer to each model by their blade lengths: shorter-blade model and longer-blade model.

Paper Helicopter 2D Templates with Shorter Blades and Longer Blades
Paper Helicopter 2D Templates with Independent and Controlled Variables

The student tester usually holds the completed helicopters away from their body and just above their head while standing on a chair. This drop distance is sufficient for comparing two different helicopters. Make sure there is enough clearance between the tester and any objects or observers to not interfere with the paper helicopters’ descent (i.e., to avoid introducing unwanted variables).

Having multiple students drop the two different helicopter types from the same height and at the same time can provide a simple and solid experimental design.

Here’s an example from NASUWT showing three students testing paper helicopters at once:

How Many Trials Should a Good Experiment Have?

What is a trial in a science experiment? A trial is one of many tests that make up the experiment itself. For example, each time you drop the paper helicopter from a fixed height to see if increasing the blade length increases how slowly a paper helicopter falls, you are conducting a trial.

We want a good experiment–one that offers fair testing and produces not only accurate data but lots of accurate data. The more trials we have, the more evidence we have that random factors are not influencing the outcome.

Other ways to think about the role of trials are: How many trials in an experiment should you conduct to get valid results? How many trials are required to validate a hypothesis? We want the results to truly represent what we are investigating.

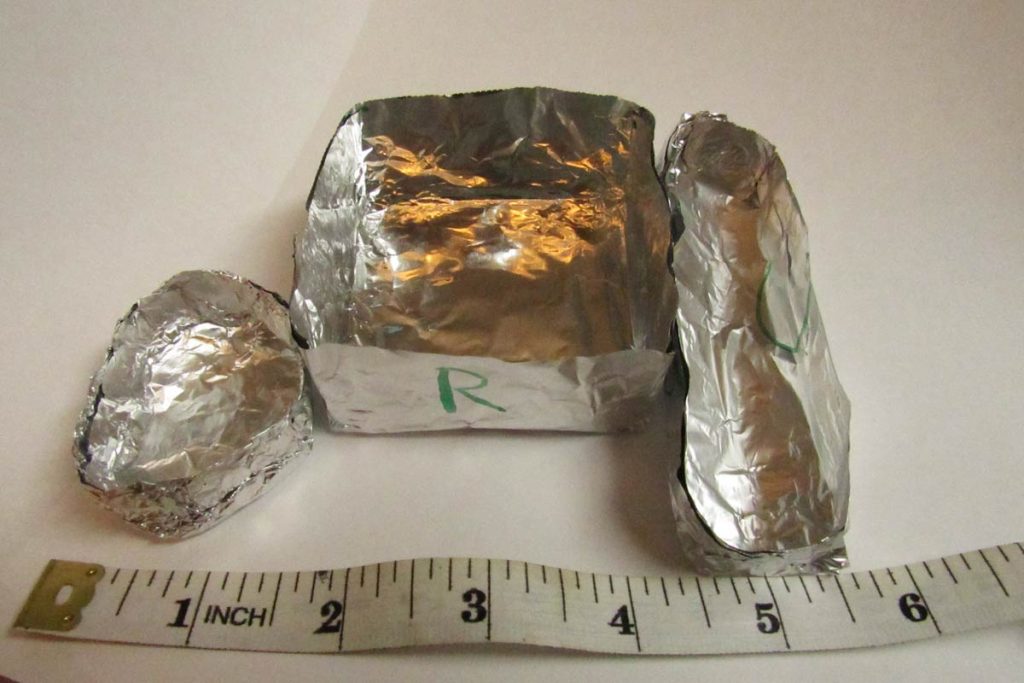
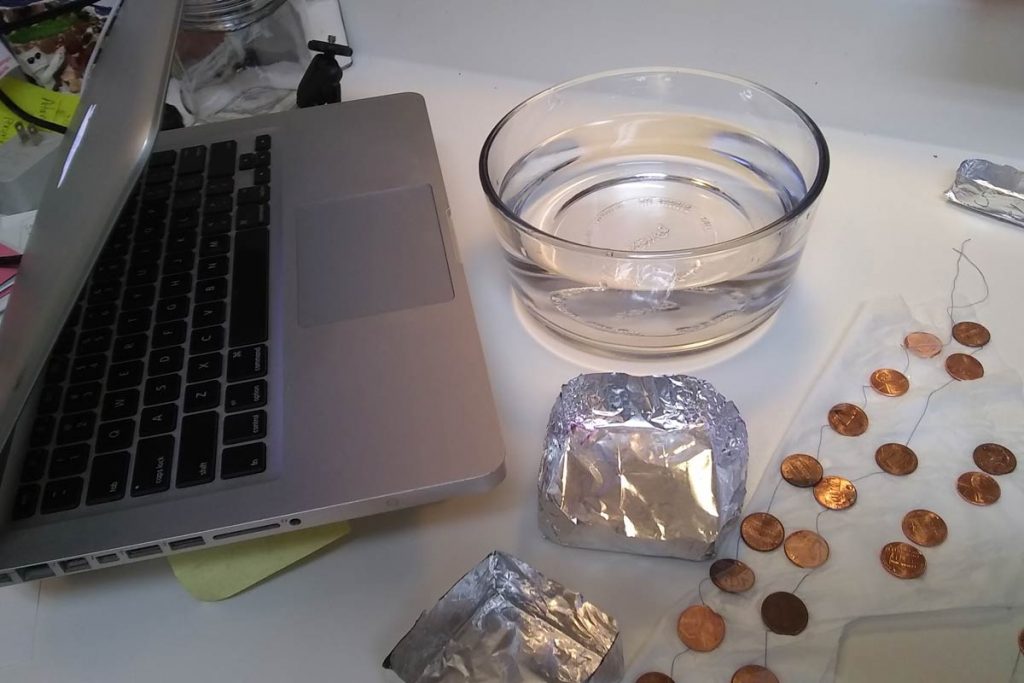
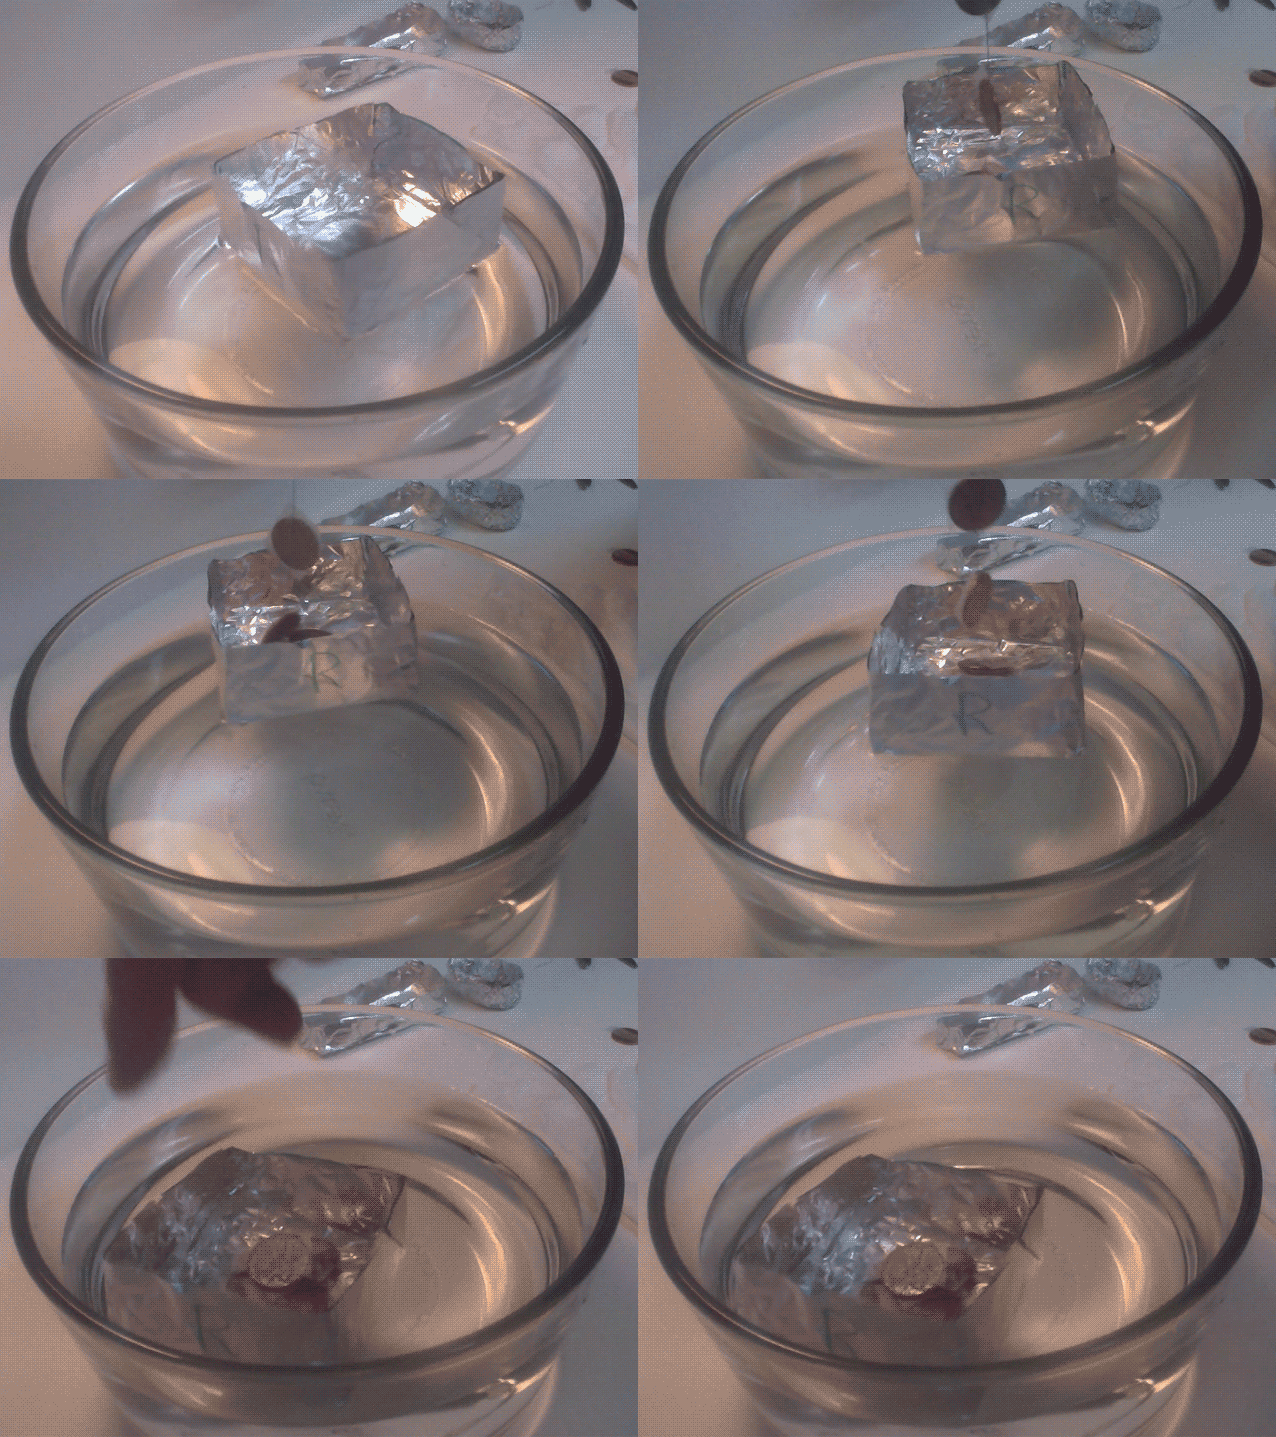
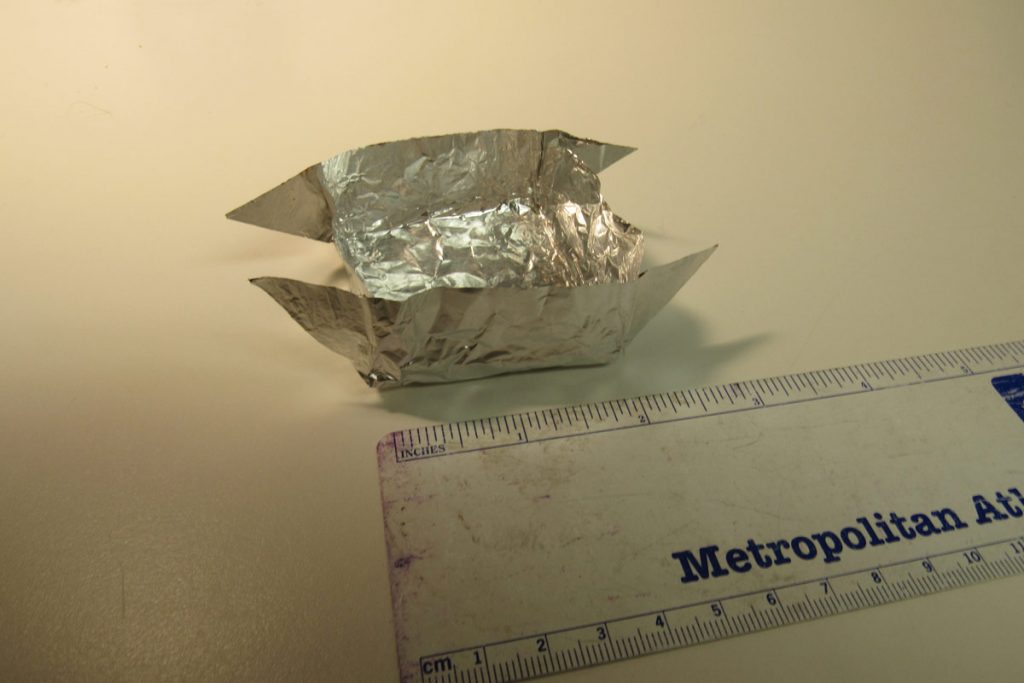
So, how many trials should a good experiment have? As many as possible. Three trials minimum seems to be a consensus. With easy-to-test paper helicopters, students can conduct many trials in a short period of time. Multiple helicopters can be tested at once as well. With a design such as the aluminum foil boat investigation, fewer trials are possible because it takes more time to prepare and test.

How to Collect Data in a Science Experiment

If you can gather as much good data as possible without too much logistic fuss, do it! For example, provide half of your class with the shorter-blade paper helicopter template. The other half of the class would be given the longer-blade helicopter template.

When ready, the two helicopter groups could be separated, face each other, hold up their models at the same height, and then drop them simultaneously. Repeat as needed. Students should keep their hands and arms as far away from the helicopters as possible, holding the tips of the blades before release.

Videos of the experiment offer easily reviewable data that would offer a more sound determination to see if longer or shorter rotor blades cause a paper helicopter to stay in the air the longest. Each model type should be clearly identified especially if relying on videos for data analysis.

Other Ways to Collect Data

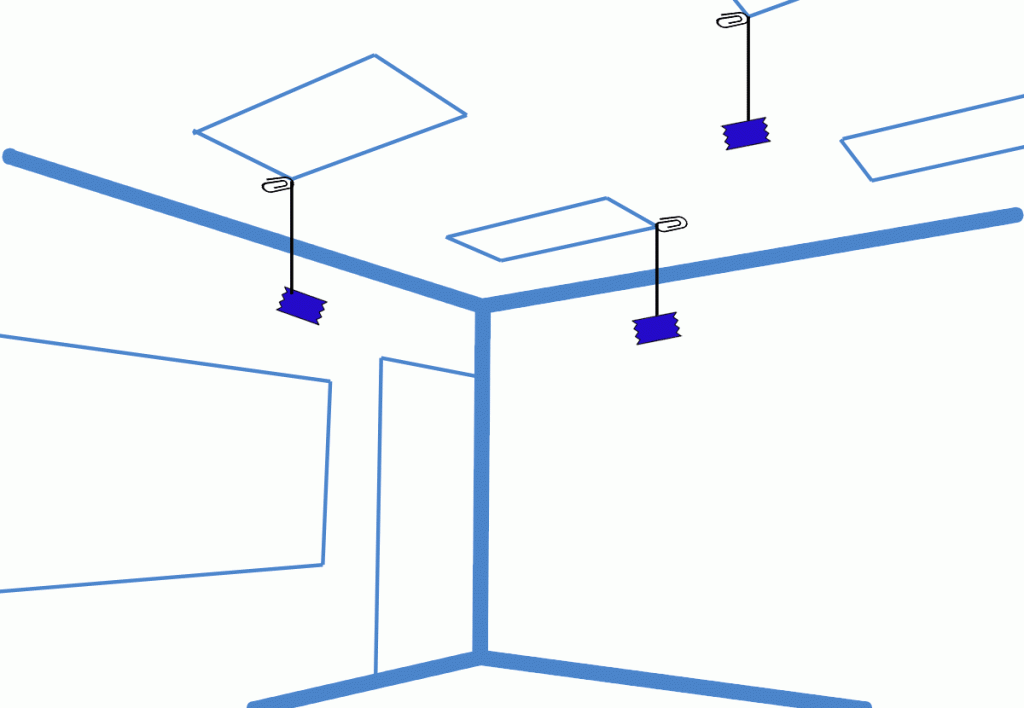
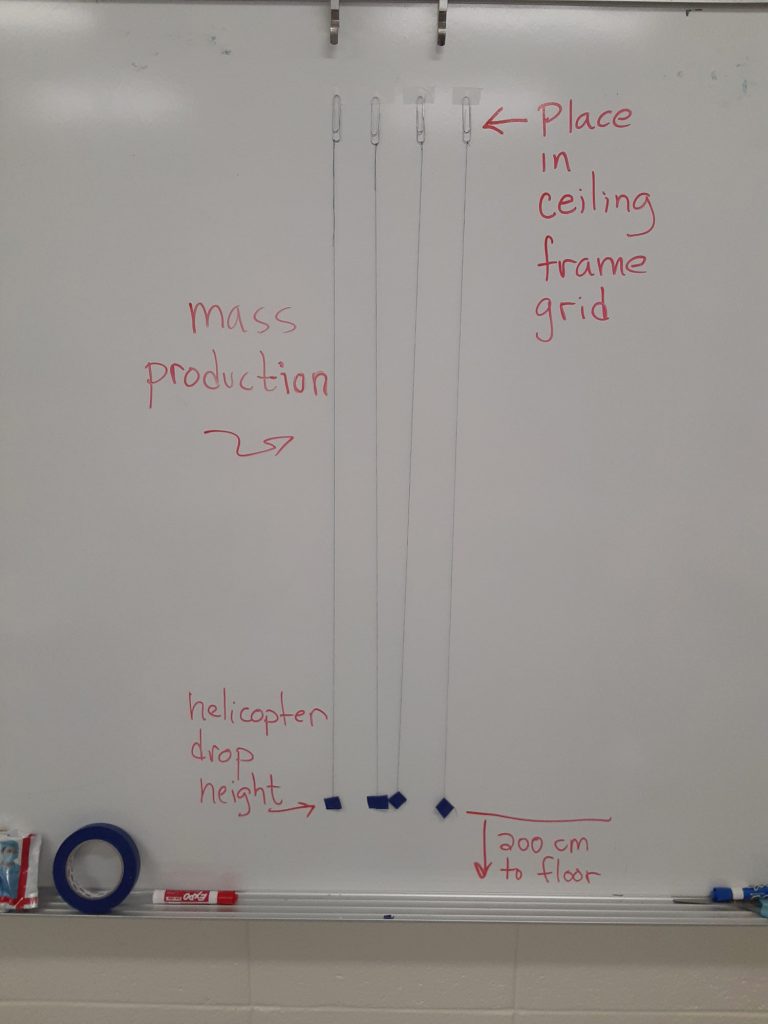
There are other ways to collect data while ensuring a fair test. Establishing a fixed height from the floor (i.e., controlling the distance-flown variable) can be done by hanging a small mass from the classroom ceiling with thread.

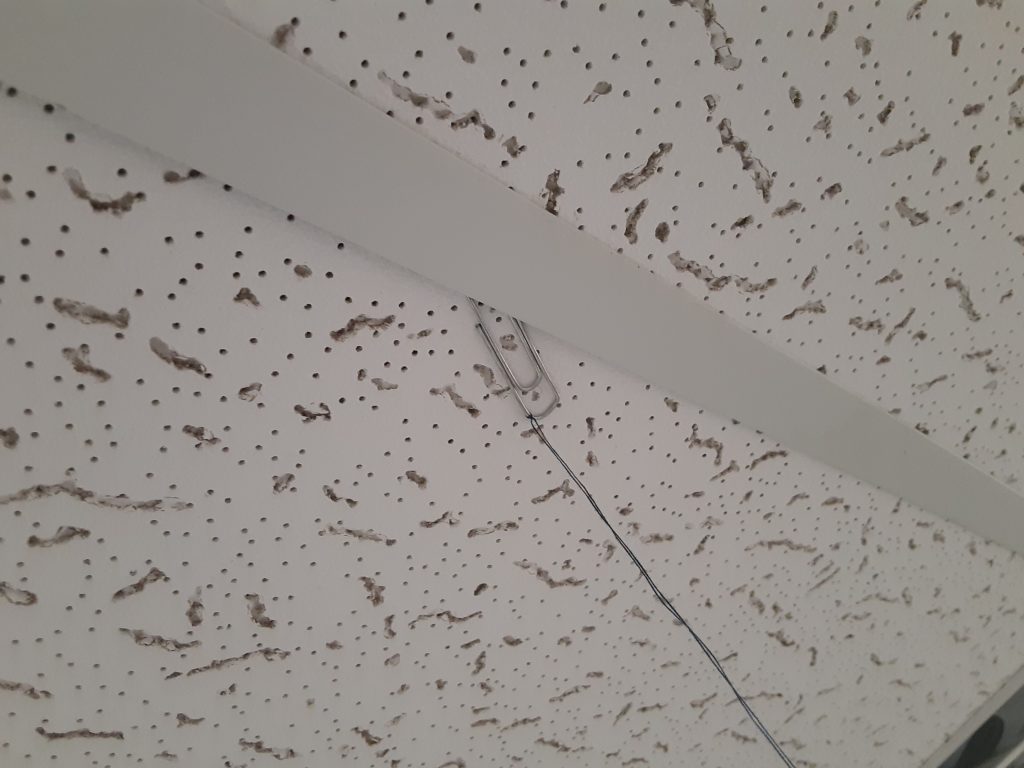
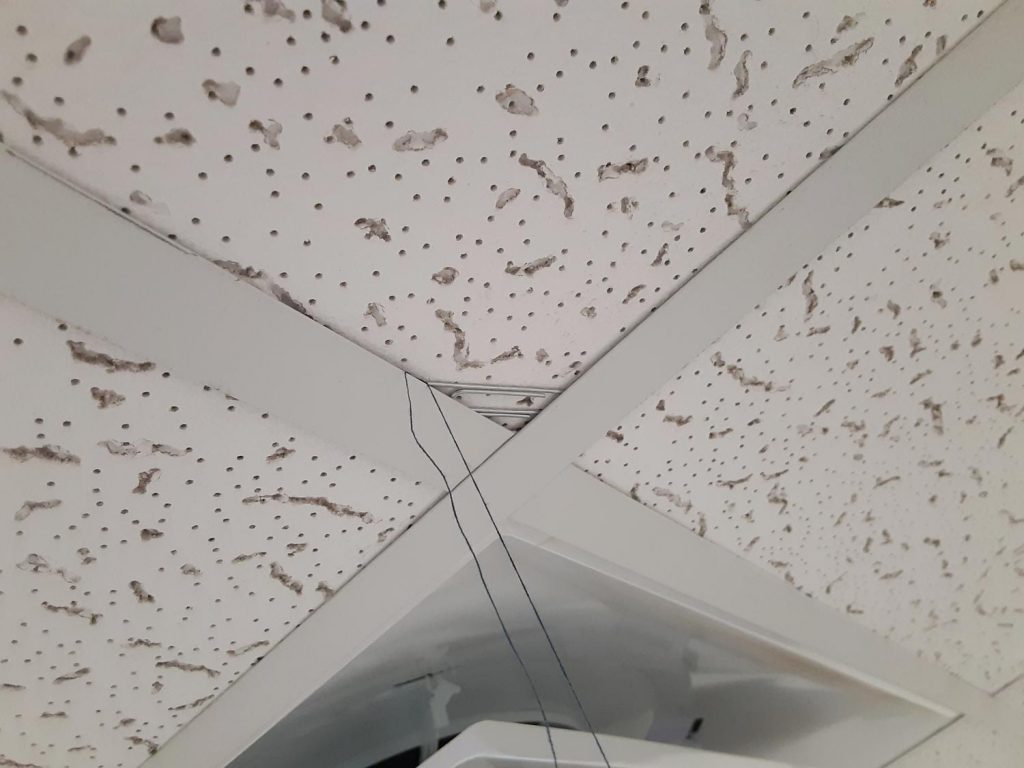
One successful set-up I have used has a paper clip on one end of a thread with a piece of blue painter’s tape on the other end. The top end with the paper clip is tucked into the metal drop ceiling frame grid, and the piece of blue paper tape has enough mass to hang down properly and be easily visible. I prefer not to have a paper clip hanging on the lower end because if hit or smacked for “fun” it could hurt someone’s hand, stick in the ceiling, etc.

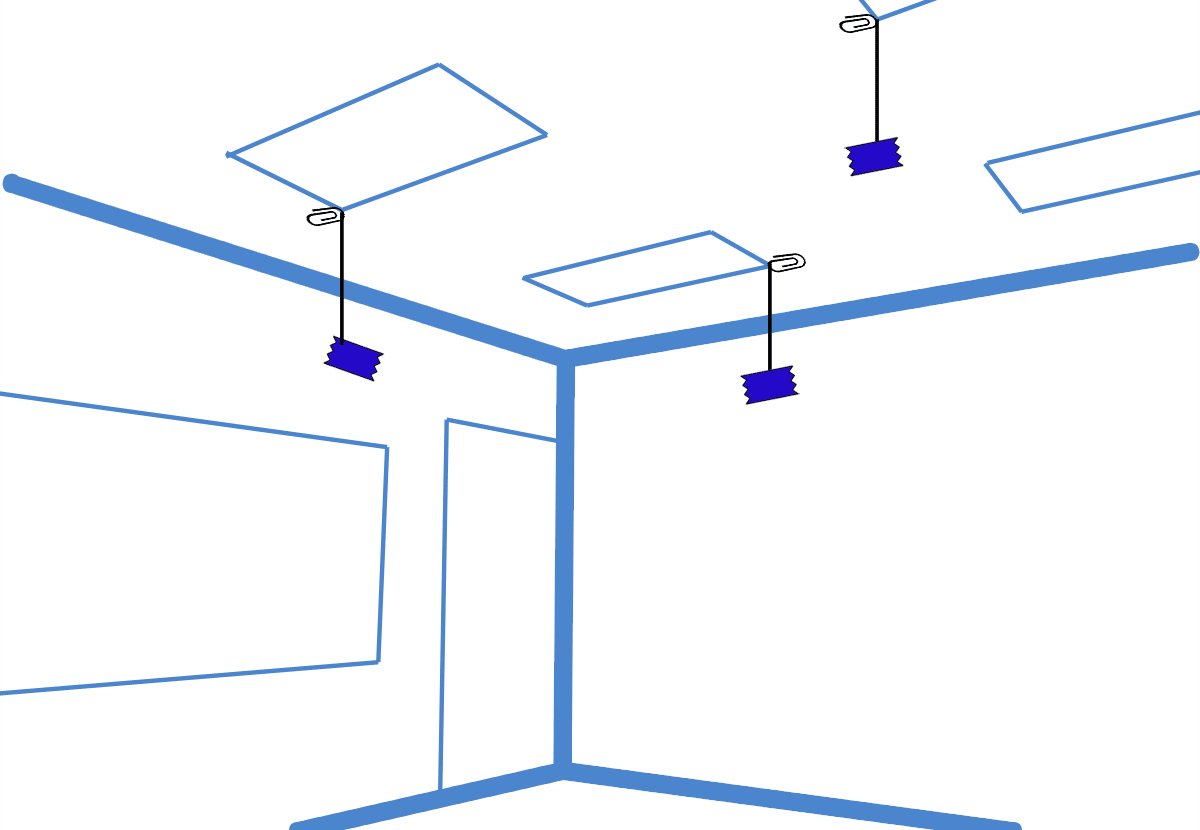
Paper Helicopter Classroom 200 cm Drop Points - 3D View
Paper Helicopter 200 cm Launch Points in Classroom

A distance of 200 cm from the tape to the floor is a good distance to establish as a controlled variable for dropping and observing paper helicopters. Place six to eight of these paperclip-thread systems around the classroom to create testing spaces for groups of two to four students.

Paper Helicopter Flight Times

The easiest and quickest way to determine which paper helicopter model falls more slowly may be the aforementioned multi-copter drop method with or without a video recording. So, if you need a quick and easy STEM activity, go this route.

Another way to perform a fair test requires a stopwatch. After setting up the six to eight test stations around the classroom with the paperclip, thread, and blue painter’s tape, each group of students can perform the 200 cm drop and time the helicopter models multiple times.

If students do, say, ten trials for each model they should have sufficient data to minimize random factors. Each group’s ability to time the drops accurately will factor into the integrity of the results. Measuring the paper helicopters’ times over a fixed distance will also produce data that can be analyzed mathematically. Some examples of mathematical analyses are:

  • represent and interpret data in a chart or graph
  • measures of center (e.g., average time for each model)
  • measures of variability (e.g., differences in trial times for each model)

Other Simple Paper Helicopter Launcher Ideas

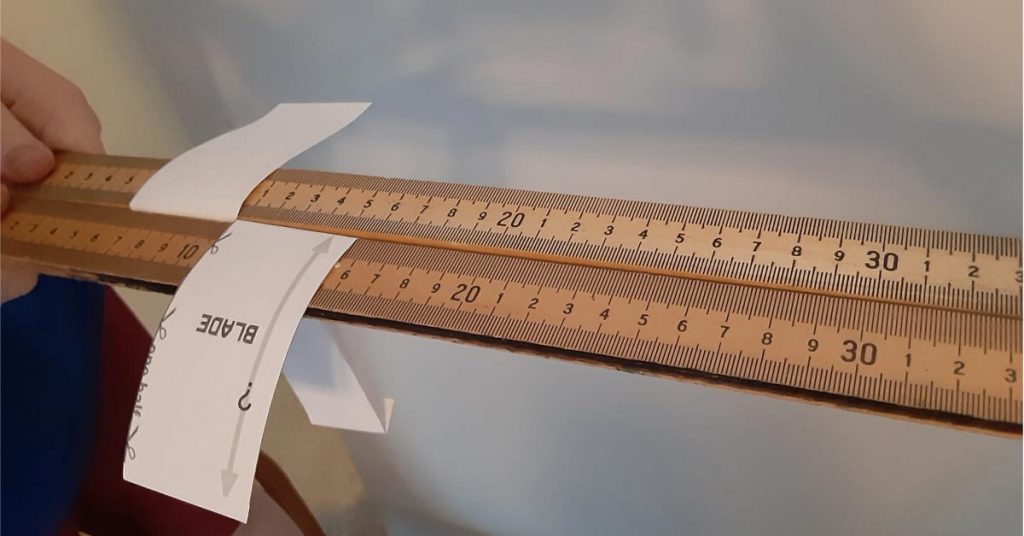
There are other ways to launch paper helicopters rather than dropping them from your hand. For example, two meter sticks, side-by-side, can launch two to four helicopters at once. Two people are needed to hold the ends of the meter sticks. A bit of practice helps to keep the sticks level at a prescribed height and to separate them at the same time for launching.

Paper helicopter experiment - two meters sticks for launching
Paper Helicopter Between Two Meter Sticks Ready for Launch
Launching Two Paper Helicopters with Meter Sticks (Shorter Blades are on the Right)

With the two-stick method, you can launch even more helicopters at once using longer pieces of wood. Consider using two 1 in. x 2 in. x 8 ft. furring strip boards for launching seven to ten paper helicopters at once with just two people.

Paper Helicopter Experiment Lesson Plan

The focus of this paper helicopter investigation explores how the independent variables of blade length and body height together affect time aloft. Remember that, the blade length cannot be changed without changing the body height (unless we change the mass, which is a variable we are controlling). This means for both types of helicopters:

Blade length (shorter) with body height (taller)
= equals =
Blade length (longer) with body height (shorter)


And, as a reminder, our paper helicopter scientific inquiry question is:

Does changing the blade-length-to-body-height ratio of a paper helicopter affect how long it stays in the air?

Paper Helicopter Template Technical Diagram

Lesson Plan Parts and Documents

Paper Helicopter Template – There are four free printable pdf templates (8.5 x 11 inches, 21.6 x 27.9 cm). Each helicopter template is one page with the two types of helicopters:

Choose the template that makes the most sense for your students. Generally, the lower the grade level, the more instruction, and guidance are needed to make a paper helicopter.

Teacher Lesson Plan Outline

Grade Levels
4 – 7 (8 – 10 works too!)

Time
How deep do you want to go? What is the grade level? Are you looking for a quick STEM activity or a long-term stem project? Consider 45 minutes (one class) to 90 minutes (two classes), and keep in mind any extension activities.

Scientific Inquiry Question
Does changing the blade-length-to-body-height ratio of a paper helicopter affect how long it stays in the air?

If you’re working with lower grade levels, or want to simplify the question, pose it like this:
Does changing the blade length of a paper helicopter affect how long it stays in the air?

Standards Connections
Common Core Next Generation Science Standards (NGSS)

Elementary School

Middle School

Materials and Set-Up (for the multi-test station method)

  • Scissors
  • Stopwatch (can be an online version)
  • 8.5 x 11.5-inch paper helicopter template – one per group
  • Group of two to four students students
  • Six to eight helicopter test stations spaced about the classroom. A testing station consists of a thread hanging from the ceiling vertically that ends with a piece of tape 200 cm above the floor.

Paper Helicopter Experiment Lesson Documents

Paper Helicopter Experiment Resources

If you would like additional instructional activities to extend the paper helicopter activity and go deeper into learning, check out the Paper Helicopter Experiment (purchase link) resources at TPT!

You’ll find all the resources shared in this blog post, plus:

  • teacher lesson presentation with custom graphics
  • paper helicopter experiment report template
  • pre/post test
  • reading comprehension activity
  • thinking routines writing activity
  • group member role definitions
  • vocabulary definitions for the paper helicopter experiment
  • vocabulary definitions for the scientific method

Books about Paper Helicopters and Flight

Check out this captivating collection of books (paid links) that explore the fascinating world of flight. From exploring the mechanics of flight and the similarities between living creatures and machines to unraveling the story of the Wright Brothers, these books provide an immersive experience of the wonders of aviation.

Planes, Jets and Helicopters: Great Paper Airplanes
Make your own fantastic flying paper aircraft! Instructions to fold paper, fly, and troubleshoot paper planes and helicopters from standard 8.5 by 11-inch paper. No glue, scissors, or tape required! Two dozen fold and fly designs with fold-by-fold illustrated instructions.

Science Comics: Flying Machines: How the Wright Brothers Soared
A National Science Teachers Association Best STEM Book Winner in 2017! A delightfully illustrated comic about the history of the Wright brothers told by Katharine Wright Haskell, the younger sister of American aviation pioneers Wilbur and Orville Wright.

Planes, Gliders and Paper Rockets: Simple Flying Things Anyone Can Make–Kites and Copters, Too!
A STEM-oriented book for older students who have access to tools and want to go beyond paper designs. Great for going deep into making hands-on, DIY flying crafts with everyday materials!

Paper Helicopter Experiment Summary

Teachers, are you searching for an engaging and cost-effective STEM activity to foster scientific thinking among your upper elementary and middle school students? High school students as well can benefit from the paper helicopter experiment!

This exciting low-budget DIY activity encourages students to develop essential scientific thinking skills by creating hypotheses, gathering relevant data, and interpreting results to draw conclusions. As a result, they will gain invaluable skills that will serve them well in future studies.

But the benefits don’t stop there! The paper helicopter experiment also allows students to explore various scientific concepts such as gravity, lift, and air resistance. Students will better understand these essential scientific principles by testing different blade sizes.

The paper helicopter experiment’s simplicity and low-cost nature make it an excellent starting point for Year 1 students to learn the MYP Design Cycle. Students can better understand the design process by identifying a problem related to helicopter design, creating a prototype, testing and evaluating their design, and communicating their findings.

To get started, check out the free resources in this blog post and on TPT! The TPT resources offer step-by-step instructions for building a paper helicopter and comprehensive tips for conducting the experiment and analyzing results. So what are you waiting for? Get started on this exciting hands-on STEM activity today!

MYP Design Criterion D – Evaluating

MYP Design Criterion D – Evaluating

Welcome to the last Criterion in the MYP Design Cycle, Criterion D – Evaluating. If you’ve been following my posts about the MYP Design criteria, I have been focusing on my teaching and learning experiences with Year 1 (grade 6) students in the IB’s MYP Design Program.

What is Criterion D in MYP Design?

After completing MYP Design Criterion C – Creating the Solution, students evaluate the success of the solution in Criterion D. For Year 1 students, by the end of the school year, they should be able to outline the following according to the MYP Design Guide:

  • simple, relevant testing methods, which generate data, to measure the success of the solution
  • the success of the solution against the design specification
  • how the solution could be improved
  • the impact of the solution on the client/target audience

The specific word the MYP Design guide uses is “outline”. Students need to be able to outline or summarize the above four bullet points to show optimal understanding in MYP Design Criterion D – Evaluating.

Team of students discussing test data in an MYP Design class
Team of Students Discussing Test Data in an MYP Design Class

What is Criterion D in the Design Cycle Really?

For my Year 1 students, I used the MYP Design Cycle to organize my approach to completing Criterion D. I would go through each strand as deliberately as possible, given that this class was my students’ first in MYP Design.

Criterion D – Evaluating starts at about four to four and a half weeks after beginning the unit with Criterion A – Inquiring and Analyzing. So, Criterion D for my classes lasted about one and a half to two weeks (i.e., four to six classes, one hour long each).

The reflective strands of Criterion D (D.3 and D.4) were not at the top of the list in terms of my students’ favorites. Overall, we did a lot of writing in each criterion throughout the unit. Had I offered other options instead of writing (e.g., Patlet, Seesaw) maybe the reflective writing in these final strands would have been met with greater enthusiasm.

When we conducted an evaluation of a physical product (e.g., performance testing), Criterion D was very popular! It can be exciting and fun to see how designs hold up to testing, how they fail, and to enjoy a little friendly competition.

MYP Design Statement of Inquiry and the GRASPS Scenario

Before getting too deep into this criterion, it’s important to spend some time reviewing and discussing the “why” of the lesson. The last time the reason for solving the design problem was reviewed and discussed was probably at the start of Criterion A.

Go over the GRASPS again (example). This brief task scenario outlines the goal of the unit, the student’s role, and who will benefit from the solution. A review of the statement of inquiry (example) will reconnect students to the big-picture purpose of their learning as well.

MYP Design Criterion D – Getting Started

For each criterion in an MYP unit, I had students complete one Google Doc over multiple class periods. MYP Design can be taught in other ways, but this is how I framed it. Here’s an example of the Criterion D document for my first unit, the paper water tank.

I found it helpful for students to warm up to Criterion D with a “zero strand”. That is, before students started Strand D.1, they completed D.0, which was essentially a success-activity warm-up piece with fill-in-the-blank questions about information from previous criteria.

For example, in our third unit, we upcycled plastic into a gift for a specific audience. For this unit, Strand D.0 – Design Reference and Identification was created to “provide elements of the design to fully communicate the solution.” Students restate the gift recipient, the gift name, and the final sketch of the gift from Criterion B – Developing Ideas.

Is Writing Fatigue Real for Criterion D in MYP Design?

As I mentioned before, the overall amount of writing can be a turn-off in Criterion D. With this being the last criteria, fatigue can begin to set in as well. Even though Strand D.0 is a tiny bit of extra work, these first few easy steps in D.0 can help make Criterion D less disagreeable and more inviting.

Strand D.1 – Design Testing Methods

Specifically, at the end of Year 1, the MYP Design Guide states that for the highest achievement level (a 7-8 score), the student “outlines simple, relevant testing methods, which generate data, to measure the success of the solution.” At the 5-6 achievement level, the student “defines relevant testing methods, which generate data, to measure the success of the solution.” How does “outlining” show more of what a student knows and understands versus “defining”? This difference has not been clear to me.

Set up the testing methods to acquire accurate data. For engineering-based units, setting up testing to get good data is straightforward. For designs that are meant to influence an audience’s behavior (e.g., cyber safety public service announcement), devising a testing method to yield good data may not be as straightforward.

How do you Design Testing Methods?

The hard-to-find MYP Design Teacher Support Material (IB login required) resource which was developed to accompany the 2014 MYP Design Guide classifies testing methods into five areas:

  • Expert Appraisal
  • Field Trial
  • Performance Testing
  • User Observation
  • User Trials

This resource also states that at the end of Year 1, students, with guidance, should be able to “design simple tests to evaluate the solution against the requirements of the design specification.”

I did try to address Strand D.1 – Design Testing Methods to honor its role as part of the MYP Design Cycle. However, I never felt like I had this strand figured out sufficiently, and I was too inconsistent across my MYP Design units. My correlation between the appropriate task and this strand could have used some improvement!

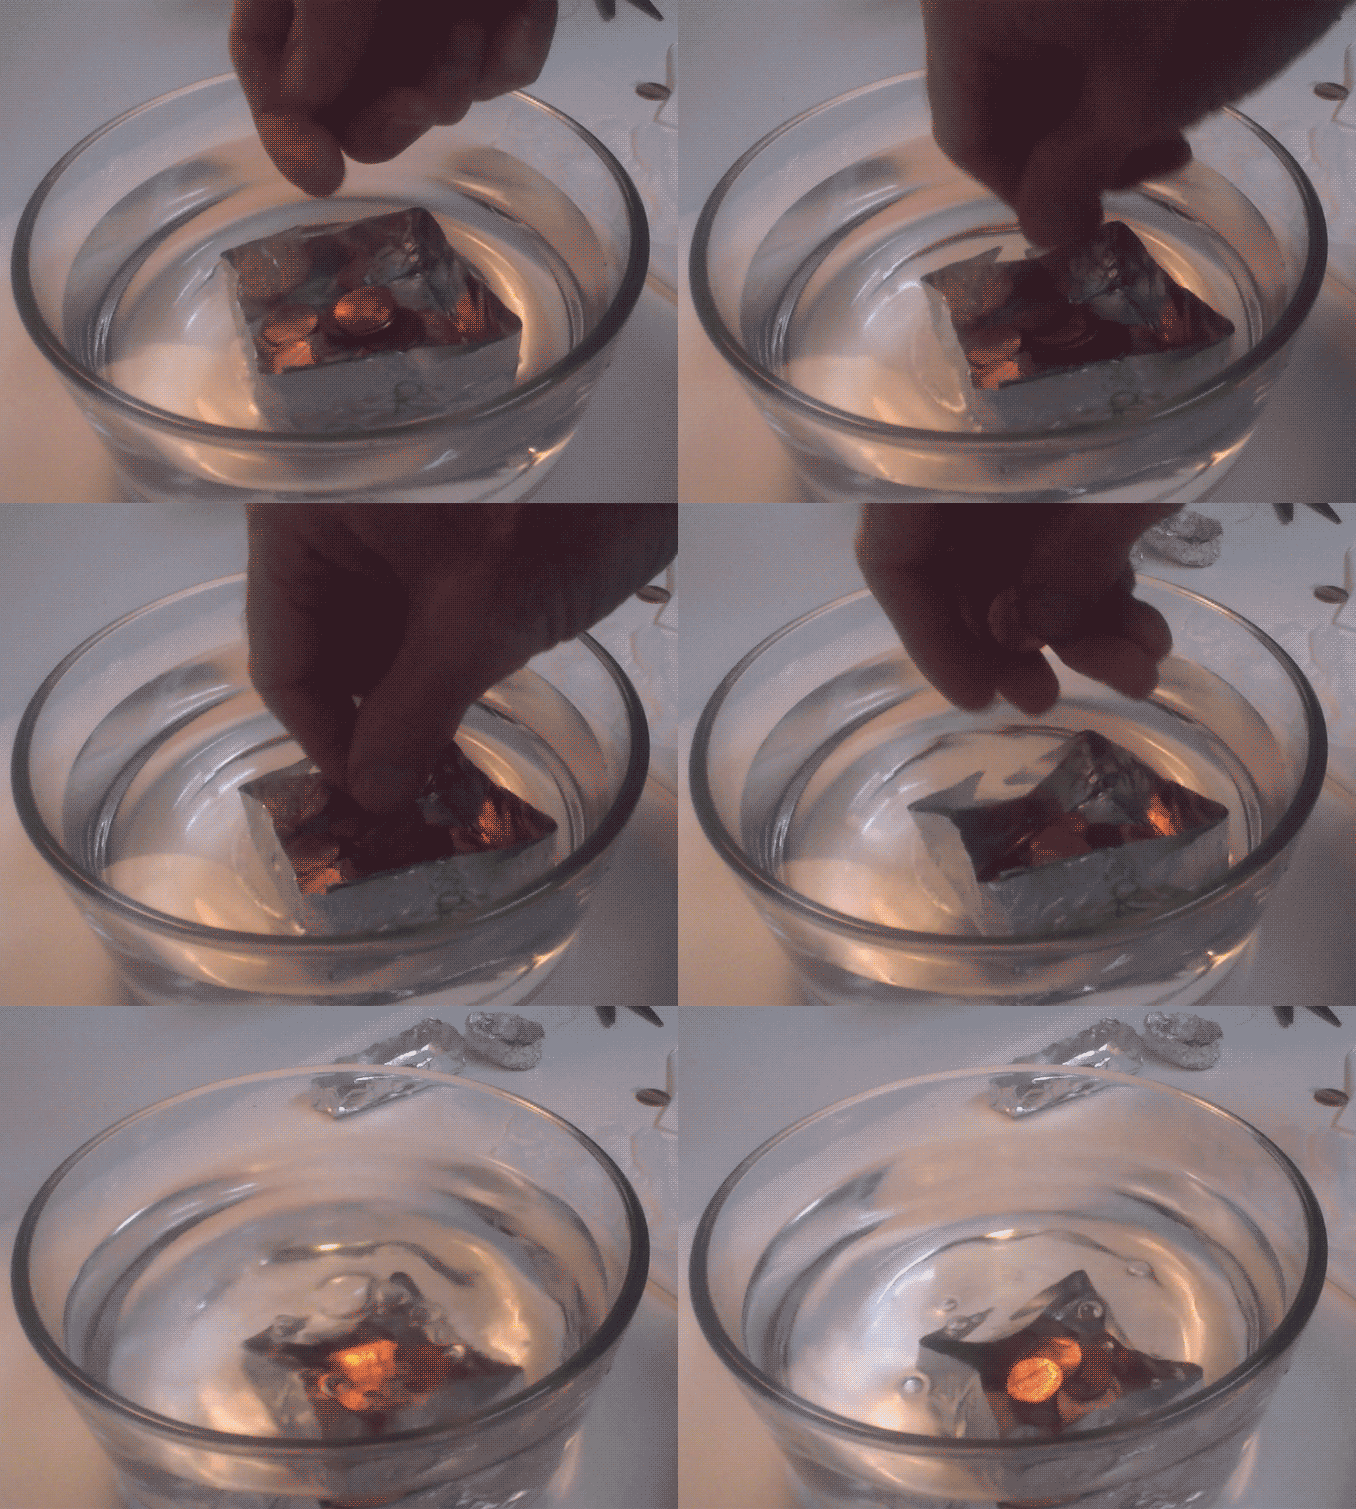
For example, for my first unit in the school year, the paper water tank, students noted their tank’s mass, created a hypothesis, tested their tanks, shared a video of their test, recorded test results, and curated observers’ notes. We conducted the test during this strand (okay) but had written the test plan with the tank building plan in Strand C.1 – Construct a Logical Plan (pdf; maybe less than okay).

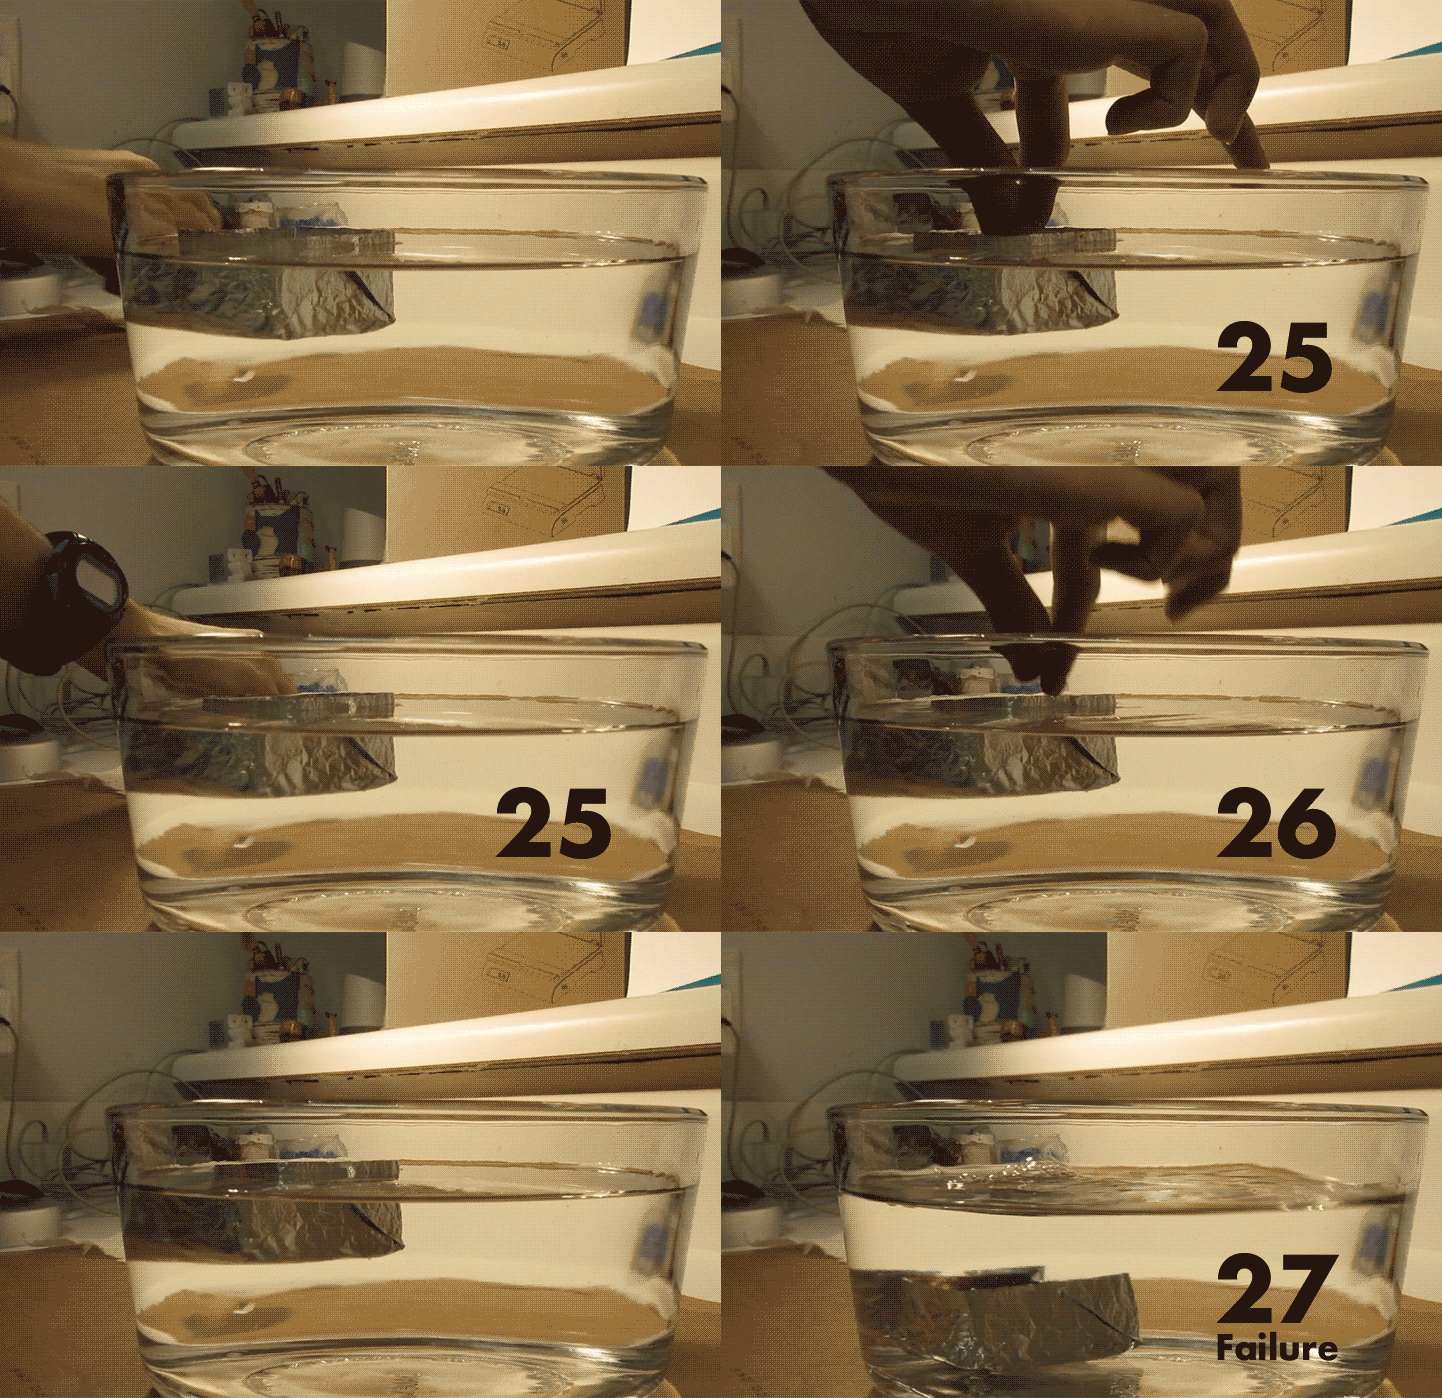
Water Pour-in, Newspaper Tank Testing Start - Criterion D
Water Pour-in, Newspaper Tank Testing Start – Criterion D

For the second unit of the school year, students created an animated cybersafety PSA for the morning announcements. In this strand, students showed their final animated PSA to two classmates and asked each to identify the PSA’s strongest characteristic among these three: relevant, memorable, or persuasive. Students then needed to explain why they agreed or disagreed (or both) with their peer observations.

An engineering unit like the paper water tank would use performance testing to gather quantitative data. The cybersafety PSA might employ user trail focus groups (i.e., peer review) and/or a field trial for testing to gather qualitative data.

Simple, Relevant Testing Methods?

So, for these MYP units, I didn’t exactly have students outline “simple, relevant testing methods, which generate data, to measure the success of the solution.” This strand on its own is difficult to address. Regardless, the testing methods should reflect the design specifications developed in Criterion B. One could argue that some sort of testing method would be needed for each design specification if time allowed. The MYP Design Teacher Support Material (IB login required) does essentially state this as “the student has tested against every aspect of the design specification.”

One way to improve D.1 would be to start with a review of the five types of testing used in MYP Design. A discussion about which of the five testing methods best fits the current unit would deepen understanding of this strand. If possible, have students generate hypotheses before testing for a bit more analysis and to cultivate buy-in. Having a conversation around hypotheses can lead to connections to the appropriate testing methods to get at the best data to evaluate the solution. For Year 1 students especially, address the purpose of the strand as accurately as possible.

Strand D.2 – Evaluate the Success of the Solution

The MYP Design Guide calls out for Year 1 students to “outline the success of the solution against the design specification.” I interpreted this to mean that students evaluate their finished product against each of the design specifications established in Criterion B. How deep you go into examining the final design against each of the design specifications can depend on how much energy you want students to dedicate to the remaining strands. Regardless, the goal/problem, introduced in the GRASPS, should be among the design specifications studied to determine the success of the solution.

Canned descriptors can provide sufficient depth of evaluation. For the paper water tank unit in Criterion D (pdf), the evaluation of the design for each specification was in terms of these five descriptors:

  • Exact – Your team’s tank exactly met the design specification.
  • Close – Your team’s tank mostly met the design specification.
  • Middle – Your team’s tank met some of the design specification.
  • Far – Your team’s tank met none or very little of the design specification.
  • NA – You are not sure how your team’s tank met the design specification (try to avoid using this).

Another way to evaluate the success of the solution is to rank how well each specification was met with a short explanation. This is more work. If you’re under a time constraint, ask students to identify which design specification was most fully met and which was most insufficiently met. Students can also explain and justify their choices when looking at these extremes as well.

Benefits of Data Collection in MYP Design

At this point in Criterion D, data have been gathered from evaluating the solution against the design specifications. These data should be collected and archived to establish authentic reference points for future classes.

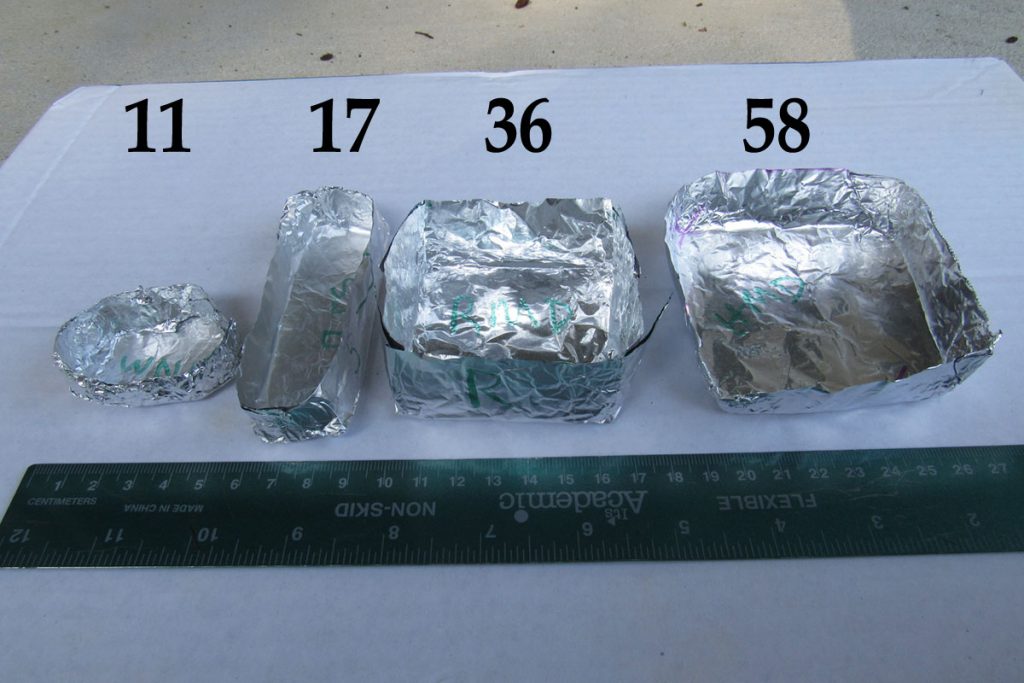
MYP Criterion D Paper Water Tank Test Data Poster
Newspaper Water Tank Test Results – Criterion D

For example, current classes can use the data generated from previous classes’ Criterion D work as credible and authoritative research material for Strand A.2 – Identify and Prioritize the Research.

Strand D.3 – Explain How the Solution Could Be Improved

If you are working with Year 1 students and want to distinctly address the design problem, note that the responses about improvement (Strand D.3) can naturally cross over into impact (Strand D.4). Also, be aware that some student energy can be lost at this point, and answers might be less detailed than a teacher would prefer.

The MYP Design Guide states Year 1 students “outline how the solution could be improved.” Year 5 students “explain how the solution could be improved”. Regardless, I have found that Year 1 students naturally go beyond “outline” and do explain how to improve the solution in D.3.

This strand is straightforward and one paragraph of writing should be enough for a student to show what they know. Flipgrid and Seesaw offer verbal, video-based choices for strands D.3 and D.4, but may require more time for the teacher to assess.

It’s best to be precise about the next steps to improve the solution. Therefore, students should explain how the solution can be improved in terms of the design specifications critical to the success of the solution. If there are many specifications to choose from, specify an essential few for students to address.

Strand D.4 – Explain the Impact of the Solution

MYP Design Criterion D – Evaluating ends the MYP Design Cycle for the unit of study. Review the GRASPS scenario for a final refocus on the why of the problem and the who–the client/target audience. A short, final discussion informed by the Statement of Inquiry Questions can reinvigorate purpose and meaning, and cultivate empathy as well.

Year 1 students’ responses might be speculative due to these scenarios tending to be more contrived than those for Year 5 students. Regardless, students should focus their explanation of the impact on the target audience–the benefit the client gains (or would gain) from the solution to the problem.

MYP Design Criterion D - Test and Evaluate
MYP Design Criterion D – Evaluating

Repeat the MYP Design Cycle?

Should you repeat the cycle? After all, a design cycle or design process is meant to improve the solution each time the designer goes through the steps. The repetition is good! However, to repeat a full six-week lesson would not be logistically possible. Plus, students would probably and legitimately lose interest.

At the end of the semester or year, students could engage in an accelerated and abbreviated version of a previously completed entire unit to apply their knowledge, honor the design process, and hopefully have some fun. Engineering-based units are the easiest to repeat in this manner.

MYP Design Criterion D Evaluating Summary

MYP Design Criterion D depends heavily on evaluating the success of the solution against the design specifications. To do this effectively, students must establish testing methods to generate accurate data. A helpful and natural progression is to share testing data with future classes as research material for Criterion A.

Criterion D is about improving prototypes through an iterative design process. Students use data from testing methods they set up. They must think about how effective their solution is for the target audience.

In Criterion D, there are different testing methods students can use. These include expert appraisal, field trials, performance testing, user observation, and user trials. Each method gives different data types to help make the prototype better. For example, performance testing gives objective data to compare designs and choose the best one for the task.

Overall, MYP Design Criterion D is a crucial step in the design process, although students may see it differently! It helps students evaluate their solution’s effectiveness and improve using the best real-world data available. By the end of Criterion D, students will have tested their design systematically and evaluated its impact on the target audience.

Engineering Design Process Example

Engineering Design Process Example for Students - General Four-step Design Process
The General Four-step Engineering Design Process

The goal of this blog post is to provide educators with a step-by-step engineering design process (EDP) example with a STEM focus. STEM is an acronym for the academic areas of science, technology, engineering, and math. These lesson resources support both virtual and traditional brick-and-mortar learning. The target student group ranges from about fourth grade to seventh.

This example lesson can last several weeks. Teach EDP at the beginning of the school year to explicitly train students in problem-solving!

What is the Engineering Design Process (EDP)?

To begin with, EDP can sometimes be referred to as the “STEM design process” or “engineering design thinking.” In fact, it’s hard to teach EDP without integrating some STEM, but it can be done!

EDP is a problem-solving cycle. It’s a series of specific and logical steps to solve a problem with fidelity. Success is determined by how well the solution meets the established design specifications (the success criteria). By repeating the process/cycle, greater success should be achieved.

Teaching the Engineering Design Process

Many teachers new to EDP and STEM come into the subject area from different educational backgrounds. Also, they may have limited resources or have inherited an array of materials that take time to learn such as Makey Makey packs, Lego Mindstorms, laser cutters, and Arduino or Raspberry Pi kits.

The sequential nature of EDP can help organize novice and veteran teachers with their thinking and planning: EDP provides a coherent framework to integrate teacher knowledge, materials, and standards into a rich learning experience for students.

The Engineering Design Process is a Cycle of Logical Steps to Solve a Problem

There are many processes or cycles that aim to solve problems and can be used with students in STEM. Some have five steps. Some have six. Others have seven! Essentially, all follow the same pattern. Briefly, the steps are:

  • Research a Problem
  • Develop Ideas
  • Create a Prototype
  • Evaluate the Prototype (then repeat to improve)

Why Use the Engineering Design Process?

The sequential nature of EDP is especially helpful for students. It provides them a procedural structure to solve a problem. The intuitive problem-solving steps also guide teachers who have different levels of STEM expertise and different standards to address. Additionally, within this logical progression of steps, teachers can use what they know to teach STEM as they evaluate, learn, and master the resources available to them.

EDP easily offers students deeper learning when strengthened with meaningful connections. Design thinking and the International Baccalaureate’s (IB) Middle Years Program (MYP) Design Program are two cyclic design processes that seek solutions within the larger picture.

Boy engaged in the engineering design process. Sketching a ball.
Student Designer

Design thinking puts a strong focus on the audience–on the people who are the end-users of the product or service that is solving the problem. MYP Design learning leverages our world as the broadest context for understanding through six global contexts:

  • Identities and Relationships
  • Orientation in Space and Time
  • Personal and Cultural Expression
  • Scientific and Technical Innovation
  • Globalization and Sustainability
  • Fairness and Development

Scenarios can help EDP further enhance learning. EDP becomes more effective when framed within an authentic context. Interdisciplinary project-based learning (PBL) provides meaningful connections and naturally meshes with EDP.

The design process, in general, can facilitate life skills such as a growth mindset. Students take on reasoned design risks and try new ways to solve contextual problems. Some designs will fail, and this failure leads to new understandings. The qualities of being positive in attitude and persistent in effort contribute to a student’s overall success.

Project-based Learning (PBL) and the Engineering Design Process (EDP)

The Edutopia blog post Project-based Learning Research Review by Vanessa Vega summarizes PBL as having the four characteristics:

  • Students solve real-world problems
  • Students have greater control over their learning as compared to traditional techniques
  • Teachers coach and facilitate student inquiry and reflection to go deep into learning
  • Students have opportunities to collaborate (sometimes)

Why use project-based learning (PBL) with the engineering design process (EDP)? STEM-based instruction and learning guided by EDP go hand-in-hand with PBL. Students go deeper into concepts and content to enhance their academic learning with a problem-to-be-solved in focus.

PBL also offers learning projects that are more personally meaningful and opens up various opportunities for students to think creatively and share their learning with school stakeholders.

Not All Projects Have Problems

Problem-solving is the focus of EDP and, therefore, problem-based learning can be confused with project-based learning. Both can be referred to as “PBL”. So, it’s worth noting how these methods differ.

John Larmer, in his Edutopia article Project-Based Learning vs. Problem-Based Learning vs. X-BL, classifies problem-based learning as a subset of project-based learning. He also shares with readers a concise comparison chart of the two types of learning.

How Effective is Project-based Learning?

The characteristics of PBL have been shown to promote student achievement in terms of the statistical measure effect size. According to educational researcher John Hattie who has written extensively on instructional strategies that promote student achievement, an effect size of 0.40 is considered to be average for a school year. However, there is some controversy with regard to this metric being a hard average for all students.

Regardless, the Edutopia article, “The Hattie Effect: What’s Essential for Effective PBL? by Suzie Boss, is an efficient and thoughtful summary of effect sizes and their corresponding PBL characteristics.

Before Starting the Engineering Design Process

Teachers should try to provide an authentic context (i.e., establish a reason for solving the problem) before engaging students in a problem-solving process. Project-based learning may require a long-term commitment. Rich and meaningful content will help students stay engaged in the process.

Some Basic EDP Resources to Solve a STEM Problem

For younger students, the reason to solve a STEM problem through EDP can be more contrived. For older students who come to class with a greater body of knowledge, the context for problem-solving can be broader and more individualized.

Story Time

Fictional stories and historical contexts can serve as the PBL backdrop for STEM learning through EDP. For example, can your students build a house within a defined budget and use alternative materials to withstand the strength of a wolf’s breath? Many STEM stories build on familiar and classic tales such as The Three Little Pigs.

With historical contexts, the MYP Design’s six global contexts can add authenticity to the PBL experience. For example, pioneering Antarctic explorer Ernest Shackleton attempted to reach the South Pole just over 100 years ago.

Shackleton did not reach the pole, lost his ship, and yet became renowned for his remarkable perseverance to survive. The problem could be to redesign his ship to better withstand the harsh elements. A global MYP connection in this scenario relates to scientific and technical innovation.

Authentic Assessment is Within your GRASPS

Educational authors Grant Wiggins and Jay McTighe in their book, Understanding by Design (UbD), outline a framework to add authenticity to a problem. The GRASPS model is an efficient scenario builder to establish a plausible context for EDP-based PBL. The acronym GRASPS stands for:

  • Goal (Problem)
  • Role
  • Audience
  • Situation
  • Product
  • Standards & Criteria for Success
The Problem Equals the Goal Animation
EDP Puts Focus on Solving a Problem. The Problem is the Goal.

A GRASPS scenario sets the problem-solving stage by outlining an authentic performance task for students.

Tip: When you are about to create an interdisciplinary STEM lesson that uses EDP, write the GRASPS first to frame your thinking!

Steps of the Engineering Design Process

As previously mentioned, the engineering design process can be based on five or more steps. I prefer a process or cycle with four steps for simplicity and mental manageability. Once you’re at five, six, or seven steps the process can begin to feel vague, and the mindset of the problem-solver less focused. This observation may be no biggie, but if you can simplify the process, I recommend doing it.

I will use these four steps that can and should repeat–with the last step informing the research for the first step:

  • A. Analyze a Need
  • B. Develop Ideas
  • C. Create a Prototype
  • D. Test and Evaluate
Engineering Design Process Example for Students - General Four-step Design Process
The General Four-step Design Process

So, if you have a design process of four steps, you have simplicity for student learning. This sequence works for a 20-minute STEM activity. But what about specificity? What if you need your students to go deeper into problem-solving?

Engineering Design Process Example for Students- Specific Four-step Design Process
Specific Four-step Design Process with Three Substeps per Step:
Analyze a Need, Develop Ideas, Create a Prototype, Test and Evaluate

Treat the four steps as the primary steps then create substeps. Try to keep the same number of substeps within each step. This symmetry should help to eventually create a predictable and familiar rhythm of sequencing for the teacher and students throughout the process.

The Engineering Design Process PBL Scenario

The engineering design process is based around a core question:

“What is the problem to be solved?”

These three questions capture the minimum amount of context to provide authenticity to the PBL:

  • What are you making?
  • Who is it for?
  • Why are you making it?

As previously mentioned, frame the problem to be solved in the GRASPS model to provide a deeper context and richer meaning for students. The GRASPS model wraps these core questions into a task scenario for greater authenticity and student buy-in.

Ideas for a STEM Project

Where can you find EDP STEM activities for elementary and middle school that can be done face-to-face and virtually? Many places! For example, the list of Science Olympiad Sample K-6 Events can inspire lesson ideas.

For this engineering design process example, I’ll use the barge building challenge. The story, The Three Little Pigs, will contextualize the problem to be solved.

The GRASPS Scenario Example

Here is the EDP scenario as described via the GRASPS model. It is written in the second person and addresses the students:

The Three Little Pigs’ Vision of their Ocean Adventure

Goal
Your goal is to build a prototype of a seaworthy aluminum watercraft to hold as much cargo as possible.

Role
You are an expert boatbuilder specializing in aluminum watercrafts.

Audience (Clients)
The Three Little Pigs.

Situation
The Three Little Pigs recently inherited their mother’s estate and now seek new adventures. They desire to sail the oceans to explore the great wide world. They need a seaworthy vessel!

While two of the pigs occasionally suffered from immaturity and frivolousness, they admired their other brother’s work ethic. All three attempted to make a sturdy watercraft on their own. However, their experimental boat made of bricks sank upon the first launch with zero cargo!

These adventurous piggies need your expertise to start their new lives safely on the ocean in a watercraft of optimal seaworthiness. You will demonstrate your boatbuilding skills to them by making an aluminum foil prototype.

Product
Create an aluminum foil watercraft prototype to hold as much cargo as possible.

Standards & Criteria for Success
The aluminum foil prototype watercraft shall support as much cargo as possible before failure (i.e., fully sinking into the water). Cargo units shall be measured in U.S. pennies. The foil may be cut, ripped, or folded into any shape. The entire 5-inch square piece of aluminum foil shall be used to make the prototype.

Exceeding a cargo of 15 pennies qualifies as adequate. Exceeding 30 pennies will be considered average. Above 50 pennies of cargo qualifies as the expert boatbuilder. Current data reference: Four 5-inch prototypes were tested. The number of pennies at failure for each were: 11, 17, 36, and 58.

More Data

Eventually, you will have a lot of data from the actual tests of the student watercraft prototypes. At that point, modify the Standards & Criteria for Success of the GRASPS: By using the average penny amount at failure as the adequate point, you can establish a familiar benchmark from which to measure success.

And now begins the engineering design process! Let’s start with the first step or phase…

A – Analyze a Need

Engineering Design Process for Students - Step A - Identify a Need
The First Step in the Engineering Design Process – Step A -Analyze a Need

In the 1933 animated short film by Disney, the pigs were named Fifer Pig, Fiddler Pig, and Practical Pig. Can you guess which two were both happy-go-lucky and foolish? Which pig was industrious and purposeful?

To get started, read the short story of The Three Little Pigs as a warm-up. Then present, read, and discuss the GRASPS scenario with your students.

A.1 – Ask and Empathize

Kids can invent and be creative in this first official part of the engineering design process to grow their buy-in. Teachers should pose questions to prompt discussion about the GRASPS. This approach helps students warm up to the lesson and invest in the characters involved. For example:

  • Why do the pigs want to travel?
  • Why travel by boat and not by plane?
  • Was building a brick watercraft a wise idea? Why didn’t they try wood?
  • Who is the boatbuilder, and what are his or her skills?
  • How might the pigs’ thinking have changed compared to the original story?

If you need to dig deeper for more specific targeting to meet an audience’s or client’s need, try this marketing resource for discussion ideas: Facebook’s ad targeting demographics categories. Rather than present the whole document, however; focus on just a few areas to explore.

A more intuitive way to get to know the characters (audience) would be to have an explicit discussion about them based on their traits. Read Write Think has a handy list of character traits.

A final but more elaborate resource to personalize and grow understanding of the pigs as the clients in the design process could be a feeling wheel. There are many feeling wheels or emotion wheels available online.

Plutchik’s Wheel of Emotions might be worth a look. It lays out eight basic emotions: joy, trust, fear, surprise, sadness, anticipation, anger, and disgust. Opposite emotions are located directly across from each other (e.g., joy is the opposite of sadness). The darker the shade (i.e., those emotions more toward the center), the more intense the emotion.

However, if your students are older and/or you’re short on time, simply read and discuss the GRASPS. Once you have A.1 – Ask and Empathize established, start the A.2 – Investigate and Research substep in conjunction with practicing communicating visually. Which means…

Technical Drawing – Practice Some Basics Right Now!

During this first step of the engineering design process, it is helpful to have students draw objects and products in a technical way. Specifically, if time allows, and you are teaching a multi-week lesson, try to spend up to 25% of class time practicing 3D sketching during this first step of EDP. Even with younger children, construction lines, visible object lines, and even hidden lines can be explored.

Intersecting Cylinders and Cuboids – 3D Hand Sketch Practice of a Camera

Warm up each class with pencil sketching, emphasize reasonable output, and encourage, but downplay, precision. This mindset keeps stress minimized and technique maximized.

I am not close to being an expert in technical drawing! You may not be either. I recommend exploring short YouTube videos about product sketching by experienced industrial artists. For example, product design sketching master, Anton Ruckman, creates a photo camera with a blue pen. This tutorial is just over three minutes and the process is sped up. These methods can help pencil sketchers as well.

Photo Camera Fast Sketching Video Tutorial

What techniques can help us?

  • Establish construction lines (lighter/thinner lines) to visualize the design.
  • Rotate the paper to create longer lines as easily as possible.
  • Arm movements, not wrist movements help create longer lines accurately.
  • Darken/thicken lines at the end to finalize the look of the design.

It’s obvious that the designer has practiced, so we practice!

Video Speed and Volume

Play with tutorial video speeds, looping, and sound for best results. I prefer the sound off. Sometimes I speed up the tutorial with looping on. Presenting techniques this way can prompt students to just sketch and not think too much about making mistakes.

Why practice so much technical sketching now? At the end of the next step, B- Developing Ideas, students will create the official sketches of their best watercraft ideas.

For other types of lessons that require digital prototyping, this sketching practice could be creating objects in Tinkercad, drawing in Inkscape, or photo editing with Adobe Photoshop–it depends on which skills may be needed to represent the best idea to solve the problem.

A.2 – Investigate and Research the Problem

Consider the research part as the actual study of the problem: How shall the boatbuilder make a watercraft prototype from a 5-inch square of aluminum foil to hold as much cargo (i.e., U.S. pennies) as possible?

Students should examine existing watercraft and any previous test data. Since this is a common engineering challenge, actual aluminum boat designs are abundant online. A general (i.e., text), image, or video search like aluminum foil boats with pennies will provide many insights.

Investigate and Research the Problem

Make the investigation a hands-on, rapid prototyping session to keep student interest high, provide an opportunity for experience, and generate some personalized benchmark data.

Avoid using the five-inch square size so as not to give the impression that indeed this is the actual prototype build. For example, use a three- or four-inch square aluminum sheet for students to investigate the problem.

Four-inch Square of Aluminum Foil for Hands-on Investigation

This hands-on investigation serves as a way for students to get to know the materials–how they function when stressed or explored but not officially tested. The experience can inspire well-reasoned ideas and serves as primary research as well.

Four-inch Aluminum Foil Investigation - Test to Failure (at 27 Pennies)
Four-inch Aluminum Foil Investigation – Tested to Failure (at 27 Pennies)

Investigation and Research Equal Rapid Prototyping?

This substep can sometimes provide rapid prototyping opportunities that are worth exploring. That is, you can capture an abbreviated mini-design cycle experience within the engineering design process.

For example, with paper airplanes that need to fly far and straight, students can set up launchers at their tables or desks. They then repeatedly try different designs (investigation) and adjust these designs based on flight outcomes (research). With the aluminum watercraft, the testing is slower because of the careful penny placement, so rapid prototyping is not as feasible.

A.3 – Define the Problem

In this brief substep, students summarize the purpose of their role as the boat builder to wrap up the research phase. The summary can be a short paragraph consisting of the previously mentioned core questions:

  • What are you making?
  • Who is it for?
  • Why are you making it?

The answers are found in the GRASPS, and the why question tends to be the most challenging. These questions get at the heart of the problem and are synonymous with a design brief.

Students should try to define the problem without being too specific (i.e., don’t give away any ideas yet–don’t constrain the designer), but teachers should play this by ear. The younger the student, the greater the chance they may state their exact idea at that moment.

If some of these questions were already explored and answered in A.1 – Ask and Empathize, that’s okay. The purpose of the EDP is reinforced, and your students are beginning the first phase of the engineering design process, so any redundancy is probably reinforcing.

Summary of Step A – Analyze a Need

Students first identify a need—a problem to solve—through the GRASPS scenario model. They also get to know the beneficiaries of the solution to the problem through open-ended questions and discussion. Investigation and research build expertise to solve the problem. Students conclude this introductory step with a focused summary of the purpose of their role in the engineering design process.

My experience with 11-to-12-year old students is that they do not prefer this research step (as compared to C – Create a Prototype). The hands-on investigation helps engagement, but overall, it can be a bit of a checkbox for kids.

B – Develop Ideas

Engineering Design Process - Step B - Develop Ideas
The Second Step in the Engineering Design Process – Step B – Develop Ideas

Officially, ideas are developed in this step. It is worth noting that the MYP Design Cycle is similar to the engineering design process steps. For example, although MYP Design Criterion B – Developing Ideas has four sequential criteria, it guides students from brainstorming ideas through criteria and constraints (i.e., design specifications) to their best ideas to solve the problem.

B.1 – Imagine Possibilities

Start with brainstorming activities that support an anything-goes approach. I used to start B – Develop Ideas by specifying requirements, but it wasn’t the best approach with younger students. Why put a damper on creativity, especially with kids? Students are bursting with ideas at this point after researching, investigating, and defining the problem.

Brainstorming to Solve the Watercraft Problem for the Three Little Pigs
Engineering Design Process Example for Students
Brainstorming to Solve the Watercraft Problem for the Three Little Pigs

Quick pencil sketches of the watercrafts, then a gallery walk to share among classmates, is one way to grow ideas. Look over part B.1.1 in the MYP unit, Water Tank Engineering with Newspaper, for an example of brainstorming.

B.2 – Specify Requirements

Here is where you can begin to focus kids toward their best idea that meets the standards and criteria for success as outlined in the GRASPS. Additional design specifications frame the scope of the problem to guide students as well. Check out the Criterion B document of the Water Tank Engineering with Newspaper unit for examples. You can see how some design specifications are both already established to guide students and some need to be written by students.

It’s important to caution students that they should try to meet all of the design specifications—both those already established, and those that they create. However, they should also be reassured that if their design does not meet the established criteria for success, it’s not equivalent to a failing grade. In substep, D.2 – Evaluate the Results, students should explore the degree to which the design specifications were achieved.

Design specifications should be as explicit as possible and categorized into logical chunks. The ACCESS FM Framework can guide teachers to sort and identify these criteria and constraints. State the category and describe the specification requirement. For example, the aluminum watercraft for the pig clients might look like this:

  • Identification – The watercraft prototype’s name
  • Success – Number of pennies at failure?
  • Compliance – Was the entire five-inch square of foil used (it was supposed to be)?
  • Integrity – Leaks before failure? Y or N
  • Construction – Layers of foil used to make the watercraft?
  • Construction – Was the foil cut or torn? Y or N
  • Design – Which 2D shape best describes the watercraft’s base?
  • Design – Side and base relationship (e.g., perpendicular)?
  • Dimensions – Maximum height of the craft?
  • Dimensions – Minimum height of the craft?
  • Dimensions – Area of the watercraft’s base?

In this substep as well, you might want to stipulate safety procedures, and not-easily-quantifiable considerations such as:

  • Aesthetics – Is it obvious which part is the hull (bottom) and which part receives the pennies (top)?
  • Safety – Is the watercraft free from sharp edges?
  • Customer Satisfaction – What is the intended emotional response by the clients after testing?
  • Environment – How shall the watercraft be managed after testing? Showcase, recycle, trash?

B.3 – Represent the Best Idea

In this substep, students communicate their best idea visually as an annotated 3D design. Annotations should be few. They should list the key features that help the design meet the goal as defined in the GRASPS.

At 4:54 of the video, What is a Robot, check out the simple and clear annotated 3D line sketch of a Roomba vacuum cleaner. The context (corner of the room) and work path (dashed line) are intuitive and helpful to easily understand the robot’s function.

What is a Robot? by Tech Policy Lab, University of Washington

Annotated student sketches of the aluminum watercraft prototype might look like these four examples:

Engineering Design Process Example - Watercraft Square Box Sketch with No Color
Watercraft Low Edge Square Box Sketch with No Color
Engineering Design Process Example - Watercraft Hexagon Sketch with No Color
Watercraft Hexagon Sketch with No Color

A little bit of color can make the pencil line sketch pop a bit visually. Consider it. Too much color can distract from the visualization of the idea.

Engineering Design Process Example - Watercraft Square Box Sketch with Some Color
Watercraft Low Edge Square Box Sketch with Some Color
Engineering Design Process Example - Watercraft Hexagon Sketch with Some Color
Watercraft Hexagon Sketch with Some Color

What about dimensions? Should dimensions be indicated in the 3D sketches? Consider putting major dimensions on the 3D sketches if you’re not going to create orthographic projection sketches (i.e., 2D views of top, front, and side).

However, 3D views could become cluttered with many annotations and dimensions. If possible, split up the labeling into two types of sketches. For example, have students create 3D sketches with annotations. In a separate sketch, they create orthographic projections (top, front, and side) with dimensions.

Could this representation of the best idea via sketching be the “A” in STEAM? Is this a STEAM lesson too? Yes! Product sketching is certainly an art commonly found in industrial design programs.

Summary of Step B – Develop Ideas

Although ideas spring forth all the time, in this step, students formally develop their best idea into a feasible design. Rich ideas are explored and then refined through design specifications. Students conclude this second step with a visual representation of their leading idea to solve the problem.


Congratulations! You are halfway through the Engineering Design Process. Skip to the Engineering Design Process Example Summary section at the bottom for a quicker read and the essential lesson documents.


Ready to move from planning to prototyping? Continue to Engineering Design Process Example – Part 2. Create and evaluate your prototype!

MYP Design Criterion C – Creating the Solution

MYP Design Criterion C – Creating the Solution

The MYP Design Cycle’s Criterion C

In MYP Design Criterion C – Creating the Solution, students make their design to solve the problem defined in Criterion A. Criterion C is usually the favorite part because students actually make their designs. Their ideas and creativity come to life. The research in Criterion A and the idea development in Criterion B have prepared the students for this moment. The time to delay gratification is over!

In general, students first write a plan to build their chosen solution. Students then follow the plan and modify it as needed to create a prototype. This solution is built according to the design specifications. The design specifications were established in Criterion B.

Strand C.1 – Construct a Logical Plan

Students make a plan to build the prototype of their best idea–the solution to the problem. They develop this plan with their peers in mind. Can a peer follow my plans easily? They also consider any relevant design specifications in this planning strand. Efficient, clear, and precise communication is essential. The design specifications in Criterion B were written in a similar way. Informational/explanatory writing is needed in these areas.

Making a plan to build the solution. Photo by Bongkarn Thanyakij.
Making a Plan to Build the Solution

The MYP Design Guide describes this plan-making strand requirement as follows:

  • Year 1 (grade 6) – “Outline a plan, which considers the use of resources and time, sufficient for peers to be able to follow to create the solution.”
  • Year 3 (grade 8) – “Construct a logical plan, which outlines the efficient use of time and resources, sufficient for peers to be able to follow to create the solution.”
  • Year 5 (grade 10) – “Construct a logical plan, which describes the efficient use of time and resources, sufficient for peers to be able to follow to create the solution.”

What works to communicate a how-to the best way? The plan’s language can be a mixture of text, symbols, images, and sketches. Think about the instructions you’d receive to build a set of shelves. What about folding an origami crane or building a model airplane? Good plans are a coherent mix of step-by-step instructions with clear illustrations. A flow chart or a PERT chart could be used to show logical steps.

Be Specific Not General

As with the design specifications in Criterion B, if students are unsure about their building plan, they may try to generalize the building steps to make their product. Watch out for this! It is best to assume that there will be changes to the plan once the building starts. Forecasting changes to the plan are not an invitation to write vague steps in this strand so that the plan may be “correct” to fit the actual build.

If the building plan lacks details, identifying changes in Strand C.4 – Justify Changes Made to the Plan, will become more difficult. Based on all the good work the student has done up to this point, they should write a plan as specific as possible and not fret over possible future changes.

Strand C.2 – Demonstrate Excellent Technical Skills

Freshly Printed 3D Robots – Designed in Tinkercad – Criterion C

For Years 1, 3, and 5 students, the MYP Design Guide states the same description for Strand C.2. In this part of the design cycle, students will “demonstrate excellent technical skills when making the solution.” What does this exactly mean? How can your students show excellent technical skills in Criterion C – Creating the Solution?

Safety First!

Safety should always be fundamental to creating physical products. Pointy scissors, hot glue guns, and hacksaws can be dangerous! Do technical skills relate to safety? Of course! However, unless you are assessing safety as part of Strand C.2 – Demonstrate Excellent Technical Skills, do not include it as an academic accountability component. Emphasize safety during Criterion C as part of your ATLs (Approaches to Learning) or under your classroom rules.

Photographic Documentation for Physical Product Designs

To the greatest extent possible in MYP Design Criterion C – Creating the Solution, have students photograph the sequence of building steps of their physical products/solutions (e.g., the newspaper water tank). It’s super helpful to take as many pictures as possible to document the process. Students need to document, document, and document! FYI: Some Criterion C documents can be over twenty pages sometimes because of the many photos.

Why take lots of photos throughout the building process? Because students will more easily know if they followed the plan to create the solution (Strand C.3 requirement). They will also be better set up to expertly and accurately justify any changes made to the plan (Strand C.4 requirement).

As early as possible in the school year, students should learn how to use the camera on their laptops. For this task, students will probably need a class or two to practice composing scenes and editing the photos for optimal lighting and clarity. You may need to do a mini-lesson on photo editing with the Windows Photo App, Preview in OS X, or something web-based like Pixlr for Chrome. Final note: The younger the student the less personal smartphones should be used as a camera option.

Photo Editing Choices

For a more comprehensive process capture of the excellent technical skills, chunk the photography sessions during the build. Do this by setting up the student document (usually a Google document) with sections in a table to insert the photos.

For example from the Engineering a Paper Water Tank unit, students needed to insert two different photos per building step (up to five per row). The five building steps were categorized into these areas:

  1. Preparation (Materials, Resources, and Group Members)
  2. The First Steps
  3. The Middle Steps
  4. The Finishing Steps
  5. The Final Tank (Include a ruler in these photos)

This setup is essentially an advance organizer to provide students with organizational cues.

Screen Shot Documentation for Digital Designs

When creating digital designs to demonstrate excellent technical skills, students can submit screenshots of their work. For some projects, students take screenshots of a digital build over time to show a progression of development to demonstrate excellent technical skills.

Additionally, screenshots of how the project looks within the app or software can serve as a demonstration of excellent technical skills for digital designs. For example, when learning to animate with Adobe Photoshop, my students submitted screenshots of their Animation and Layers Windows. The animation frames show the timing and sequence decisions of the layers to be shown. The Layers Window nomenclature can reveal decisions about organization choices.

For presentations or graphic designs, you can consider technical skills in terms of the best practices in visual design. One idea I have used: When creating Google Slide presentations about community service robots, my students showcased one slide that best used the C.R.A.P. Model for optimal visual communication. Students also needed to explain why their chosen slide was effectively using contrast, repetition, alignment, and/or proximity.
Finally, Criterion B‘s design specifications may be calling out for requirements that require excellent technical skills. It does though depend on the focus of the unit. Regardless, make sure to keep in mind the design specifications when determining how you want your students to demonstrate excellent technical skills when making the solution.

Strand C.3 – Follow the Plan to Create the Solution

I have found for some units, combining strands is helpful. For example, it can make more sense for students when creating a physical product to combine Strands C.2 and C.3 or combine C.3 and C.4.

For the Water Tank Engineering with Newspaper unit, the students addressed C.2 and C.3 simultaneously. The step-by-step photographic evidence of the build offered direct evidence of technical skill level (Strand C.2). The photos also showed how the student followed the plan to create the solution (Strand C.3).

Honestly, most students do not reference their plan made in C.1 while building in C.2 and C.3. However, having a plan makes sense to be as prepared as possible. A written plan allows students to reflect on changes as well to deepen their understanding of problem-solving.

Strand C.4 – Justify Changes Made to the Plan

Justifying Changes Made to the Plan – Upcycling Plastic Infinity Gauntlet – Criterion C

All plans change. It’s a fact of life. Reassure students that their plan could change. Even with adults working in fields such as construction changes occur. For example, a change order is a common document in the construction of homes and office buildings. Change orders officially record an amendment to the original construction contract.

Changes to plans that arise from an intent to better solve the design problem should happen in MYP Design. And these changes should be well documented. Unreasoned or drastic changes to plans should not be happening.

The C.1 to C.4 Connection

A common problem in Strand C.4 can arise from the lack of details in the step writing in Strand C.1. A plan that lacks specifics inevitably results in an inability to sufficiently identify changes to the plan. Students with a limited vocabulary and/or limited English may not generate sufficient details in C.1 and can suffer from the challenges of needing to be specific. With this in mind, try to give detailed formative feedback no later than the end of Strand C.1 to help ensure future success for students in Criterion C.

MYP Design Criterion C Wrap Up

MYP Design Cycle with focus on MYP Design Criterion C - Creating the Solution. Four strands labeled.
MYP Design Criterion C – Creating the Solution

After researching the problem in Criterion A and developing their ideas in Criterion B, students are eager to make their design in MYP Design Criterion C – Creating the Solution. They are as ready as ever to show what they know to be an effective solution to the problem.

Starting with a very specific written plan leads to success in Criterion C. It’s okay if a plan changes. It’s not okay if a plan is unclear.

Assessing Criterion C is done across all four strands. It’s important to provide feedback early so that any misconceptions can be cleared up to ensure future success. Strands C.2 and/or C.3 can wind up being a series of process photos for physical product designs. Ensure students know how to use their device cameras and have some skills in image editing.

Ready to wrap up the MYP Design Cycle with one final criterion? Then it’s time to check out Criterion D – Evaluating.

MYP Design Criterion B – Developing Ideas

MYP Design Criterion B Developing Ideas. Human brain with a lighting bolt (brainstorm) and light bulb.
MYP Design Criterion B – Developing Ideas

Introduction to MYP Design Criterion B

The focus of this post targets Year 1 (grade 6) designers. The MYP Design Criterion B information below can be applied to other grades as well. Year 1 students are those new to MYP Design. They start the school year as 11-year olds and finish as 12-year olds.

If you’re here and didn’t come from my Criterion A post, take a moment to look it over. In that post, I go into detail about each strand (or step). Additionally, I explain one way to start building lessons for MYP Design. This approach offers a helpful thought process for unit planning. After all, there are many moving parts in the IB!

For Year 1 students beginning Criterion B, the Middle Years Programme Design Guide (by the International Baccalaureate Organization, 2014-15) states that students first develop success criteria for the solution. The next strand would be to come up with ideas to solve the problem established in Criterion A. The third strand requires students to present their best idea in some form. This idea is usually what is created in Criterion C. Finally, to wrap up Criterion B, students create visual diagrams to identify their best idea’s essential characteristics.

MYP Design Criterion B brainstorming session using sticky notes in a classroom. Photo by You X Ventures
Brainstorming Ideas in MYP Design Criterion B

Start with the MYP Design Guide

The guide states that the first strand of Criterion B calls out for the following:

  • Year 1 (grade 6) – “Develop a list of success criteria for the solution.”
  • Year 3 (grade 8) – “Develop a design specification, which outlines the success criteria for the design of a solution based on the data collected.”
  • Year 5 (grade 10) – “Develop a design specification, which clearly states the success criteria for the design of a solution.”

I learned that writing the success criteria to start Criterion B was not helpful for the age group. After about two weeks of research to complete Criterion A (i.e., roughly six classes), my students were ready, willing, and bursting with ideas. Therefore, the time was ripe to capture as many ideas as possible regardless of their plausibility. It was not the time to add rules (specifications) and limit design ideas to begin Criterion B.

So, how do you solve this problem to honor students’ ideas? Basically, I switched the first two strands in the MYP Design Cycle. By developing ideas first and then developing design specifications next, engagement and enthusiasm grew, and more ideas became available.

Modified MYP Design Cycle with Labeled Strands (B.1 and B.2 Switched for Year 1 Students)

Students started Criterion B with brainstorming activities to get as many ideas as possible ideas out on the table first. What a relief!

What is another benefit of generating ideas before establishing specifications? Students are willing to take more risks with their thinking. Fewer rules mean: Why not go for it? At this beginning point in Criterion B, any possible constraints (i.e. specifications) are those few listed under Standards and Criteria for Success in the GRASPS.

Strand B.1 – Develop Design Ideas

Brainstorming activities should not be limited to what you may find on educational websites. What’s great about teaching MYP Design is the applicability of Design Thinking resources and marketing resources freely available on the Internet. For example, check out this post by TechnologyAdvice about Brainstorming. How could a teacher modify or use this list of nine brainstorming activities to help their students generate ideas?

Here’s a low-budget technique that has worked for my design classes: Students anonymously and quickly generate as many idea sketches as possible. The teacher collects, randomizes, and redistributes the sketches (try to share sketches across different classes). Students identify which design ideas show promise. Finally, students justify their idea choices. This method can be seen in Water Tank Engineering with Newspaper, Criterion B.

Criterion B header for paper water tank engineering
Engineering a Paper Water Tank – Criterion B

At this point, a few students probably will have commented the following,” I already know what I am going to make.” Be ready for it. Here’s one technique that may help you help them: Ask the students to be open to new ideas. That is, to be open to change. If that doesn’t work, ask your students to pretend to be open to new ideas and see what happens. By just being open–or pretending to be open–they can better relax into the developing ideas process.

Strand B.2 – Develop Design Specifications

For this strand, the language of the MYP Design Guide states that for Year 3 and Year 5 students, they “develop a specification” which lists the success criteria. Why is “specification” singular? The MYP Design Cycle states “develop a design specification” as well for all students. This terminology can be a bit confusing.

The glossary defines a design specification like this: “A detailed description of the conditions, requirements, and restrictions with which a design must comply. This is a precise and accurate list of facts, such as conditions, dimensions, materials, process, and methods, that are important for the designer and for the user. All appropriate solutions will need to comply with the design specification.”

Similar to the glossary, the difficult-to-find and helpful MYP Design Teacher Support Material (IB login required) resource by the IB clarifies that, for all students, a (singular) design specification is “a set of considerations, constraints and requirements for a solution: what the solution must or must not have to be successful.”

Design Language

Possibly the plural-singular issue is due to the difference between American and British English, and maybe it’s no biggie. I think the plural “design specifications” is clearer, so I have used it. I have also found it helpful to not distinguish between “a list of success criteria” (i.e., what the MYP Design Guide states in this strand for Year 1 students) and “design specifications”. Year 1 students understand and benefit from defining and evaluating their designs in terms of design specifications (plural).

Finally, rather than use “must” and “will” for compliance verbs, I prefer “shall” since this term encourages a greater commitment to the specification. A greater commitment promotes increased specificity rather than less which is beneficial for evaluating the success of the solution in Criterion D.

How to Write Design Specifications for MYP Design Criterion B

For MYP Criterion B, I organized the design specifications into logical chunks. The ACCESSFM framework can also comprehensively guide the creation of product design specifications. Learn more about it under Strand A.3 in MYP Design Criterion A – Inquiring and Analyzing.

Student writing design specifications by hand while researching with a laptop
Student Writing Design Specifications

The MYP Design Teacher Support Material suggests the following categories to consider when creating design specifications:

  • Aesthetics
  • Cost
  • Customer
  • Environmental considerations
  • Function
  • Manufacturing
  • Materials
  • Safety

Generally, I would write a few specifications with my students, then ask them to complete the missing ones. Some completed design specifications were already written by me as well (these examples served as mentor text). I recommended that students finish the easiest first unless they had a better strategy. I do recall one of my students wanting to complete the most difficult specifications first, just because!

Overcoming Design Anxiety in MYP Design Criterion B

“What if I don’t meet the product design specifications? Will I fail?” This was a common concern, even during the last unit of the school year. I think this fear led to some specifications to be written in a vague manner.

Many of my students expressed concerns about not meeting the design specifications, and this “failure” would result in a poor grade. Students at this age (11- to 12-years old) need reassurance that designs that may not meet the design specifications do not necessarily equate to a failing grade. As long as each specification was as precise and relevant as possible, the learning would be evident; and the grade would take care of itself.

Live Long and Write like a Vulcan

Design specifications need to be written with precise, economical language. Ask your students: How would a Vulcan like Spock from Star Trek write a product design specification? What about an extremely logical robot? How would they write a design specification?

Optimal student design specification writing facilitates the testing to be completed in Criterion D. Students develop a complete list of design specifications for the solution that can be precisely and easily measured during testing.

Strand B.3 – Present and Justify the Chosen Design

At this point, most students have a solid idea of their design. They should know more or less what they will create to solve the problem introduced in Criterion A. But the idea still may change! In any event, the question at this point is: How will they present and justify their current best design idea?

From the IB Design Guide, Strand B.3 – Present and Justify the Chosen Design is defined as follows:

  • Year 1 (grade 6) – “Present the chosen design.”
  • Year 3 (grade 8) – “Present the chosen design and outline the reasons for its selection.”
  • Year 5 (grade 10) – “Present the chosen design and justify its selection.”

It’s not clear from the IB Design Guide, what this presentation should look like. A poster? A slide show? An oral presentation? For my 11- and 12-year-old students, the presentation of the chosen design looked like this for the units I taught:

  • Unit 1 – Engineering a Paper Water Tank – 3D sketch and justification paragraph
  • Unit 2 – Cybersafety PSA (Animation) – 2D sketch of the animation frames
  • Unit 3 – Upcycled Plastic Gift – Analysis of the best three ideas against the design specifications and a justification paragraph
  • Unit 4 – 3D Digital Robot – Analysis of the best idea against the design specifications

I prefer technical sketching with pencils on paper. As such, students developed and refined their do-anywhere, fundamental visual communication skills. At relevant times in this strand as well, students “presented” their competing ideas against the design specifications. These internal “presentations” provided analytical insights into the best solution to solve the problem.

Presentation Considerations

In Strand B.3 – Present and Justify the Chosen Design, I avoided having students actually present to a small group, the class, or to parents. Why? With the rich array of digital tools available such as Flipgrid and Seesaw, why not showcase students’ creative and pragmatic problem-solving insights right now?

Two reasons: First of all, our academic class time was always tight. The middle school schedule provided three MYP Design classes a week for a total of 190 minutes. It felt like not enough time to honor traditional student presentation efforts.

The second and more important reason had to do with student stamina and lesson timing. By making the presentation of the idea highly showcased, this strand could feel like a final project. As such, students would run the risk of not developing their ideas fully.

For the age group in MYP Design, developing an idea–even during Criterion C –should be encouraged (within reason). Finally, a premature idea presentation in Criterion B also might lead to a loss of energy and enthusiasm for Criteria C and D.

Strand B.4 – Develop Planning Sketches

This MYP Design Criterion B – Developing Ideas strand ends with sketching the best idea. The requirement in this strand is generally the same for Year 1, 3, and 5 students. To the greatest extent possible, students create planning drawings/diagrams, which thoroughly and clearly communicate the main details for making the chosen solution.

If there’s already sketching to be done in Strand B.3, why require it again in Strand B.4? First of all, for the units I taught, Strand B.4’s planning sketches looked like this:

The sketching in Strand B.3 was in 3D and less technical, although students were gently encouraged to use isometric graph paper (i.e., 3D graphing paper). Many “fought” against the grid lines and preferred blank paper to sketch ideas in 3D.

In Strand B.4 – Develop Planning Sketches, the sketching of an object’s top, front, and side views (i.e., orthographic sketching) is more technical. Here, the idea that is sketched in 3D needs to be represented by three, 2D drawings that align.

Sketching Ideas and Timing

As I mentioned before, idea development throughout Criterion B should be encouraged. If an idea changed for a student from Strand B.3 to B.4 and there was sketching in both strands (e.g., the paper water tank), sometimes the sketches in B.3 compared to B.4 looked different. That was okay!

In both Strands B.3 and B.4, students sketched officially (i.e., for a summative grade). For this reason, there was frequent practice sketching during the Criteria A phase. At this point in the MYP Design Cycle as well, many of my students were reaching sketching burn-out and were eager and ready to create in Criterion C.

Pencil Sketching Alternative

The second unit of the year required learning animation software (to create a cybersafety PSA) which required quite a bit of practice. Students learned and used Adobe Photoshop to animate their public service announcements. The unit was a bit unusual in that the digital idea work developed in B.4 might have continued on as the solution created in Criterion C.

MYP Design Criterion B – Developing Ideas Wrap Up

MYP Design Cycle with focus on MYP Design Criterion B - Developing Ideas.  Four strands labeled.
Design Cycle – MYP Design Criterion B – Developing Ideas

Criterion B provides Year 1 student designers real opportunities to explore their creativity and develop analytical skills. By brainstorming ideas before developing design specifications, student creativity is prioritized, leveraged, and celebrated. Technical sketching skills go deep and showcase ideas in both two and three dimensions.

Ideas developed in Criterion B may still be developing in Criterion C. By encouraging the improvement of ideas, students learn that design is an evolving process.

Assessment should put a focus on all four strands, although Strand B.1 should be more lightly weighted. Download the grading rubric for MYP Design Criterion B. It is on a 0-7 scale and uses assessment language adjusted for the 11- to 12-year old age group.

Ready to learn about creating solutions to solve problems with Year 1 design students? Check out the next criterion: MYP Design Criterion C – Creating the Solution!

MYP Design Criterion A – Inquiring and Analyzing

MYP Design Criterion A  - Inquiring and Analyzing. Puzzle piece and research papa er icons.
MYP Design Criterion AInquiring and Analyzing

MYP Design Criterion A – Introduction

Before we take a look at MYP Design Criterion A (the first phase), a review of the most official perspective on MYP Design might be helpful. The Middle Years Programme Design Guide from the International Baccalaureate® (IB) Program is the resource for MYP Design teachers. For a slightly different perspective of MYP Design (with a focus on supporting beginning designers), check out my posts, MYP Design Basics – One Perspective, and MYP Design Assessment Criteria Modified.

I wanted to share my thoughts about teaching MYP Design by reflecting on each phase of the design process. Most of my MYP Design experience comes from teaching to 11- and 12-year old students. Your MYP Design project ideas start here!

MYP Design promotes thoughtful inquiry to solve meaningful problems through four cyclic criteria. These criteria serve to guide students to make pragmatic connections between the content of their learning and what happens in our world outside of school. These important relationships are intended to prepare students for further studies and for life.

Lesson Plan Design

Paper pad and pen noting ideas for the MYP Design Lesson Plan. Photo by Karolina Grabowska.
MYP Design Lesson Planning

MYP Design has many moving parts! To get things going, this method has worked for me: When I develop MYP units, I write the GRASPS first to get the concrete elements of the lesson established. Then I try to make relevant connections to promote deeper meaning: I consult the MYP global contexts to see which best applies and simultaneously write the statement of inquiry with the inquiry questions.

Once these three core ingredients of the MYP Design lesson are drafted, I edit each more or less simultaneously to have them inform and improve each other. When I am ready to communicate the content to students, the GRASPS, global contexts, and inquiry pieces have evolved into coherent curriculum elements for students.

Related concepts should naturally emerge and meaningfully relate to the content. In spite of the many moving parts, try to have a sense of what each curricular component is about before diving into MYP Design lesson planning.

Context and Audience

In Criterion A, Inquiring and Analyzing, students define and research a problem to be solved according to the needs of a specific audience. Before students conduct research, a scenario should be established to provide a context for learning and to set up the problem to be solved. The GRASPS model does this well (see examples by Understanding By Design coauthor Jay McTighe). It is simple and naturally sets the stage for authentic learning and assessment–hallmarks of MYP Design.

In this context as well, the statement of inquiry should be presented and discussed. It’s also worth noting that the MYP Design Cycle and four criteria do support students in their MYP Personal Project (maybe sometimes called the IB personal project). For example, global contexts are emphasized to promote relevance. Process focus, product creation, and reporting out are also key components in both MYP Design and in the MYP Personal Project.

Product Design Sketching Practice

One final note before getting into the strands deals with sketching. It’s a good idea to have students practice product sketching as much as possible during the Criterion A phase. I found it helpful for students to practice up to 20 minutes per one-hour class.

Practice sketch during MYP Criterion A. Intersecting rounded solids.
White Board 3D Practice Sketch – Intersecting Rounded Solids

There are many free, short, and helpful product design drawing videos online. Check out YouTube for guidance. One technique is to do a search for “product design sketching” then filter the duration for under four minutes. After you review and choose one for helpfulness, play and loop the video for your class, and maybe change the speed accordingly. Turn the sound off in almost all most cases. We tended to sketch for accuracy and quantity with a focus on industrial design sketching of products.

Students made sketchbooks from recycled 8.5″ x 11″ paper. Standard number 2 pencils supplemented with 5B, 6B, and 7B drawing pencils produced favorable results.

Why so much sketching? To prepare for their official planning and drawing diagrams requirement in Criterion B, students practiced representing objects visually in nearly every class during Criterion A. I would ask students to be mindful of good sketching practices, but I did not grade each practice sketch. I eventually did include a sketchbook feedback grade that focused on accuracy and productivity.

Strand A.1 – Explain and Justify the Need

After reading, reviewing, and discussing the scenario for the problem to be solved, students typically explain and justify the need for a solution to a problem for the specified client/end-user. By empathizing with their audience, designers are more able to fully justify the need to solve the problem. To the greatest extent possible and as naturally as possible, empathy should be stressed to best help the audience.

Originally after reviewing and discussing the GRASPS, I would ask students to restate the problem and explain why we needed to solve it. Restating the problem required listening and reading comprehension–basically a straightforward task that made sense at the beginning of a unit of learning.

MYP Design Criterion A. What is the problem to be solved? White puzzle pieces. Photo by Markus Winkler.
What is the Problem? Why Solve it?

Explaining the “why” was the area that caused the most difficultly for students in this strand. The GRASPS essentially states the problem to be solved as the goal, but the “why” must be synthesized. When mistakes were made, many of the students would write a “what” (i.e., a possible solution) instead of a “why”.

Common Misconceptions – Breaking Down the Problem

Note: Although difficulties in understanding could have been attributable to most of my students being non-native English speakers, nearly all had been in English-speaking classrooms since early elementary school.

How did I try to help kids avoid the what-why mix-up error? Eventually, I made Strand A.1 – Explain and Justify the Need, into three parts:

  • What is the problem to be solved?
  • What is one possible solution to the problem?
  • Why does the problem need to be solved?

By adding a “what” question, students began to better focus on the often-missed “why”. Sometimes I added a “who” question in addition to a “what” as a gentle disrupter as well and to put a focus on the audience. However, if you’re a purest, the “what” could be considered really part of Criterion B – Developing Ideas. I felt the trade-off was worth it to reduce the confusion.

To the greatest extent possible when you finish Strand A.1 – Explain and Justify the Need, make sure that your students know what the problem is, and why they are solving it. By establishing these fundamentals early, students are better set up for success later on in the design process.

Strand A.2 – Identify and Prioritize the Research

Students identify and prioritize the primary and secondary research needed to develop a solution to the problem. If this is your first unit or first unit after a big break, or if you are working with younger designers, it is well worth it to review what primary and secondary resources are.

I never developed my own materials to dig into the benefits of understanding research resources as primary or secondary. I did use the following short video frequently by Imagine Easy Solutions.

Understanding Primary & Secondary Sources by Imagine Easy Solutions (2:53)

Newspapers offer both primary and secondary resources and are easy to access. Consider using them to learn about the benefits and differences between original and interpretive information.

I also used an activity sheet to help students learn about primary and secondary resources. I found it on the Idaho State Historical Society’s website. It originally came from Common Core Sheets. There are 15 source statements and students are asked to identify if the resource is primary or secondary. You might find that some of the responses produce a debate in your classes!

To the greatest extent possible, try to make a primary research experience happen for your students in this strand. If this experience is hands-on, engagement and interest will be even better. Why? Because Criterion A tended to be, at least in my experience, one of the least preferred of the four criteria. Grades tended to be the lowest in Criterion A too.

MYP Design Teaching Tip

For instance, when my students engineered a paper water tank, the official build took place in Criterion C. However, they made rapid prototypes with half the materials to get acquainted with the properties of the newspaper, Popsicle™ sticks, and masking tape as part of their research.

Close up photo of students' hands building a prototype of a newspaper water tank. MYP Design Criterion A - Strand A.2 Identify and Prioritize the Research.
Identifying and Prioritizing the Research – Newspaper Water Tank – Criterion A

Depending on the nature of the unit and what the students already know, the inquiry questions can be answered here. These questions are factual, conceptual, and debatable in nature and work to establish connections to significant and enduring concepts, principles, and/or theories.

Strand A.3 – Analyze Existing Products

Here, students analyze a range of existing products that inspire a solution to the problem. If you have physical products in the classroom or at home for students to study and inspect, that would be ideal especially for English-language learners. Previously-made student designs inspire interest as well.

A women in a large grocery market in Indonesia.  Photo by Bernard Hermant.
Large Product Market – Ubud, Indonesia

In many cases, however, Internet research will be useful and the primary option. Students would need to find and evaluate high-quality, relevant, and useful information about existing products. You may need to pair up with your media specialist to examine ways for help!

I vetted and communicated a set of helpful websites because I worked with 11- and 12-year olds and our academic time was limited. Students would check these resources out first, then maybe go on to perform their own Internet searches about products that inspire solutions.

ACCESS FM Meaning

I recently became aware of ACCESSFM which is a framework to guide product design. It was created by Design Technology guru Spencer Herbert. ACCESSFM can be used as well to focus students’ analyses into studying existing products.

The letters of the ACCESSFM acronym each represent a characteristic of a product to study. Note the questions that students could use while analyzing products to inspire a solution:

  • AAesthetics – What should be the color, shape, texture, style?)
  • CCost – What are the material costs, labor costs, time costs?)
  • CCustomer – Reference the GRASPS: Who is the audience? What do they want/need?
  • EEnvironment – How reusable, recyclable, repairable is the product?
  • SSize – Does the size make sense for the context of use? What about similar products?
  • SSafety – How safe is the product to make, use, repair, store?
  • FFunction – How well does the product do what it is supposed to do?
  • MMaterial – What is the product made from? How is this optimal? 

Strand A.4 – Develop a Design Brief

If you try internet searches for “examples of design briefs” and “what is a design brief” you encounter aspects of the GRASPS! Design briefs essentially outline the requirements of the project at hand. But what does that look like in MYP Design?

The official Middle Years Programme Design Guide states the following for Year 1 (grade 6): “Students should be able to present the main findings of relevant research.” For Year 3 (grade 8) we have: “Students should be able to develop a detailed design brief which summarizes the analysis of relevant research.”

I did try to have students write design briefs that inspired but did not constrain the designer, but that was too confusing. Trying to under-explain felt contrived, didn’t summarize their Criterion A research experience comfortably, and led to more dislike for Criterion A!

MYP Design Year 1 Criterion A - Essential Elements of a Design Brief - Strand A.4
MYP Design Year 1 – Essential Elements of a Design Brief – Criterion A

Design briefs for beginning designers are not recommended in the Middle Years Programme Design Guide and more importantly, concluding our research with a design brief didn’t help learning for the age group. Looking back, I was taking my cues primarily from the MYP Design Cycle rather than digging into the Middle Years Programme Design Guide.

A “Brief” Journey

I eventually developed the optimal requirement to be for students to summarize, and present in full detail, the main findings of their relevant research. The “full detail” part tended to be a retelling of much of what was already established in Strand A.1, Explain and Justify the Need unless the “what” for example had changed.

Essentially, students developed a general design summary from an analysis of the relevant information to guide and inspire the designer. Although again, we might have been getting into Criterion B – Developing Ideas a bit, students were required to state: what they were going to make, why they were going to make it, and who the design was for.

MYP Design Criterion A Wrap Up

MYP Design Cycle with focus on MYP Design Criterion A - Define and Research a Problem. Four strands labeled.
MYP Design Criterion A – Inquiring and Analyzing

With an authentic scenario established by the GRASPS and supported by a statement of inquiry, Criterion A can effectively set the stage for MYP Design students to solve problems with success. Both primary and secondary research prepare students well to develop ideas and create a solution.

Hands-on investigations are especially helpful to promote high-engagement learning in MYP Design projects. Summarizing this research at the end of Criterion A officially opens the door to focus on developing ideas in Criterion B.

If you need help with MYP grading, download and check out the grading rubric for MYP Design Criterion A. The language is modified to be more in tune with the needs of Year 1 students.

Do you want more insights into helping Year 1 MYP Design students develop ideas? Check out MYP Design Criterion B – Developing Ideas.

5 Short and Helpful Design Thinking Videos for Students

Building Plans on an Apple MacBook Laptop

Getting started in MYP Design? Need a few short and helpful videos to support or direct your students’ human-centered, problem-solving thinking? You may be beginning a project-based STEAM lesson and need to prime your students into design thinking mode.

Actually, there are more than five videos about design and the design process. Enjoy!

Why Use Short Videos?

Human learning theory suggests that using short videos in lessons with students can be an effective instructional strategy. Teachers know this intuitively. I try to keep instructional videos under four minutes, and YouTube can filter for this length.

Of course, the effectiveness of a short-video strategy depends on how it is designed and implemented. One essential theory that applies to short videos is the Cognitive Load Theory. The amount of information we present to our students should be carefully thought out and managed.

Another helpful theory to remember is the Social Cognitive Theory, which emphasizes the importance of observation and modeling in learning. Short videos provide opportunities for students to observe real-world examples, demonstrations, and simulations of concepts or skills, which can help them to understand and apply the knowledge in context. Product sketching and digital designing Tinkercad use come to mind.

Design Thinking Videos

Check out the following five short design videos for your students. I have shown most of these videos multiple times to prepare and support my MYP Design classes. Their use has helped my students demonstrate a substantial interest and engagement with the content.

These videos offer multiple perspectives on design thinking and range from about three to eight minutes long.

Enjoy the messy design process!

If you’re seeing this I finished the project

Author: makethingwithhand
Length: 8:06
Date: October 30, 2024

How do you make an ideal real? The video explains how creative ideas take shape! It focuses on the steps involved in turning an idea into a finished product. Enjoy the journey of design thinking!

Creativity and Design Thinking

This video frames creativity as a step-by-step journey. It shows how creators begin with rough, unrefined ideas and improve them through exploration and practice. A tolerance for ambiguity is beneficial! This focus on gradual progress reflects the iterative nature of design thinking, where each step eventually builds on previous insights.

Empathy and Observation in Design

The creator, makethingwithhand, starts by reflecting on their drive to create something meaningful. They observe challenges and think critically about potential solutions. This foundation stage is similar to the empathy stage in design thinking, where designers focus on understanding the needs of others to define problems more clearly.

From Ideation to Execution

The video emphasizes the importance of brainstorming, experimentation, and persistence. It shows how creators generate multiple ideas, refine them, and remove what doesn’t work. Can you say MYP Design process? This journey mirrors the ideation and prototyping phases of design thinking, where trial and error leads to and better and better outcomes. Enjoy the ride!

Focused and Diffused Thinking: The Ping Pong Technique

Author: Sprouts
Length: 2:52
Date: May 24, 2015

Sprouts makes animated videos about education, learning, science, and creative and critical thinking.

This video uses sketchnoting techniques to illustrate the two types of thinking (focused and relaxed) to solve problems. One astute YouTube commentator remarked that basically, we need to take breaks from what we are doing–you know, our work. I like seeing this common-sense advice from another perspective. It gets me thinking…

Some possible MYP Design questions: How can the MYP Design Cycle promote focused and diffused thinking to solve problems? Should it? In which criteria or strands would a focused or relaxed approach best apply?

How to Solve Problems Like a Designer

Author: Vox
Length: 4:50
Date: September 21, 2017

Updated October 18, 2022. I initially cited a video by LinkedIn Learning called User Experience Tutorial: Fitts’s Law Logical Physical Design of Items, but they have since made it private.

Another visually fun video I used with my students about the design process centers on IDEO, a company that went from making products to making experiences. Tim Brown, IDEO’s Chair and co-CEO, goes into the design process and begins by asking interesting questions about the world around us.

Usually, these are “why” questions that focus on human struggles and how to eliminate or reduce those struggles with good design. There’s a focus on gathering lots of feedback about a problem before ideation and prototyping.

Why Design Matters

Author: The School of Life
Length: 3:42
Date: June 22, 2015

The School of Life is a global organization based in London. Their general goal is to help people lead more fulfilling lives. They go about this in their videos by exploring the deep questions that involve human emotion and our psychological lives.

This video is made up of cleverly animated photos narrated by a compelling voice. The speaker argues that design matters because it affects how we as people feel and relate to each other. What I have remarked to my students is that designers tend to have a lot of strong opinions and this video follows suit!

What about the narrator’s assertion that “good design helps us be the best versions of ourselves”? Do you agree with the author? Did the Catholics design better churches than the Protestants in terms of all of the elements of design?

The Design Thinking Process

Author: Sprouts
Length: 3:56
Date: October 23, 2017

Sketnoting is used once more to describe a five-step process to solve a problem for an identified audience. Also, there is mention of Stanford’s d.school which offers a free virtual crash course to guide participants through a full human-centered design thinking cycle. There are multiple educational resources in many languages with the course!

How is the five-step design thinking process in the video most similar to or most different from the MYP Design Cycle (which has four steps/criteria)?

Learning Graphic Facilitation – 7 Elements by Bigger Picture

Author: Bigger Picture Video
Length: 4:26
Date: April 5, 2013

Bigger Picture is a strategy, learning, and design agency based in Denmark. They use an approach called System Visualization to process complexity to be more manageable.

I think I’ve shown this short video the most to my students. I’m still intrigued and motivated to sketch better for my students to communicate ideas and concepts. Sketchnoting is used to show how simple sketches, symbols, and text can create powerful visuals.

The vibe seems to be how to communicate big with a little, and these techniques can apply students as they are engaged in design thinking. The minimal use of color I find especially helpful with 11- and 12-year olds who can tend to overcolor sketches.

Some questions to use with your students may be: What do the different arrows represent in Element 3, Process? What do the different arrows represent in Element 4, Speech? Why is less actually more for visual presentations? Empathy question: In Element 7, what are the five people feeling (bottom right, at about 3:05 in the video)?

Understanding Design Thinking

Design Definition on a Tablet - Photo by Edho Pratama on Unsplash
The Definition of Design on a Tablet

Consider using the questions I wrote for each video, have students develop their own, or ask students to simply reflect on these resources. Some summary questions could be: How are you already using these thinking techniques to solve problems in your life? Which academic subject areas benefit most from design thinking? What did you learn in the videos to help your problem-solving abilities?

For a 20-minute task, select maybe one to two videos to review. Students could generate one reflective response or answer one to two questions.

If you are in a digital learning and teaching context, consider using a Google Form to capture your student’s written work. A collection of student text responses allows you quick access to their work in one place for evaluation.

Tag Cloud of this Blog Post's Text in the Form of a Speech Bubble
Tag Cloud of this Blog Post’s Text in the form of a Speech Bubble

You can also create a tag cloud to summarize the responses with a free online service like WordClouds.com. Share the tag cloud for additional discussion with your students.

Design Thinking Videos Summary

These helpful design thinking videos for students can be effective for comprehension because they deliver information in manageable chunks that can be processed and integrated into existing knowledge more efficiently.

Students can use these short videos to learn about the design process and gain inspiration for their STEM, STEAM, and MYP Design projects. Additionally, they can use the short videos to learn about different design-thinking methods and STEM tools and their application in real-world situations.

Videos help start a class on the right track and facilitate group discussions and brainstorming sessions. With the right questions, the videos can foster critical thinking and problem-solving skills.

Videos can be beneficial in subjects like MYP Design that can be abstract or difficult to visualize, such as learning 3D modeling with Tinkercad or product sketching.

Finally, students can reference the design thinking videos to learn about different industries and careers that benefit from design thinking. Some examples are product design, user experience design (UX), and service design. When I was at the American School of Lima, the high school offered a food design class!

Water Tank Engineering with Newspaper, Part 2

Water Tank Engineering with Newspaper - Build & Test -MYP Design Year 1
Water Tank Engineering with Newspaper – Build & Test – MYP Design Year 1

MYP Design Subject Overview

In the prequel to this follow-up post, I began to reflect on my first experiences in MYP Design with Year 1 students (grade six). I chose this topic because I thought that the information would be helpful for MYP Design teachers–especially those new to MYP like I was. Also, if you teach STEM/STEAM, I believe there are tips and tricks to be gained from this information. Water tank engineering from newspaper was a perfect first lesson to learn problem-solving through a cycle.

Here’s a mini-review: MYP stands for Middle Years Program and is part of the International Baccalaureate® (IB) Program. MYP Design puts a focus on problem-solving and systems thinking–ideally in a global context. Students solve problems guided by the four-part MYP Design Cycle which structures their learning through four phases or criteria.

MYP Design Cycle Image - 4 parts, 16 strands
MYP Design Cycle (slightly modified in Developing Ideas for Year 1)
Image Credit: http://anwatindesign.weebly.com/

These four criteria are:

A – Inquiring and Analyzing – Define and research a design problem.
B – Developing Ideas – Brainstorm and refine ideas to solve the problem.
C – Creating the Solution – Plan and build a prototype sufficient for testing and evaluation.
D – Evaluating – Test and evaluate a solution to determine the effectiveness of the solution for the target audience.
(I worded some of these criteria slightly differently than the official versions based on my experiences with the age group’s needs.)

Water Tank Engineering in MYP Design

Water Tank Engineering from newspaper made sense as an introductory lesson to MYP Design because of its straightforward nature and the materials are easy-to-acquire. The topic was limited, however, in terms of extending student thinking into historical and contemporary contexts (which is part of how the IB describes MYP Design).

The GRASPS, which is an effective model to begin a performance task, establishes the context for MYP Design units. In this example with the newspaper water tank, the GRASPS could have been elaborated to accommodate the need for a broader, more global perspective. The “MYP-ness” of the units did grow as the year went on.

A paper water tank engineering project can also be considered an easy, long-term STEM activity, aligns with many connections to Common Core Standards, and offers project and problem-based learning for students.

Water Tank Engineering Design Choices

Primary Research – Criterion A Inquiring and Analyzing,
Strand A.2 Identify and Prioritize the Research

Water tank engineering from newspaper, like any problem to be solved, starts with research! In Criterion A, Inquiring and Analyzing, Strand A.2 Identify and Prioritize the Research, students made a rapid prototype to conduct their primary research. They interacted with about half of the total newspaper, Popsicle™ sticks, and masking tape to get acquainted with the properties of the materials.

Why just half the materials? I didn’t want to give too much away–I didn’t want students to feel like this was the actual tank build without a deliberate and sequential process. Initially, Criterion A for this unit had been purely reading and writing with discussions. It was also regarded as the least-liked of the four MYP Design criteria for all the units I taught. Making the research phase more hands-on promoted greater engagement among students and boosted Criterion A’s popularity a bit more with the students and with me!

Although a few student teams would arrive at Criterion C ready to negotiate a final newspaper water tank design, and willing and able to grapple deeply to create a light and strong tank, many chose to make simple rectangular boxes using all of the available materials.

From Criterion A to Criterion B

Partially annotated student 3D sketch of a newspaper water tank
Partially Annotated 3D Student Sketch of a Newspaper Water Tank – Criterion B

Students spent the beginning of nearly every class sketching for 10 to 15 minutes during Criterion A. This was practice–not for an academic grade–but to develop and refine their visual communication skills. Students practiced sketching frequently during this research phase to arrive at Criterion B as prepared as possible to visually represent their best idea as clearly as possible.

Much of Criterion B was dedicated to brainstorming tank ideas, refining the ideas in terms of established specifications, and developing specifications from which to measure success.

Water Tank Volume Insights

After my first year of MYD Design, I eventually learned that my students needed to have a sense of what 200 milliliters looked like–the volume of water that each tank was required to hold for three minutes.

Two hundred milliliters of water in cylinders of different diameters and heights can appear to be different amounts! Therefore I shared various cylindrical containers with marked graduation intervals for discussion during Criterion A to gain insights into how to build appropriately sized tanks.

Taking advantage of the fact that one milliliter equals one cubic centimeter in volume, I also shared base-ten blocks in units (ones), rods (tens), flats (hundreds), and cubes (thousands) for a more rectilinear perspective of 200 milliliters.

By exploring volume a bit, students were better equipped to make tanks with sufficient capacity for testing. If we had gone deeper, the Common Core geometry-based standard, Solve Real-world and Mathematical Problems Involving Area, Surface Area, and Volume, offered rich connections for learning.

Must-have STEM Supplies

Animated demonstration of pouring water into a newspaper water tank from a beaker.
Water Pour-in, Newspaper Tank Testing Start – Criterion D

Apart from the tank materials listed in the GRASPS, research and testing equipment were needed as well! A STEM bin in your classroom or a neighbor’s classroom might have these generally easy-to-acquire items, so check there first. The suggested quantities are for one class of students:

  • Bin of 1 cm cube blocks, 10 cm unit rods, 100 cm unit flats, and a 1000 cm unit cube. Use during Criterion A research for volume understanding. Quantity: 1 per table group.
  • Stackable and reusable transparent plastic measuring cups. 8 ounces/250milliliters with marked intervals. Set of 20. Use during primary research in Criterion A and for volume understanding. These can be used like beakers, but do not have pour-out spouts. Quantity: 1 set.
  • Triple beam balances that max out in the 600-gram range, or the much less expensive electronic scales. Quantity: 2-3 for triple beam balances. Quantity: 1 per table group for electronic scales. Be consistent. Use the same scale for the official massing of all tanks.
  • 250-milliliter clear plastic measuring beakers with 25 mL milliliter increments. Set of 12. Quantity: 1 set. These may be optional if you feel the stackable and reusable transparent plastic measuring cups will suffice. These beakers do add a sense of officialness when used during the actual testing. They are also not expensive.
  • 250-milliliter graduated cylinder, with graduation intervals of 2 milliliters to measure water held by tanks after three minutes. Quantity: 1-2.
  • 6-inch+ diameter plastic funnel for the official testing of the water pour-out into the graduated cylinder. Avoid spills! Quantity: 1-2.
  • Stackable rectangular plastic cafeteria trays to control spills during primary research in Criterion A and during the official testing. Quantity: 1 per table group.
Plastic Measuring Cup with Graduation Intervals

As mentioned previously, the measuring jars combined with unit cubes provided a more comprehensive volume perspective during the Criterion A research. To be consistent when massing the final tanks, I used one calibrated scale for all tanks to eliminate extraneous variables. My students were more interested in learning how to use a triple-beam balance, so we used that for the official massing of tanks over the less expensive electronic scales.

Where possible, consider using plastic instead of glass to facilitate your peace of mind given the age group. Also, a little precision may be lost with beakers and graduated cylinders greater than 250 mL capacity, especially when pouring out the water after testing.

How to Test a Newspaper Water Tank

Animated demonstration of pouring water out of a newspaper water tank and into a graduated cylinder.
Water Pour-out, Newspaper Tank Testing Completion, 2018 – Criterion D

A funnel might help to pour water out of the tank and into the graduated cylinder with consistency. We did not use one. Eventually, we got the hang of the process by tilting the cafeteria tray to support the tank for the water pour-out. This method reduced accidental spillage and limited any accidental tank failure caused by picking up a wet and sometimes delicate tank.

We learned too that upon finishing the test any water in the tray would spill out onto the bookshelf or onto the floor. This tray water would of course not count toward the goal of the tank holding as much water as possible.

Water Pour-out, Newspaper Tank Testing Completion, 2017 – Criterion D

During the test, two members of each team were required to film the process with their laptops as part of their evaluation. The testing arrangement was completed on top of a low bookshelf pulled away from the classroom wall to provide 360 degrees of observation by the class.

Final Thoughts and Applications

Here ends my MYP Design journey of designing a newspaper water tank. But like design, there’s always something more to improve! Thanks again to Angie and Jessie for the initial idea, and thanks to my partner Ileana who graciously accepted all the developments I made to the lesson over the two years we worked together. Student feedback was a big part of the process and I am grateful for the insights my students offered each year.

Failure is Part of the Process

I neglected to mention in part one that failure is an important part of the design process. In Criterion A, many students were eager to cite the F.A.I.L. acronym: First Attempt In Learning. This exuberance was just what the doctor ordered and showed me that most had relevant experiences in elementary school to fail forward toward growth.

When it came to testing the tanks in Criterion D however; I had a lot of requests for reassurance. A common question as Criterion D would begin was: ” If my tank fails, will I get a failing grade?” A great question–one I was asked over and over.

Criterion D was set up to capture test data, evaluate the tank against the design specifications, and reflect on improving the design. My answer was always more or less the same: As long as students were showing their thinking along the way, there was no reason the assume they would do poorly even with a tank that fails the water test. Over the years we did have a couple of fountains made by students who were also academically successful!

It is also worth noting that at the point right before testing, my students had received abundant verbal teacher and peer feedback, about three official formative grades, and three official summative grades. So they were in good shape to know what was expected academically.

The Design Cycle – Teach It Again?

Even though I had taught this unit to over 300 sixth graders, I had only taught it at one school to one age group. Seventh or eighth graders might be more in tune with a mathematical trade-off equation; however, they might find the problem using everyday materials not as interesting.

Though it may be not every teacher’s cup of tea, teaching multiple sections of the same lesson can add insights into perfecting the learning–at least for me. I liked the repetition of teaching five similar lessons in one day. Finding the sweet spot between the right amount of support and the right amount of challenge does become easier. Do take notes and gather data as you go!

When there are opportunities to capture data, I tried to go about it so that it made sense for students in the context of the current lesson and maybe for later on. The “later on” part was for my interests too since I like playing with numbers and statistical techniques. Concerning students: What if they could use the data they generated as 6th graders later on as eighth or ninth graders? They could go deep mathematically and might have a greater interest given that the numbers came from their work.

How to increase engagement in other ways? This six-week-ish unit was how we started semester one. A hands-on, project-based lesson with an easily quantifiable goal was a good fit for the age group to begin to learn MYP Design. Consider doing a rapid-prototype version of the tank again at the beginning of semester two. Also, consider having students write a version of the GRASPS–a STEM story–with the essentials, of course, as non-negotiable (i.e., the goal of a strong and light tank with a fixed set of materials).

The optimal time in the lesson might be around Criterion D for a STEM story. If I were to remove the MEAL paragraph requirement, there could be a good fit here but it may seem to the kids to be slightly out-of-tune with the reflective nature of Criterion D. A more extensive review of the inquiry questions would probably be a better fit.

Free Lesson Plans – STEM Resources

All of the materials I’ve developed for the MYP Design lesson of engineering paper water tank I am sharing here. This work is licensed under a Creative Commons Attribution-NonCommercial-ShareAlike 4.0 International License. This means adaptations of this work can be shared and others may create and distribute derivative works, but only under the same or a compatible license. No commercial use of this work is allowed. A link back to VistaThink is always appreciated.

Consider modeling other engaging STEM/STEAM or MYP activities based on how the water tank lesson is structured. For example, could you develop a STEM story around a ship or boat in danger story and connect it to the Science Olympiad’s Barge Builder?

Water Tank Engineering from Newspaper – the Files

These materials are essentially MYP Design lesson plans. For the MYP Unit Planner, the context and concepts are:

  • Global Context – Scientific and Technical Innovation
  • Key Concept – Systems (interacting components where a tradeoff must be found to achieve the goal)
  • Related Concepts – Function and Evaluation

The documents can also be considered as STEAM lesson plans for teachers. The last major update was about June 2019. All of the free printable STEM activities are in pdf format and are listed roughly in the order that they should be used. These pdf files were originally made with Google Docs but they do not covert back well (format suffers and images are lost).

Criteria A, B, C, and D make up the student’s MYP Design Process Journal (or design thinking journal). These documents serve to capture each student’s thinking and learning throughout the entire unit.

In Criteria A, B, C, and D, consider adjusting the number of responses for questions that require multiple examples (e.g., Strand A.2 in Criterion A, and Strand B.1 in Criterion B). These criteria are color-coded according to the criterion and the colored areas are instructions or prefilled-in answers. The white/blank empty cells/boxes are meant to be completed by students.

GRASPS Scenario
1 page
Establishes and outlines the learning context for the water tank engineering from newspaper lesson: Goal, Role, Audience, Situation, Product, and Standards (for Success).

Engineering a Paper Water Tank Vocabulary Words
1 page
Multiple links out to definitions and representative images–some links go to general Google image searches. This resource was made quickly and is basically in draft mode.

Statement of Inquiry with Factual, Conceptual, and Debatable Questions
1 page
Some of the debatable questions may be misleading and should be balanced with a corresponding counter-question. For example, this question, “Why should newspaper tank designers use all of the masking tape?” needs to be balanced with: “Why should newspaper tank designers not use all of the masking tape?”

Images of Various Water Tanks in Our World
16 pages/slides
Use for research in Criterion A.

Criterion A – Definition and Research of a Design Problem
3 pages
Strands A.2 and A.3 have links to external sources (e.g., YouTube videos).

Criterion B – Developing Ideas
5 pages
All strands have links to internal and external sources.

Criterion C – Creating the Solution
4 pages
Strands C.1 and C.4 have links to external sources. Strands C.2 and C.3 are combined into one strand for simplicity.

Criterion D – Test and Evaluate
7 pages
There are links to general internal resources at the start. Strands D.1 and D.2 have internal and external resources. A MEAL paragraph is required in Strand D.2. The MEAL paragraph could be substituted with a deeper look into the conceptual and debatable questions.

Criterion D – Test Observer Notes
1 page, 4 copies
Note-taking sheets for student observers of each tank test (not for the testing group). Photograph and place in Strand D.1.6.

Student Tank Sketches, Final Tank Builds, Data Posters, and Data Analyses
17 pages
Visual examples for teachers and students to reference. Note: the tank volume calculation in the student sketch on page 3 is incorrect.

Feel free to use these educational resources as STEAM worksheets for middle school as well!

MYP Design Journal Version

Mr. Matthew C. Miller, Head of Design Technology at the Cairo American College in Egypt with his co-teacher, Mr. Marzouk, refined the Water Tank Engineering unit into an elegant design journal format. Their work includes many thoughtful features to help sixth graders fully experience the design process.

For example, there is a detailed sketch rubric helpful for product design visualization. Also noteworthy is the Writing in Design Technology section on page 16, which includes sentence frames and design vocabulary that would be especially helpful to English-language learners. The entire document is available in both pdf and editable Google Doc formats.