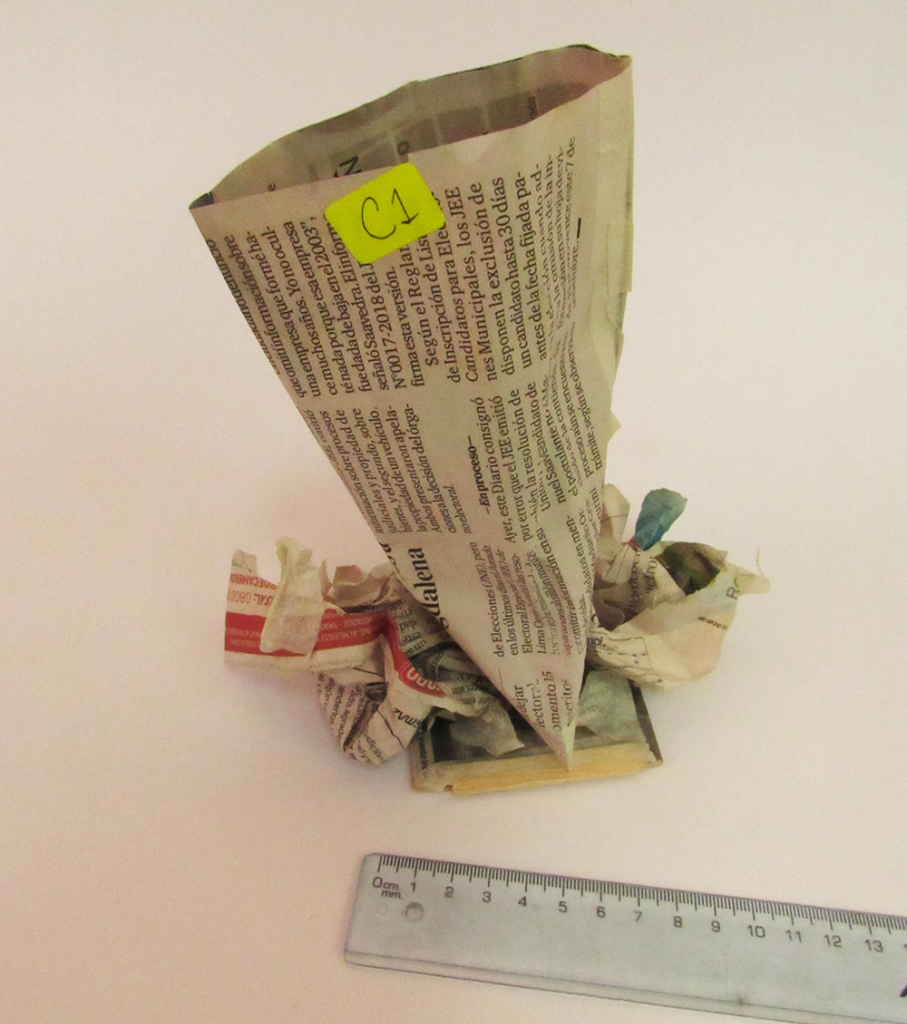
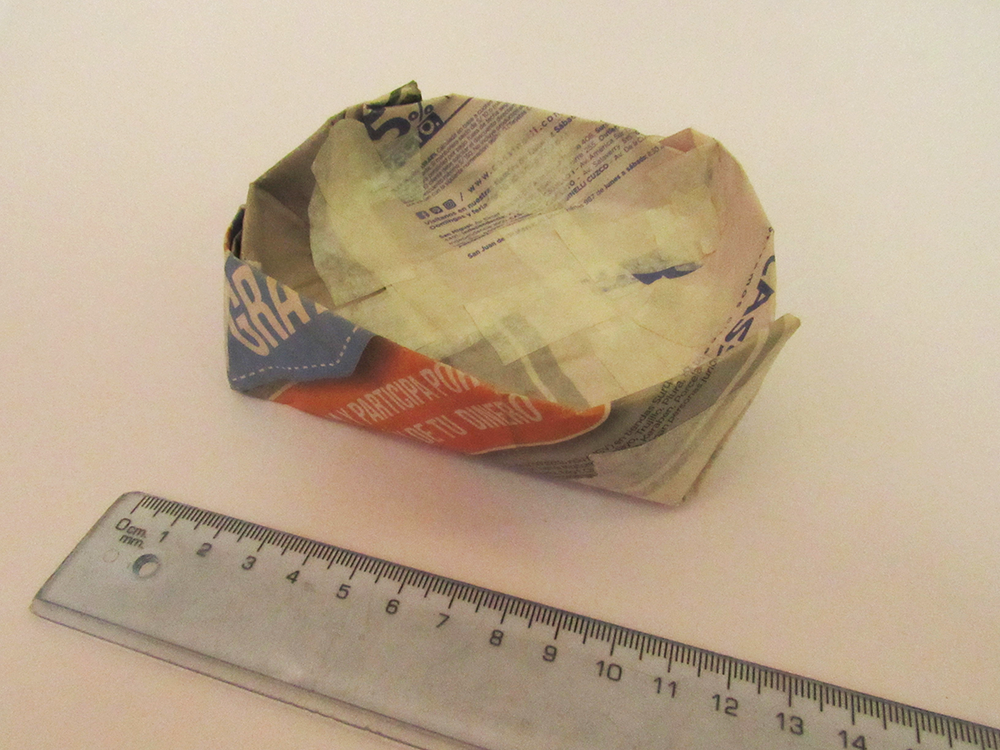
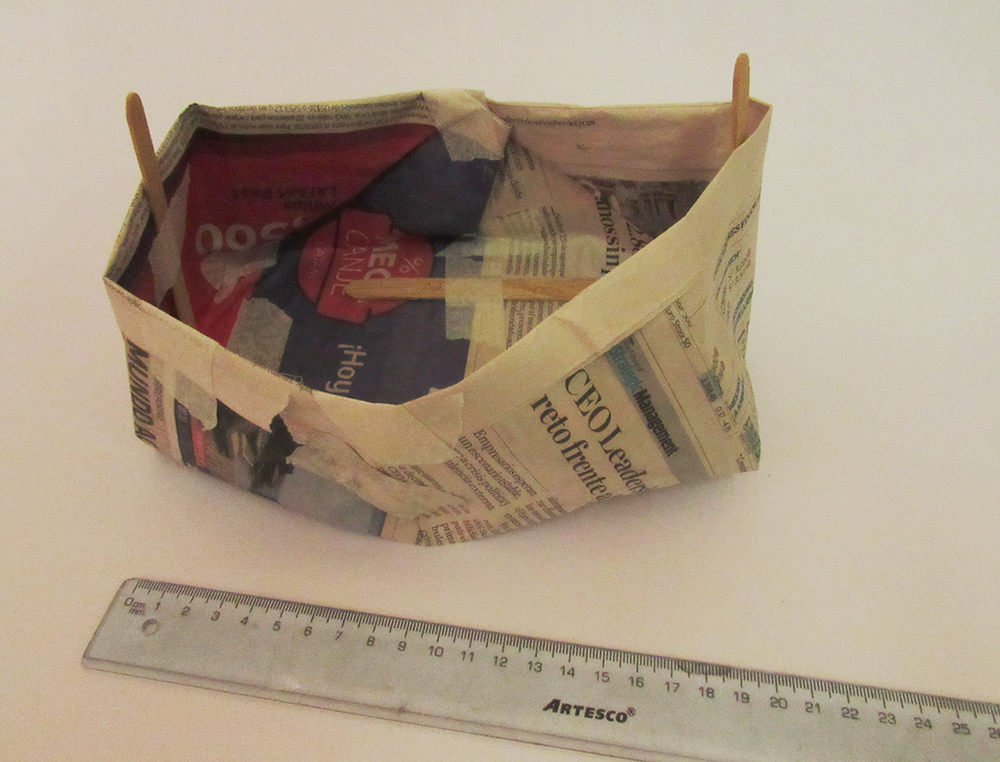
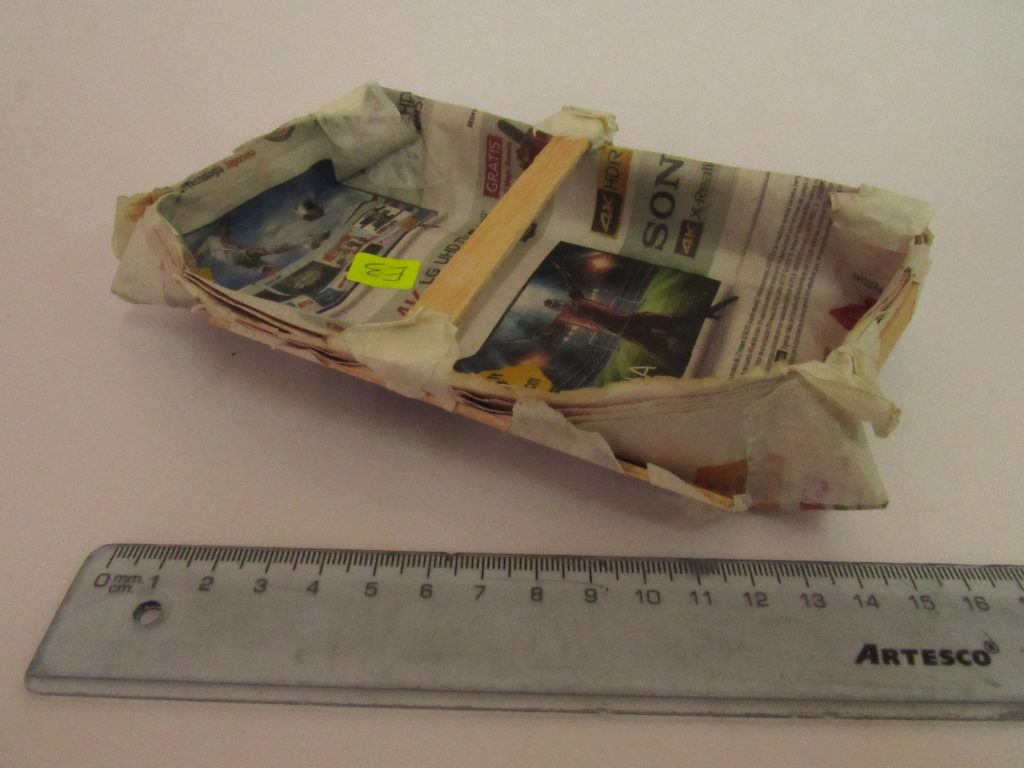
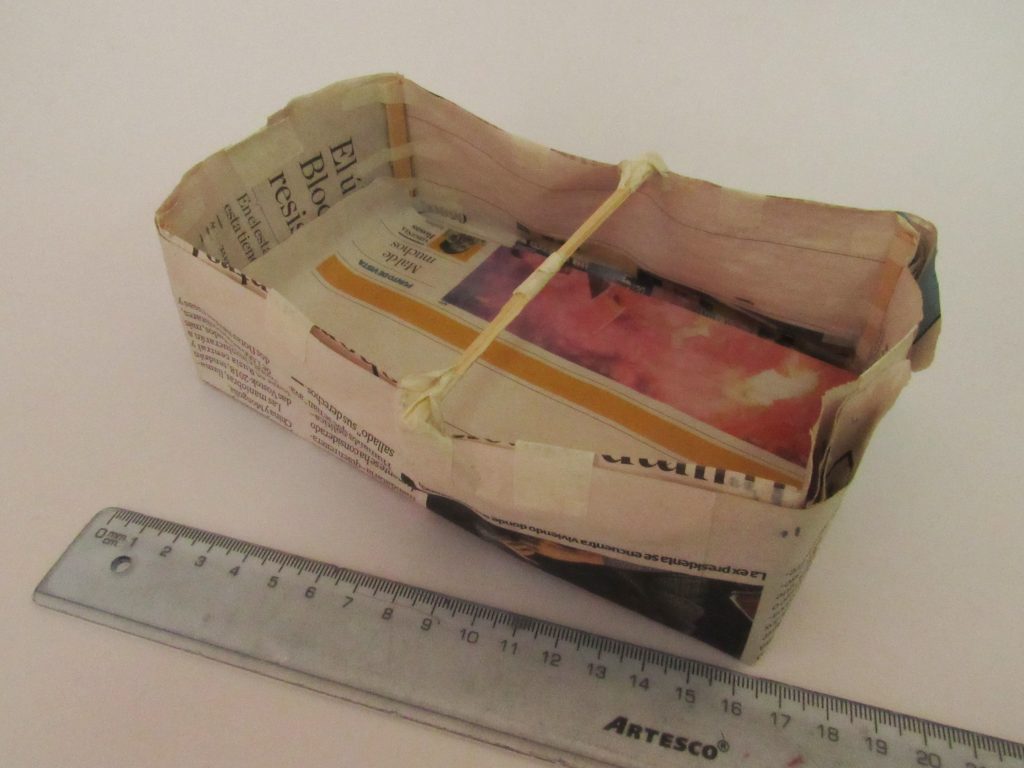
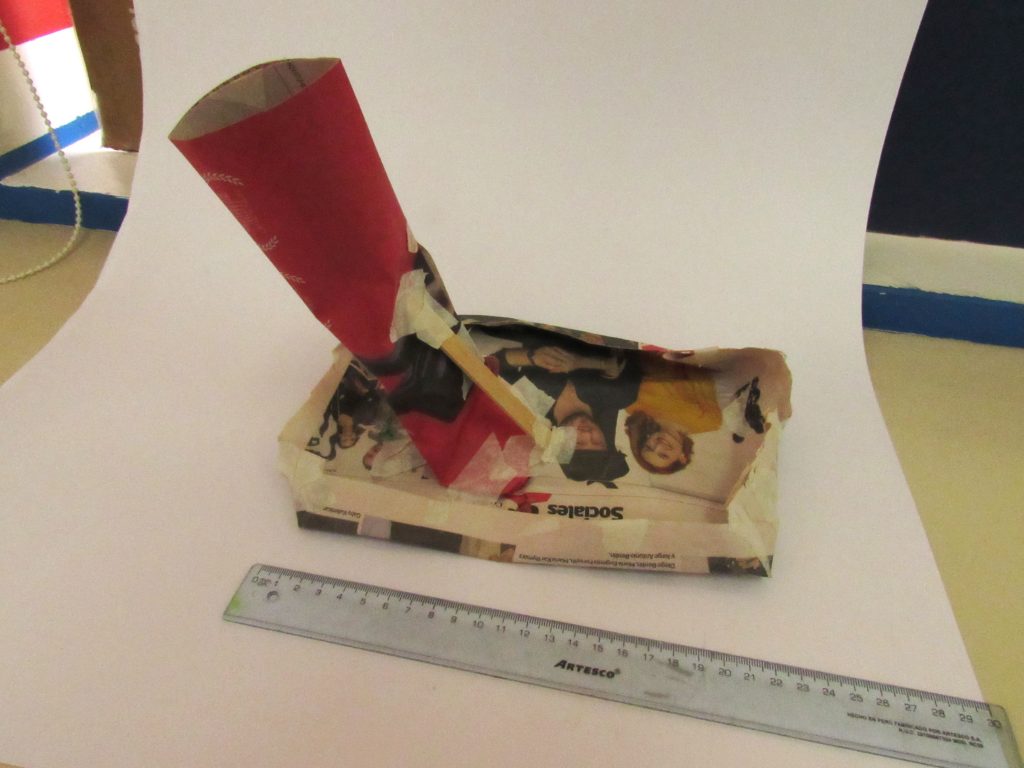
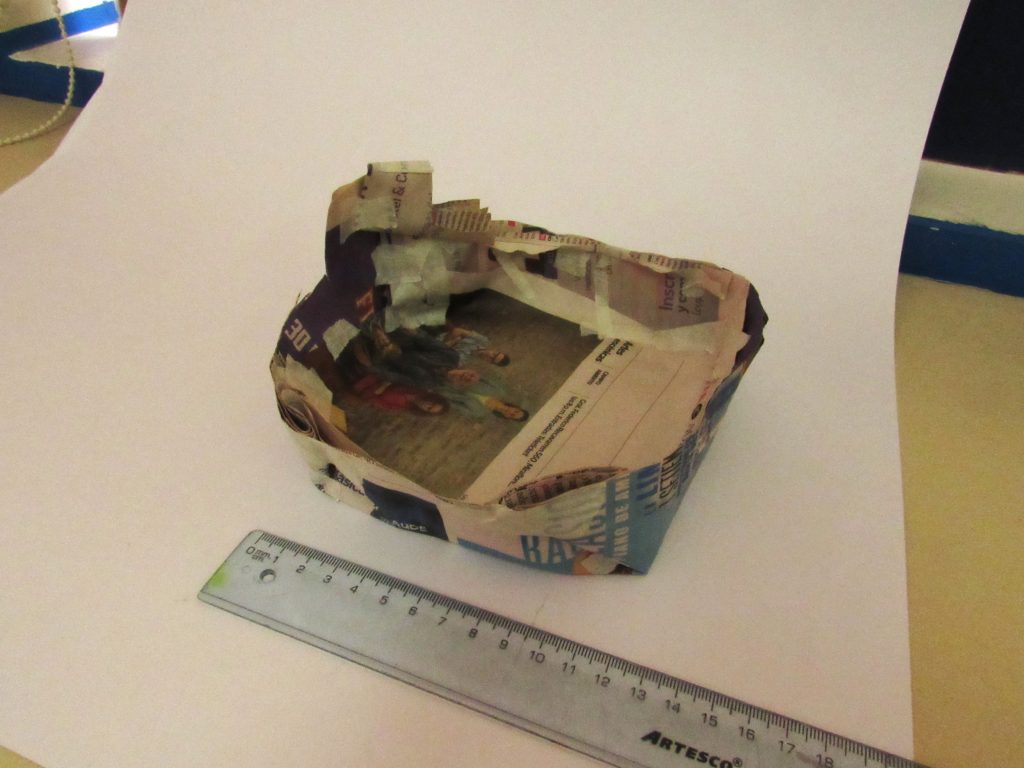
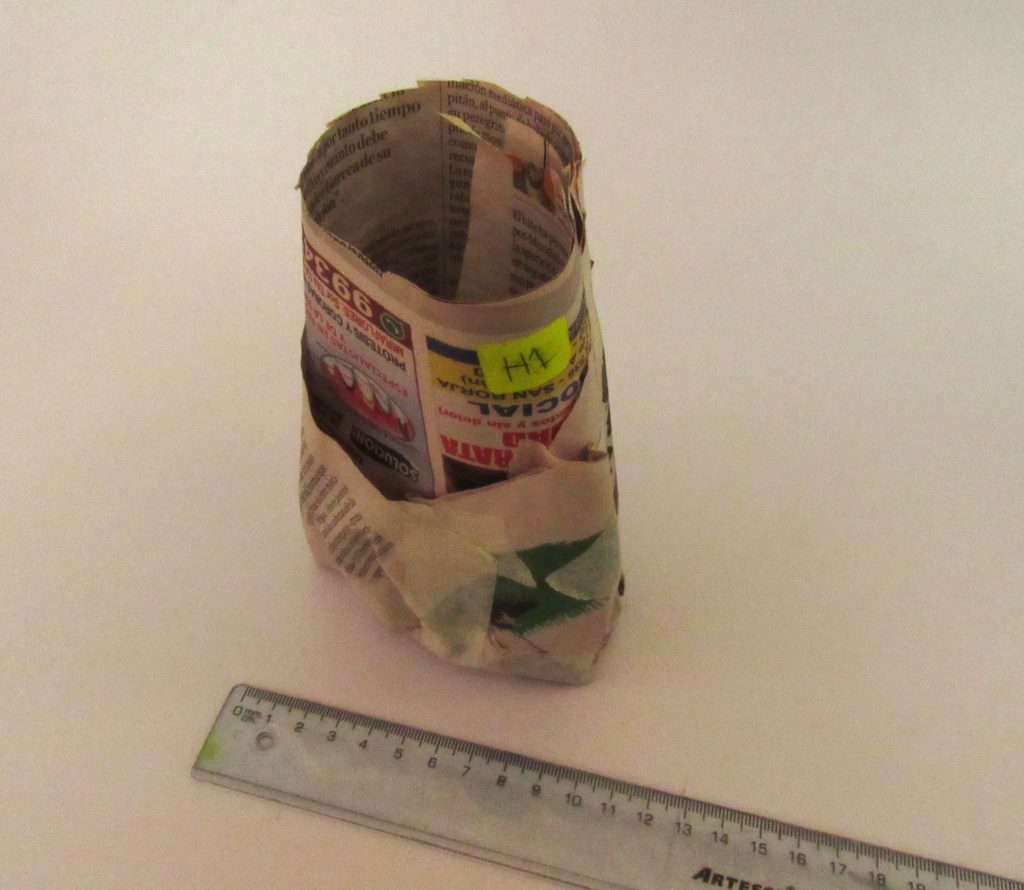
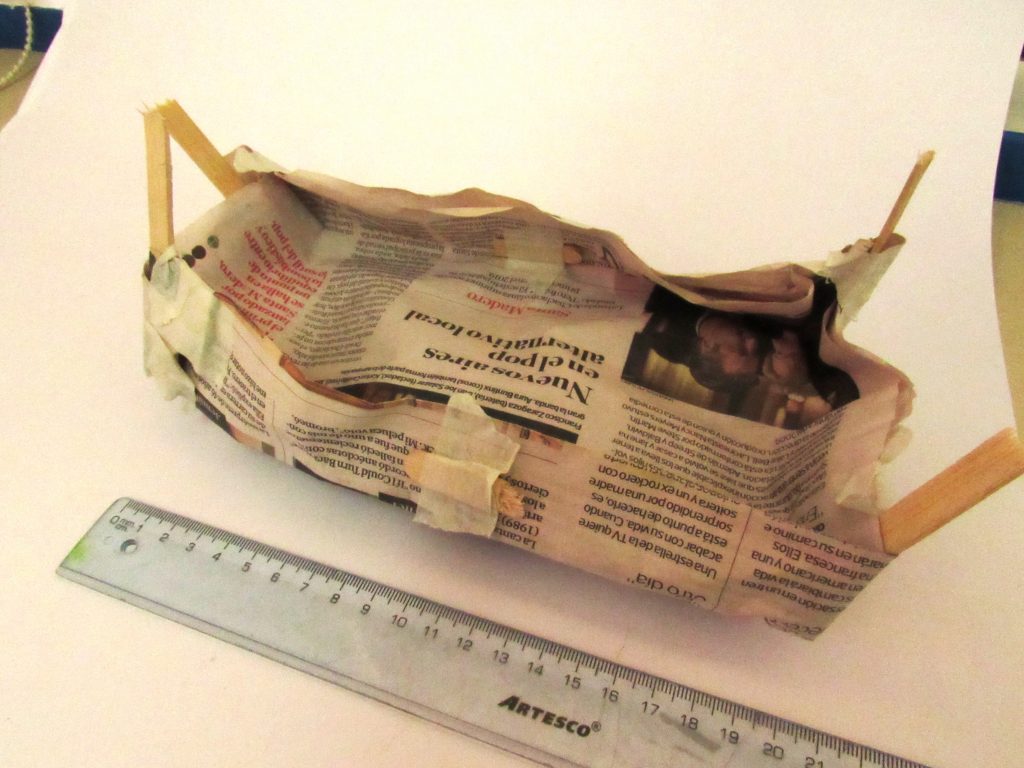
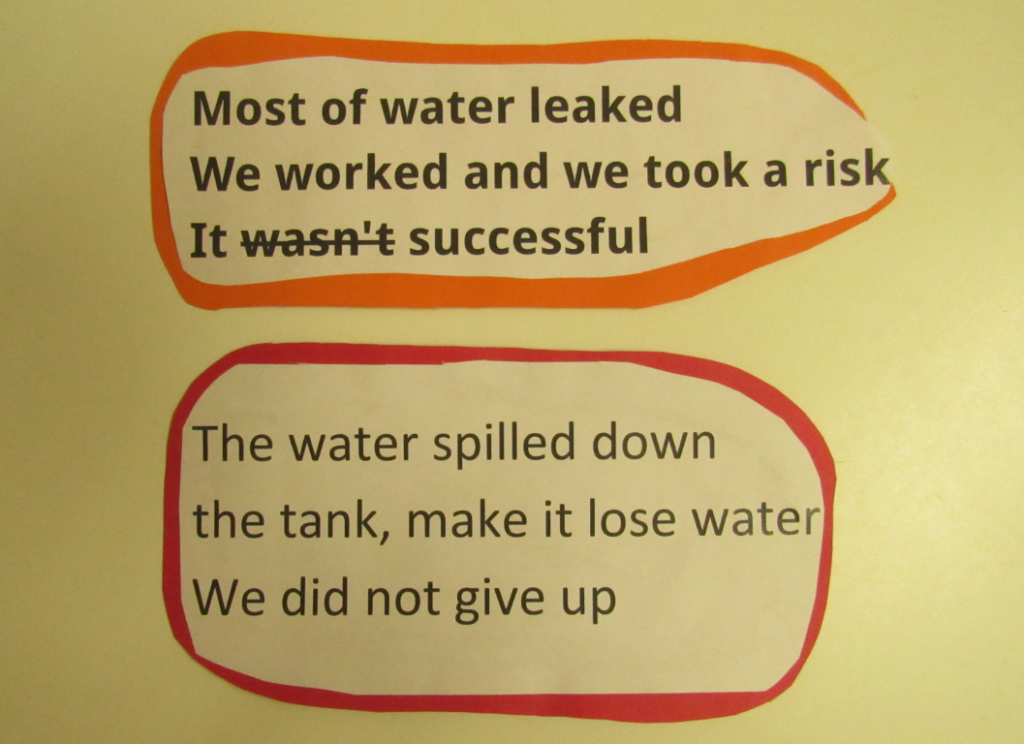
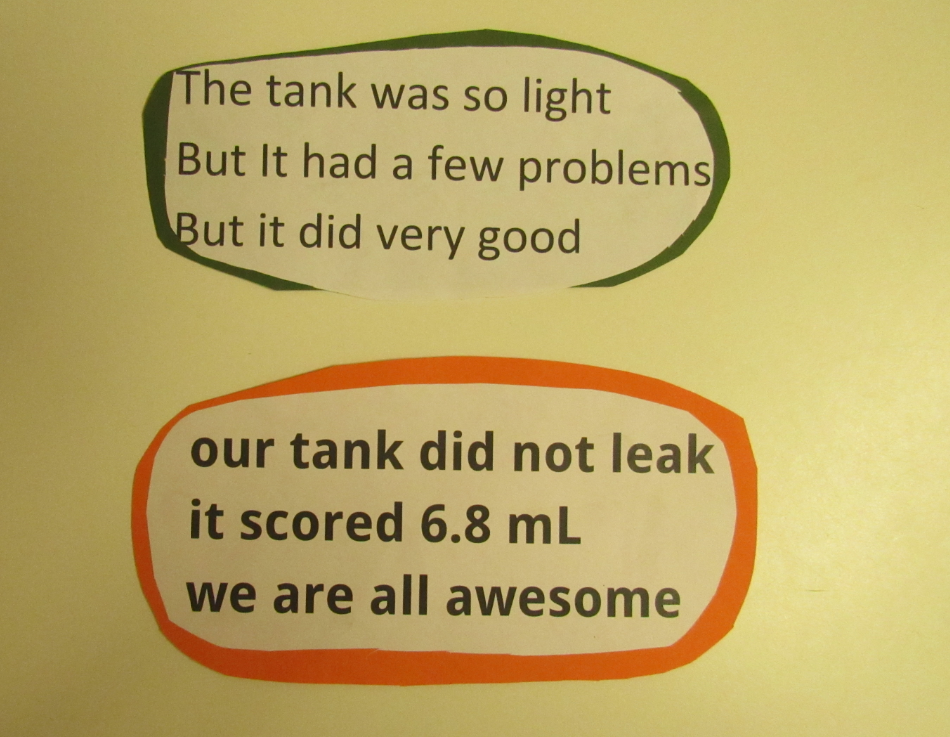
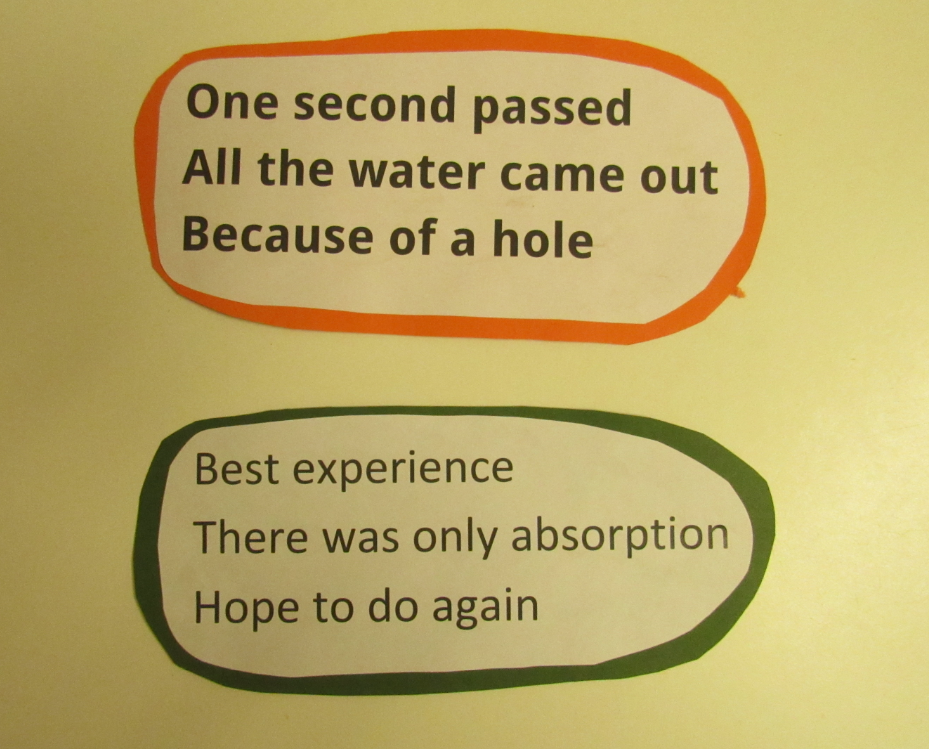
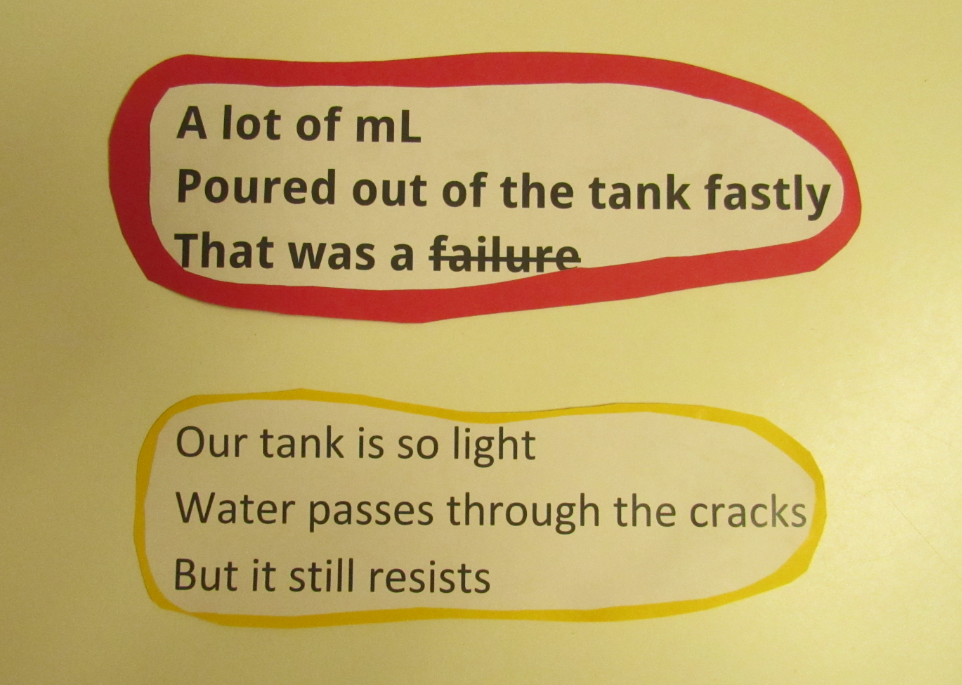
Water Tank Engineering with Newspaper, Part 1

MYP Design Cycle – Getting Started

In July 2015, I introduced my sixth-grade students to their first design unit: engineering a water tank from newspaper. Middle school design teachers and colleagues Jessie M. and Angie U. created the first version of the unit. This hands-on challenge served as an engaging introduction to the MYP Design Cycle and emphasized problem-solving through an accessible and inexpensive paper STEM challenge project.

STEM projects with paper. Discover how students can build water tanks using newspaper in this fun and educational paper STEM project. Ideal for MYP Design classes and STEM challenges. Part 1.
Water Tank Engineering with Newspaper – Getting Started – MYP Design Year 1

Initially created by my colleagues Jessie M. and Angie U., the project simplified the MYP Design Cycle for middle school students, transforming abstract problem-solving concepts into hands-on learning. The project spanned a quarter of the school year, which felt lengthy for a single activity. I was concerned about keeping 11- and 12-year-olds engaged and focused throughout.

Balancing Depth and Engagement in Paper STEM Projects

I initially expected rapid prototyping and shorter timelines, as most paper STEM activities are quick and straightforward. However, the extended project duration provided opportunities for deeper exploration and refinement, allowing students to fully engage with the four stages of the MYP Design Cycle: inquiring, developing, creating, and evaluating.

Managing materials was simple and cost-effective. Newspaper, PopsicleTM sticks, and tape were both sustainable and scalable, ensuring accessibility for all students. This simplicity was essential for the more than half of the class who spoke a language other than English at home. Using basic materials leveled the playing field, fostering inclusivity and encouraging creativity.

The MYP Design Cycle Image - 4 criteria, 16 strands. Criterion B's Developing Ideas is sequenced before Develop a Design Specification.

MYP Design Cycle (slightly modified in Developing Ideas for Year 1)
Image Credit: http://anwatindesign.weebly.com/

After completing the unit for the first time, I realized I had developed a new appreciation for the structured guidance and dependable framework provided by the four-part MYP Design Cycle.

Shifting Expectations for Paper STEM Challenges

Throughout teaching the unit to more than 300 students, I realized the value of focusing on foundational skills. Rather than merely building a water tank, students practiced comprehensive problem-solving, from analyzing requirements to iterating on their designs. These skills directly supported their success in future MYP Design projects, solidifying their ability to tackle increasingly complex challenges.

The thinking behind this approach was simple yet effective: A solid foundation in problem-solving and critical thinking would set students up for success throughout their four years in MYP Design.

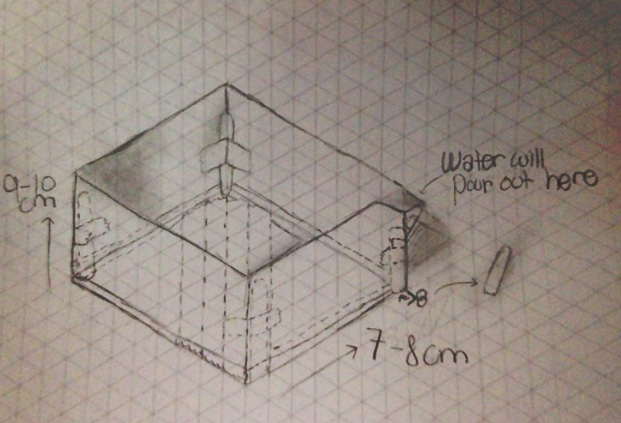
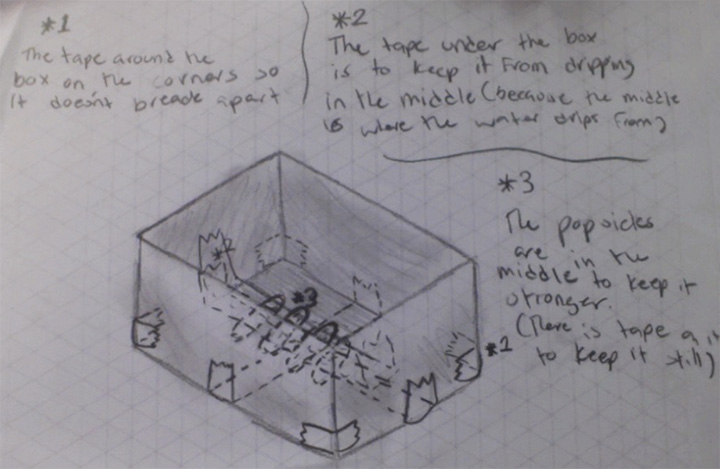
STEM Paper Activities - Engineering with Paper - Student 3D pencil sketch
Annotated 3D Student Sketch of a Newspaper Water Tank – Criterion B

Connections to Standards

In terms of more traditional learning goals, it can be both a pro and a con that straightforward and easy STEM activities for middle school students such as water tank engineering from newspaper connect naturally with standards and instructional techniques found in NGSS, ISTE, CCSS (English Language Arts Standards for Science & Technical Subjects), Visible Thinking Routines, and Research-Based Instructional Strategies.

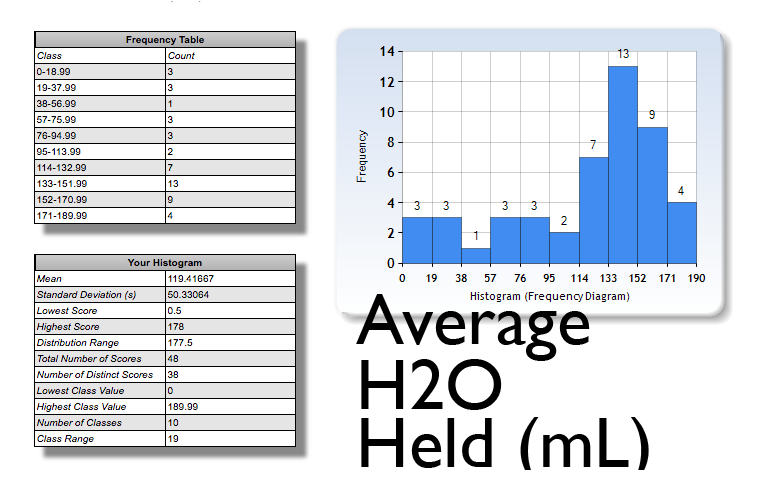
For example, one pro is the rich math connection with engineering where concepts can come to life: Analyzing the ratio of milliliters of water held per gram of material used for all tanks connects neatly with the 6th Grade Common Core Math Standard Ratios & Proportional Relationships. When multiple tanks are tested and the data captured and analyzed, the Common Core Standard of Statistics & Probability can certainly come to life for students!

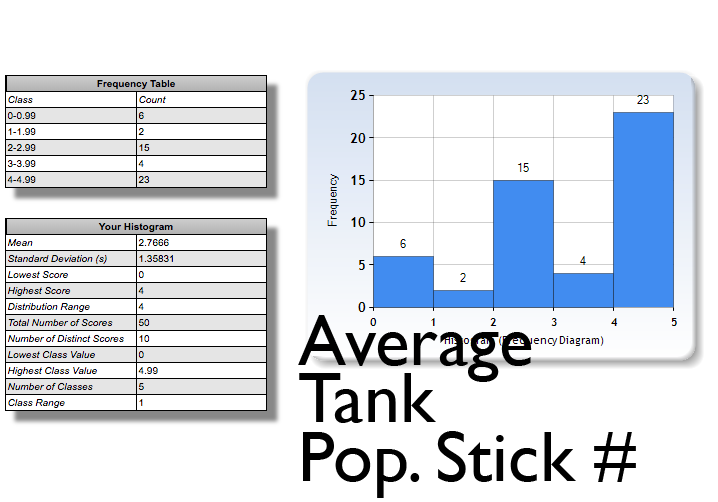
Histogram of Amount of Water Held for 48 Newspaper Water Tanks – Criterion D

Another pro is the straightforward science connection. The NGSS Cross-cutting Concepts of Cause and Effect and Systems and System Models could be supported and explored.

I developed the unit–especially the evaluation part–from a somewhat subjective observation of the tank holding water during testing. A more scientific approach was needed to gather and analyze data. Students were encouraged to be mindful of the tank’s mass in their planning and worked to control variables during testing. They precisely measured the water put into the tank and the water that came out.

The cons related to standards can come about due to the abundance of choice. The many rich connections in the teaching and learning mix can produce a bunch of questions for teachers that may need sorting out: What standards should be used? In what order should standards be assessed and how should they be weighed? Can the standards be easily assessed within the MYP Design Cycle? To what extent can the MYP Design Cycle fulfill both a sequencing role and a scope/standards role in problem-solving? Honestly, even after four years, I felt like I was just beginning to dig deeper into connecting my students’ design learning experience to standards.

A Performance Task Scenario

The water tank engineering lesson plan benefited students by framing the problem within a scenario to create a more genuine experience. How? The Wiggins’ and McTighe’s GRASPS model guided student learning to provide a meaningful context to engineer the tank designs.

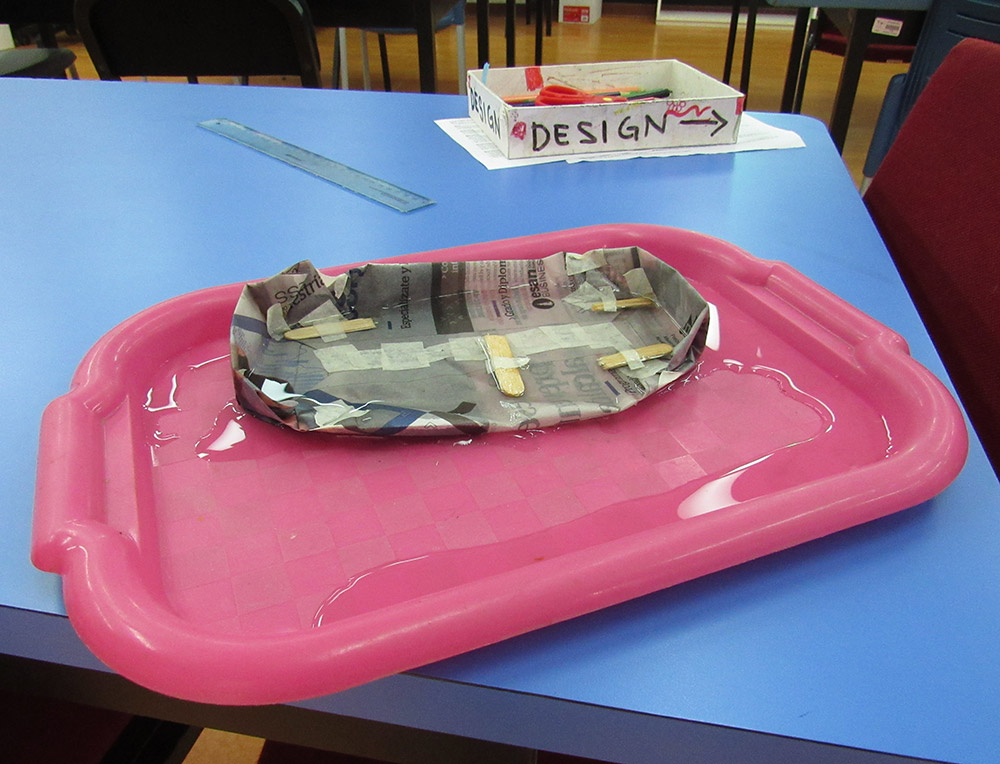
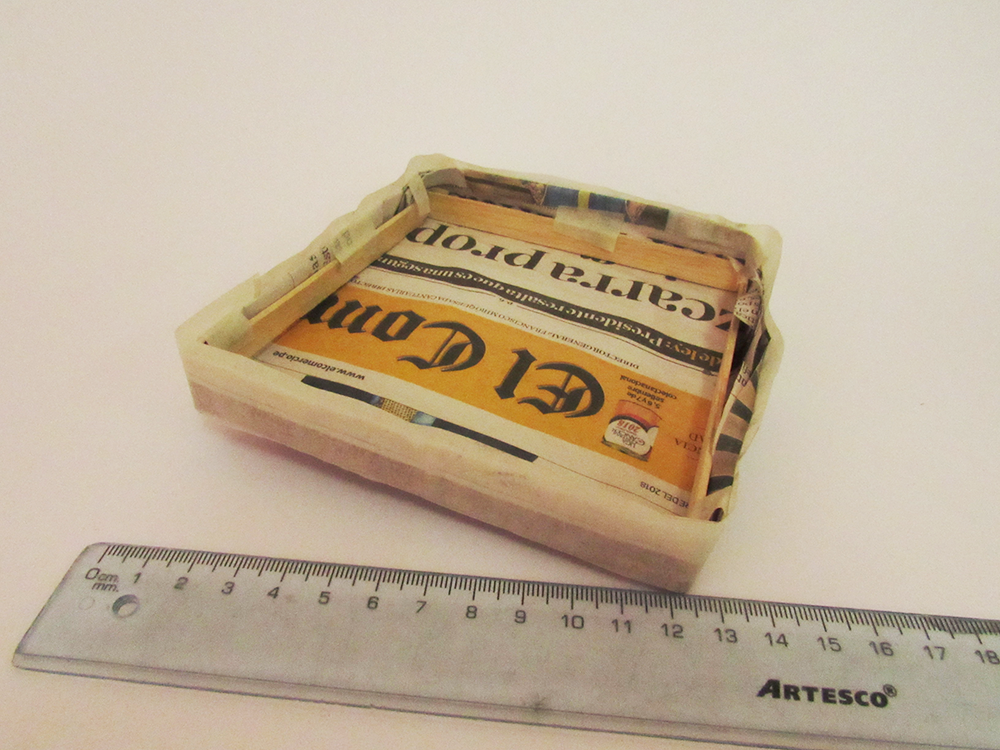
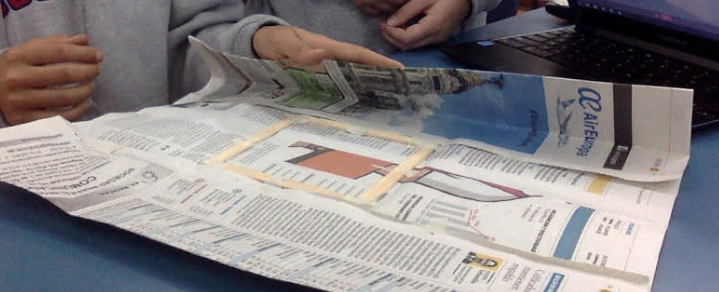
Beginning the Final Newspaper Water Tank Build – Criterion C

GRASPS stands for Goal, Role, Audience, Situation, Product, and Standards & Criteria for Success. The GRASPS scenario set the design problem-solving stage by outlining an authentic performance task for students.

Students found themselves in the following GRASPS scenario (written in the second person) to prepare for water tank engineering from newspaper:

Goal

Your goal is to design a water tank from a minimum amount of newspaper, Popsicle™ sticks, and tape to hold 200 mL of water for three minutes.

Role

You are a recently hired engineer in a construction company. Your training requires that you solve problems in an efficient manner with limited resources.

Audience

Your supervisor at the construction company will evaluate how well you addressed the problem, researched and developed ideas, decided on a solution, gathered data while testing your tank, and reflected on your learning.

Situation

Your newspaper water tank design will be developed, built, and tested by you and other “trainees” at your table. Reporting out will be done by you alone through writing and sketching. Your team’s materials are limited to:

  • 1 sheet of newspaper (57.5 x 44 cm, 12.1 g)
  • 4 wooden Popsicle™ sticks (4.4 g)
  • 80 cm of masking tape (1.5 g)
    Maximum Total Mass = 18 g

Product/Performance and Purpose

The product is a water tank of minimum mass made from newspaper, Popsicle™ sticks, and/or masking tape that holds as much water as possible for three minutes (200 mL will be used).

Paper Water Tank Math Animated Equation
Paper Water Tank Success Criteria Equation (Animated)

Standards & Criteria for Success

• The tank shall stand on its own on a flat horizontal surface. It shall not be supported by anything other than the approved materials. It cannot be taped to any surface.
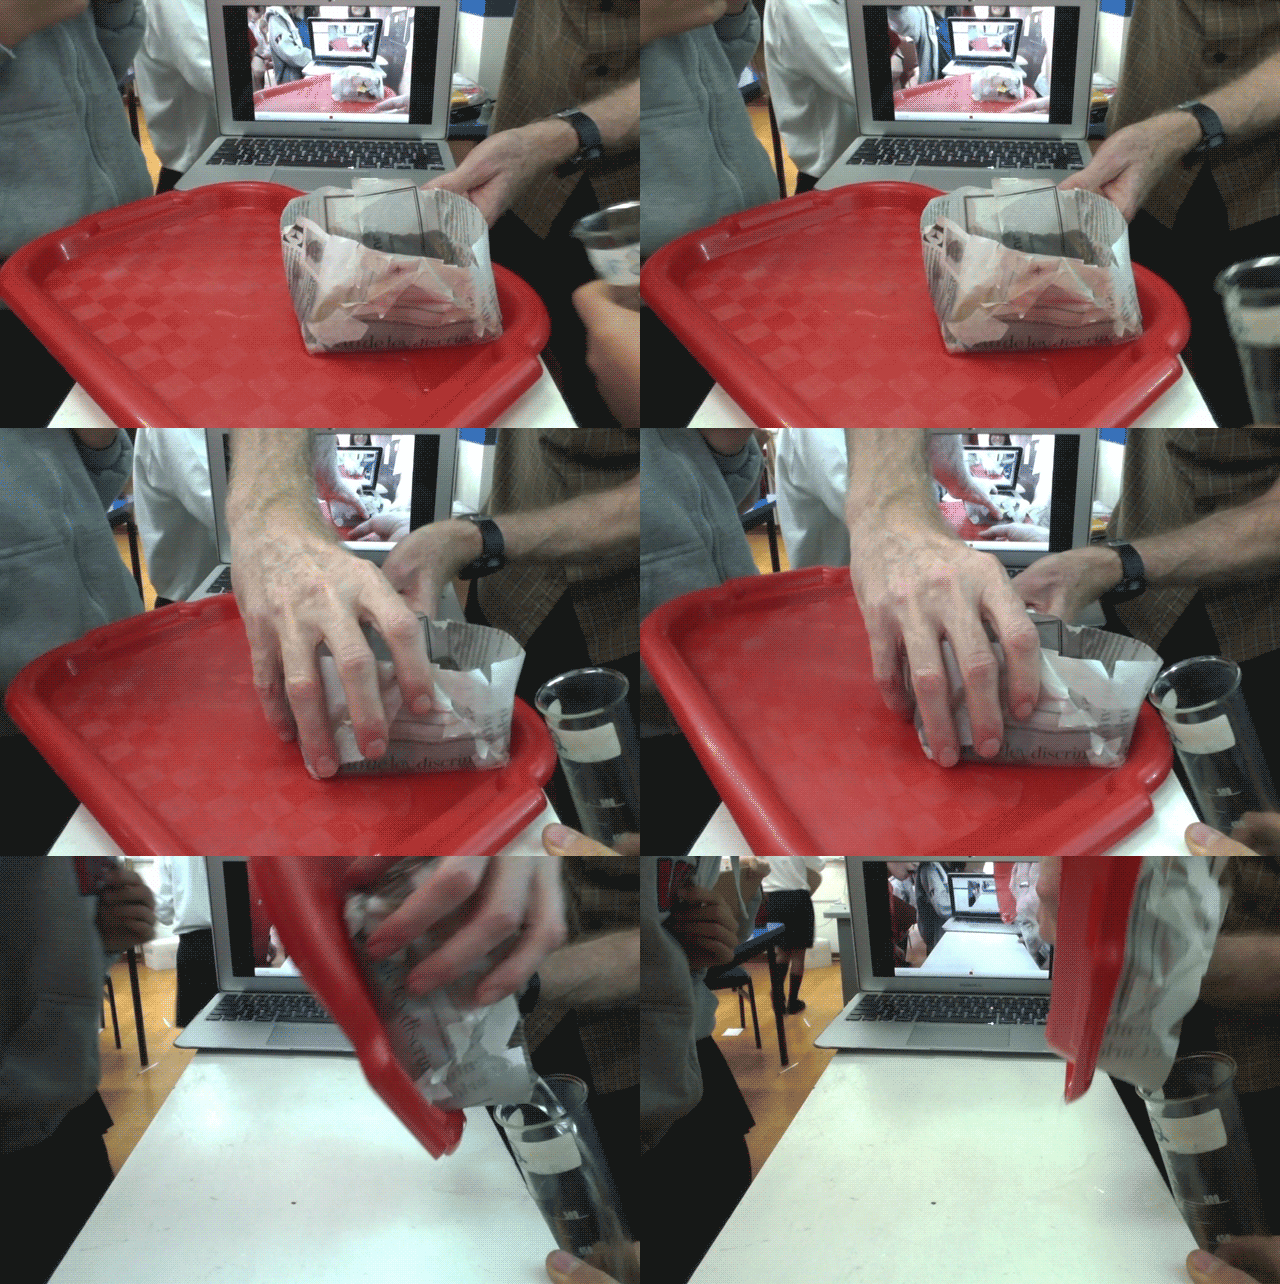
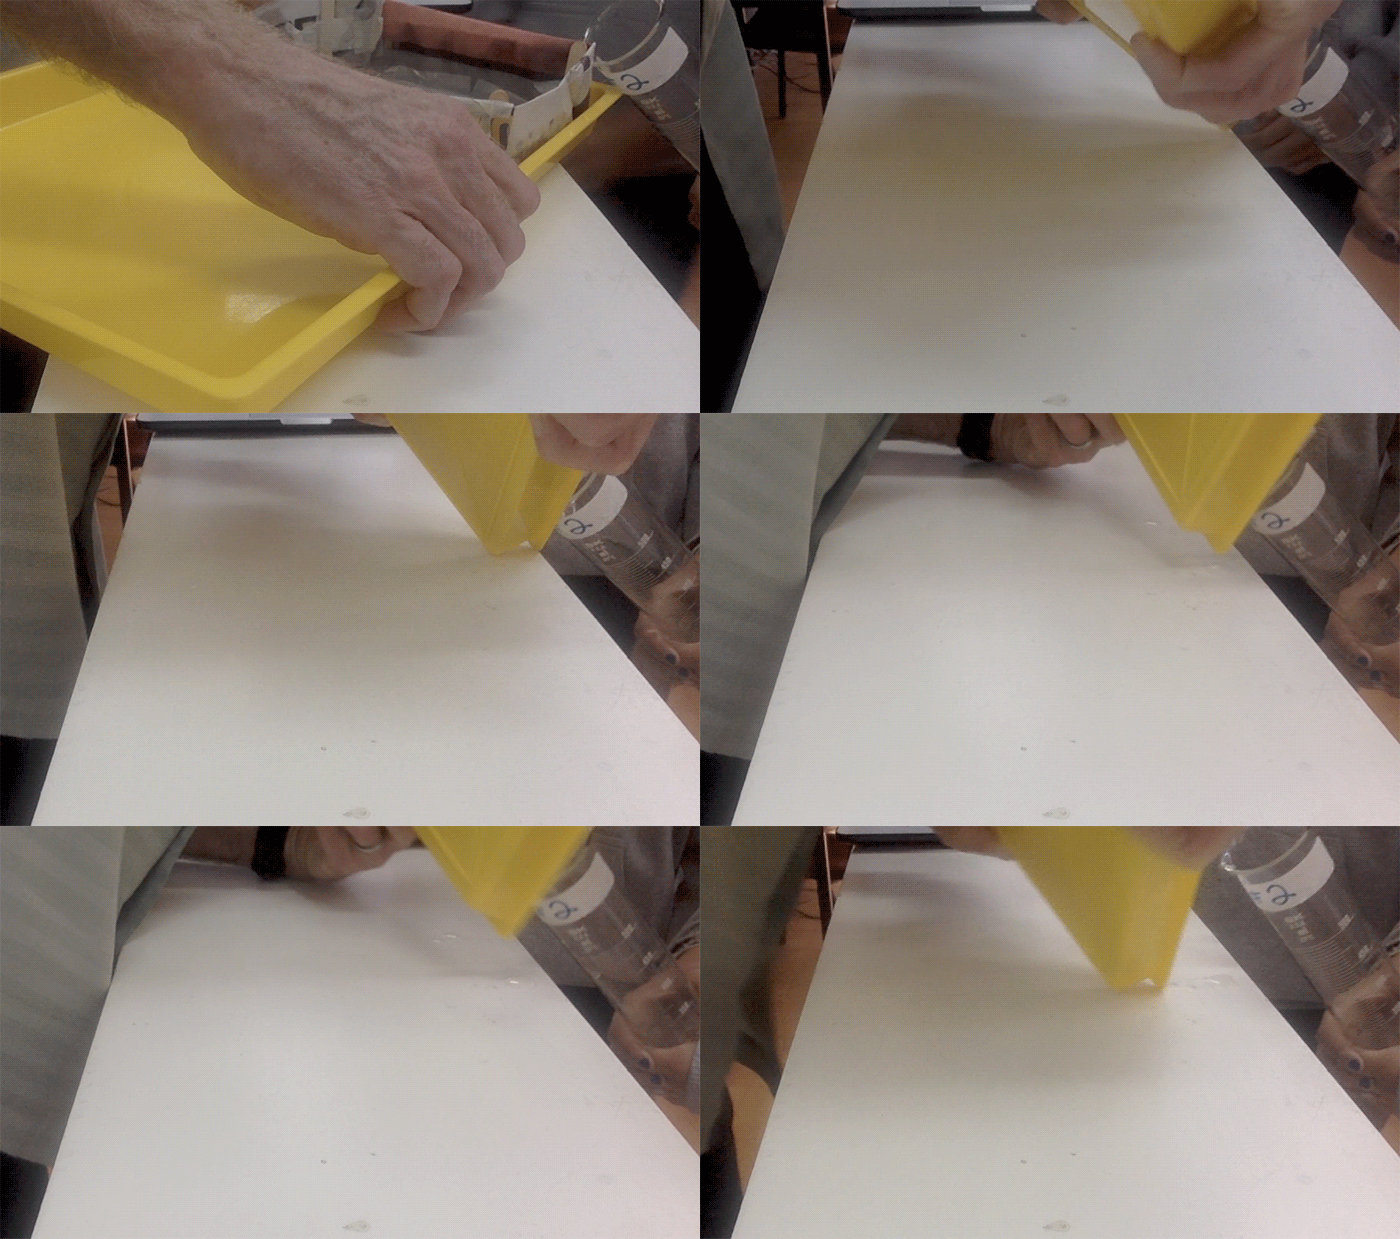
• The tank shall hold as much of the 200 mL of water as possible for three minutes. After three minutes, the water in the tank shall be poured out and measured by the supervisor.
• Success will be determined mathematically: The amount of water held after three minutes divided by the mass of the materials used. The higher the quotient, the greater the success (i.e., the more efficient the tank).

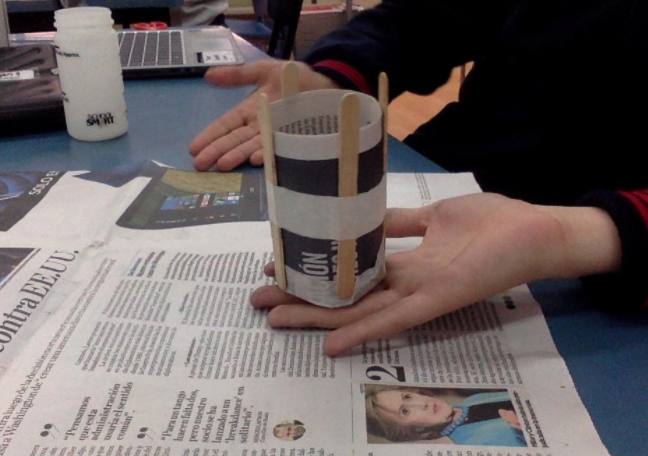
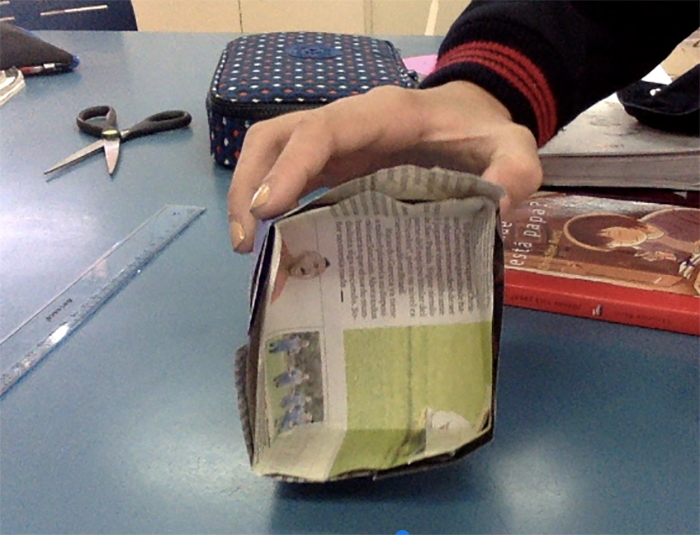
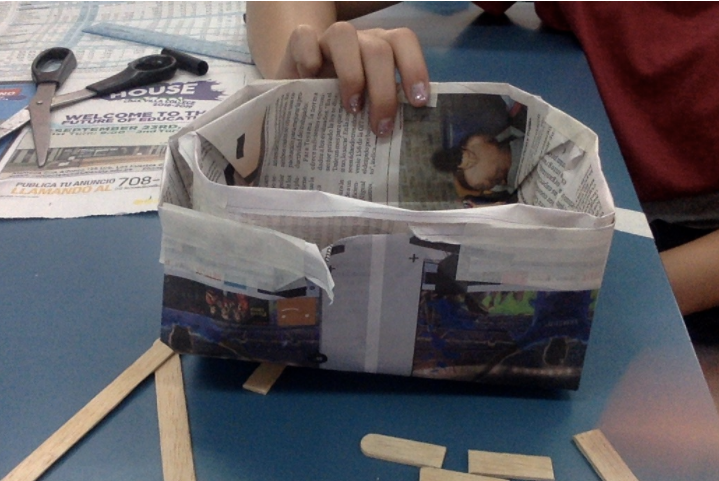
Student hand holding a newspaper water tank ready to test.
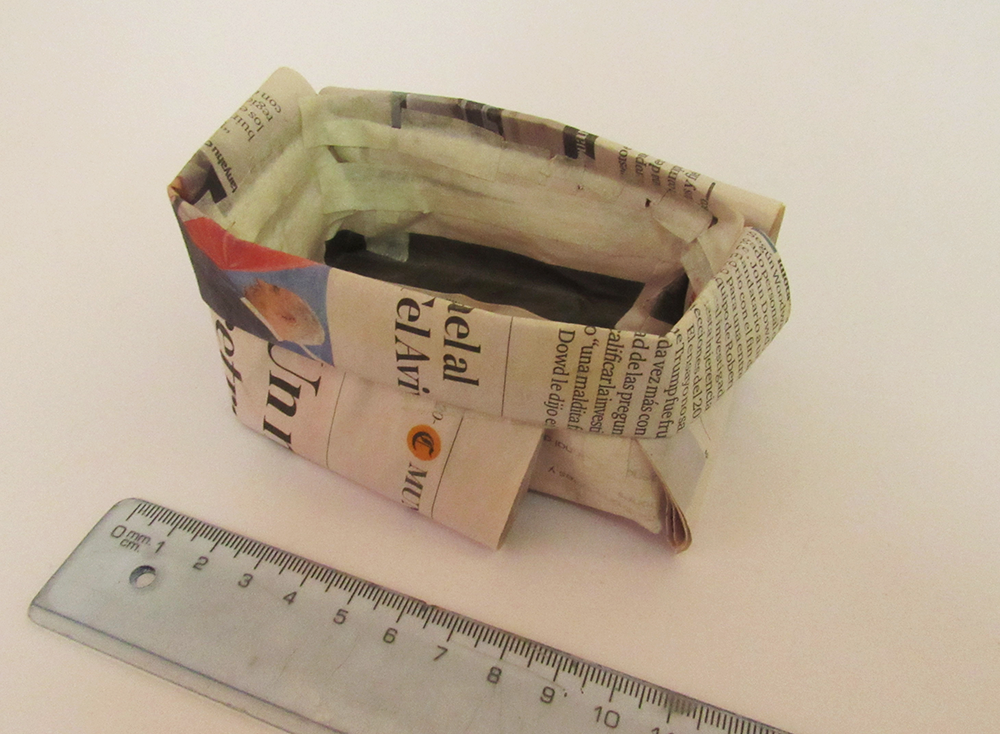
Test-ready, Newspaper Water Tank, Box Style – Criterion C

I’m not fully satisfied with how I wrote the Standards & Criteria for Success. They could be more concise and precise. Ideally, the Standards & Criteria for Success should include a few essential, non-negotiable design specifications that align closely with Criterion B. Improving the connection between GRASP and Criterion B was also an area I needed to address to enhance my students’ learning.

Statement of Inquiry

Broader than the GRASPS, the statement of inquiry was also introduced at the beginning of the unit. It established connections to significant and enduring concepts, principles, or theories. In the case of engineering a paper water tank, the idea of tradeoffs came into play as “Engineers must use finite resources responsibly to design structures efficiently.” We dug into knowing what this meant through a series of factual, conceptual, and debatable questions. For a deeper look into getting started with an MYP Design unit, check out the post, MYP Design Criterion A – Inquiring and Analyzing.

Design Trade-offs with Newspaper STEM Activities

For some students, the concept of trade-offs emerged naturally as their investigation deepened into engineering a newspaper water tank to be of minimal mass and strong when wet.

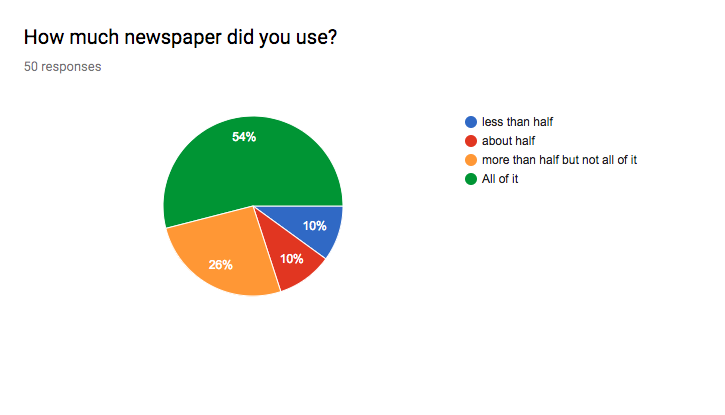
However, many students seemed to assume they should use all the materials. A common tendency was to associate a successful tank with greater mass. Adding mass to a tank was achieved through thicker walls or bases and using all of the Popsicle™ sticks. Unfortunately, many students tended to overlook the other side of the trade-off equation–the benefits of lower mass.I believe that the thinking went something like this:

more material =>
stronger tank =>
more water held after three minutes =>
Success!

Learning by Doing Quote by John Dewey

In spite of my desire for students to better understand the nature of the ratio-based success criteria before their official tank build, I did not show each previous year’s tanks with their respective scores. I felt like it would give too much away and narrow students’ analytical thinking and creative problem-solving.

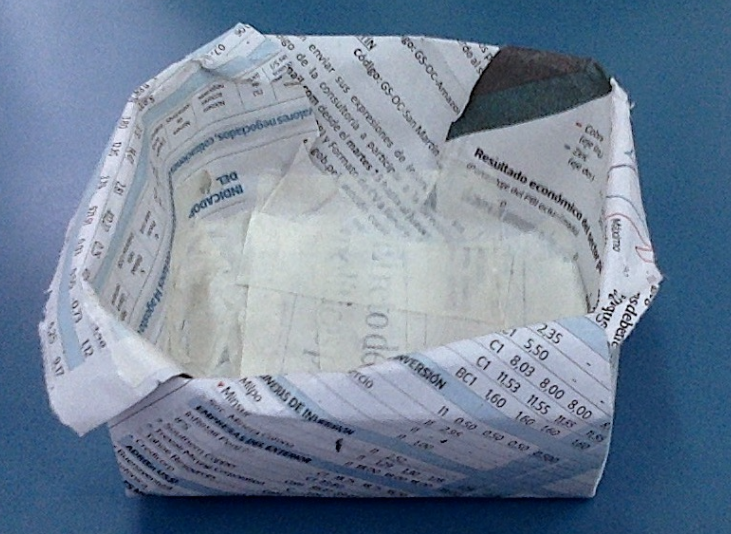
I displayed a couple of real tanks from previous years to enhance thinking and learning. These tanks dried out easily with minimal effort, and you couldn’t tell that they were once filled with water for three minutes. In fact, during my parent-teacher meetings, I showcased these dried-out tanks.

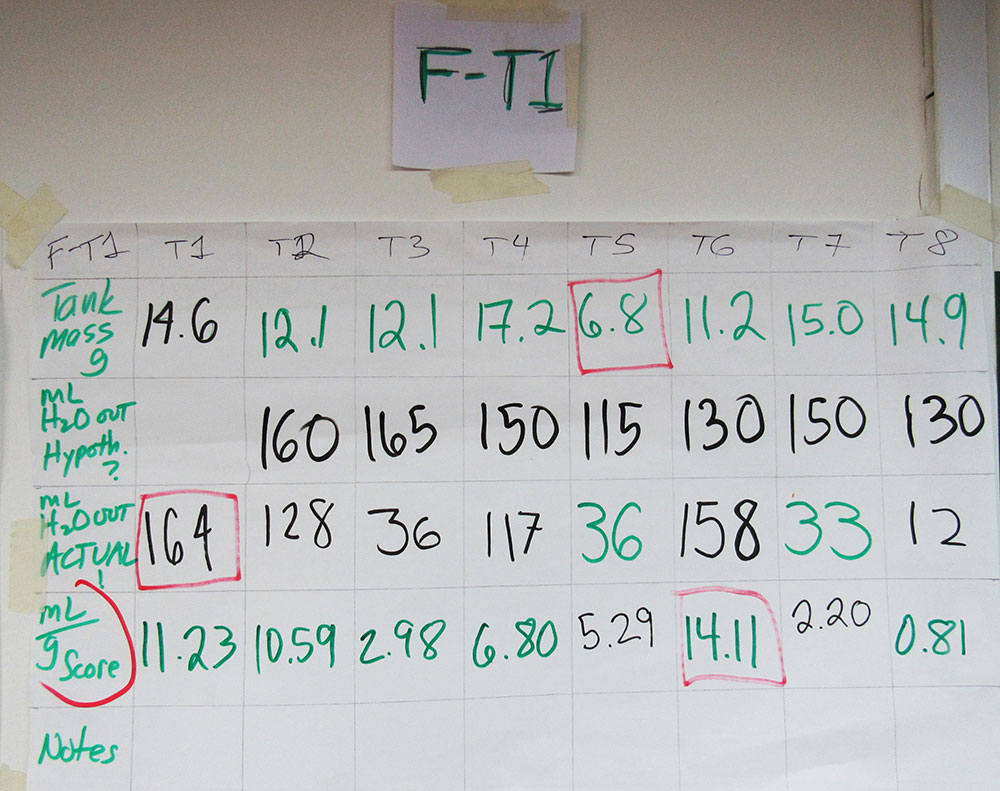
What I also felt was legitimate guidance to help students dig into the trade-off struggle without giving too much away. I provided the tank mass and test data from previous years’ tests. Each year, we recorded the data as it became available during the testing phase. I hung the charts up around the classroom for easy reference. The charts also offered an authentic look as to how it all went down the year prior.

Newspaper Water Tank Test results for One Class – Criterion D

MYP Design Criteria A, B, C, and D

So far, I have briefly touched on some of the roles of different criteria in the MYP Design Cycle with regard to Water Tank Engineering. Before closing, here’s a more precise summary of the design process: The GRASPS set the stage for student research in Criterion A – Inquiring and Analyzing. The statement of inquiry was introduced here as well. With a foundation of research, students were ready to brainstorm and formalize their tank concepts in Criterion B – Developing Ideas.

In Criterion C – Creating the Solution, students worked in table groups to negotiate and build a final newspaper water tank design from their individual Criterion B ideas. Finally in Criterion D – Evaluating, students tested their tanks and determined success against the design specifications established in Criterion B. They then came up with ways to improve their designs if they were to engineer a water tank again.

Water Tank Engineering from Newspaper – What’s Next?

At this point, one takeaway you might have is that the MYP Design Cycle has the power to explore almost any problem relevant to student learning. In this case with 11- and 12-year old students new to MYP Design, a simple concrete problem with a clear quantifiable goal made the most sense as an introduction to the process.

In the follow-up blog post about newspaper water tank engineering via the MYP Design Cycle, I showcase some of the different designs students created to meet the goal in the GRASPS. I also want to go over student perceptions of volume, STEM supplies to have on hand, and testing insights.

If you are interested in a more formal understanding of MYP Design, check out the sometimes difficult-to-find 62-page Middle Years Programme Design Guide for grades 6 to 10 (Years 1 to 5). It’s from 2014-15. I also put together two blog posts about MYP Design with an eye on specifically supporting grade 6 (Year 1) students: MYP Design Basics – One Perspective and MYP Design Assessment Criteria Modified.

Check out the Water Tank Engineering from Newspaper Part 2 blog post for the free lesson activities.

Effective Habits of Learning

Habits of Learning (HoLs) are essential for students as they progress through their academic journeys. These customs and routines encompass a wide range of behaviors and practices that support students in their academic pursuits and challenge them in all aspects of life. While some schools may refer to this area as “citizenship,” Robert Marzano, in his book Transforming Classroom Grading (2000), uses the term “nonacademic factors” to describe these habits of learning.

It is important to note that classroom rules and guidelines can overlap with these nonacademic areas. However, citizenship and nonacademic factors focus on cultivating students’ highest-self behaviors, and HoLs are the next step in promoting positive behaviors and habits. These habits go beyond merely complying with classroom rules; they encompass the development of a growth mindset, effective time management, critical thinking, and reflection, among other skills.

Habits of Learning in the IB

The International Baccalaureate (IB) program emphasizes the development of good habits of learning, which are essential for success in both academic and personal pursuits.

Some of the key habits of learning that the IB promotes are:

  • Time Management: IB students learn to manage their time effectively, prioritize tasks, and meet deadlines.
  • Independent Learning: IB students are encouraged to take responsibility for their learning, think critically and reflectively, and seek out new knowledge and experiences.
  • Active Learning: IB students are encouraged to participate actively in class discussions, ask questions, and engage in collaborative learning activities.
  • Inquiry-based Learning: IB students learn to ask thoughtful questions, research and analyze information, and develop reasoned conclusions and solutions.
  • Reflection: IB students learn to reflect on their learning, evaluate their progress and performance, and set improvement goals.
  • Effective communication: IB students learn to communicate verbally and in writing effectively and listen actively to others.
  • Cultural awareness: IB students learn to appreciate and respect different cultures and perspectives and to become global citizens who are open-minded and inclusive.

These IB habits of learning aim to equip students with the skills and tools necessary to succeed in a constantly evolving world, nurturing a lifelong learning mindset.

The International Baccalaureate® (IB) Organization describes ATLs as falling into five areas: thinking, communication, self-management, research, and social. There are also ten specific MYP skill clusters that fall within these five ATL areas. Both the ATLs and HoLs support and promote the whole student in school and beyond.

Evolution of the Habits

When I started teaching MYP Design in 2015, we were using Approaches to Learning (ATLs) to support student growth. In middle school, our HoLs covered three domains: organization, collaboration, and communication. We provided feedback to students in these areas via progress reports and report cards. We eventually grew our expectations and support to include self-reflection for a total of four HoLs. In both situations, our HoLs were more non-academic than ATLs (which include both thinking skills and research skills).

The authors of the HoLs at my school developed detailed descriptions broken down into what each HoL looked like ranging from below expectations all the way up to exceeding expectations. This guidance was helpful for teachers to have a clear and common message for our students across the middle school grade levels.

Student hands sketching straight lines with a ruler and pen in a spiral-bound notebook. Effective habits of learning helps students focus on academic content.

Changing Habits

My sense was that students in my Design Classroom would benefit from a more concise version of the Habits of Learnings to best serve their needs. Also, I wanted a set of relevant classroom rules to best ensure day-to-day learning. I did not want to add another rubric/list/expectation chart for my sixth-graders to have to manage since their world was already abundant with keeping track of eight classes: English, Spanish, design & technology, science, humanities, physical education, and fine arts.

Essentially, if I could cover the concrete classroom operation (rules) while promoting ideal mindsets and attitudes (HoLs), and limit the number of things I ask students to pay attention to, teaching and learning would be very much on track!

So, I modified the Habits of Learning into printable posters (each HoL is two pages long in a landscape format, pdf file type) and one small presentation (five slides: title and the four HoL pages; pdf file type). Feel free to use them!

Summary of Effective Habits of Learning

By encouraging and developing these HoLs, students can not only achieve academic success but also thrive in their personal lives. The ability to manage time effectively, think critically and reflectively, and communicate clearly are all essential skills that will serve students well beyond the classroom walls. Ultimately, the aim of cultivating HoLs is to equip students with the necessary tools to become lifelong learners, who are self-motivated and equipped to succeed in an ever-changing world.

MYP Design Basics – One Perspective

VistaThink MYP Design One Perspective

What is MYP Design?

If you are new to MYP Design and possibly coming from a more traditional educational system, some of the nomenclature may be worth a quick review. This post will cover some of the MYP Design basics. The term “MYP” means Middle Years Program and serves students from ages 11 to 16. It spans both middle and high school. MYP operates within the International Baccalaureate® (IB) Program which fosters open-minded learners, who strive to be inquisitive, caring, and balanced risk-takers with a global perspective.

In this post, I will provide some insights for upper-elementary and lower-middle school teachers who are curious about MYP Design basics and the problem-solving process. Check out my brief About page to get a general sense of where I am coming from as an educator.

MYP Design Cycle - Four Criteria: A, B, C and D. Sixteen strands total.
MYP Design Cycle (slightly modified in Developing Ideas for Year 1)
Image Credit: http://anwatindesign.weebly.com/

My specific experience with MYP Design includes almost 70 trips around the MYP Design Cycle with 17 different groups of sixth grade (Year 1) students. That’s about 340 total students. I also taught one year of grade 8 (Year 3) MYP Design. This cycle is sometimes referred to as the IB Design Cycle as well.

If you want a bit more context about the design process, see my post with a simple and short example: Paper Airplane Design, Data, and Discovery. For a deeper dive, check out the six-week lesson on Water Tank Engineering with Newspaper. An MYP Design Cycle Template can help you get started in MYP Design.

Ideally, MYP Design puts a focus on holistic problem solving and systems thinking. The program promotes responsible, practical, and creative problem-solving skills in historical and contemporary contexts all the while asking students to be mindful of their design choices. Essentially, teachers of MYP Design should strive to make problem-solving meaningful for their students through relevant connections. This is sometimes easier said than done!

MYP Design and STEAM

MYP Design does have similarities with STEAM learning (science, technology, engineering, art, and math): MYP Design and STEAM benefit from a problem-solving cycle and can incorporate aspects of problem-based and project-based learning. Both also emphasize and develop cross-disciplinary skills.

It’s worth noting that the differences between project- and problem-based learning are efficiently summarized by Dr. Chris Campbell in his short article Problem-based learning and project-based learning found at Teacher (published by the Australian Council for Educational Research).

For grade six (Year 1) middle school students in MYP Design, learning scenarios are developmentally more contrived than for older students and therefore more like project-based learning. The units can tend to be both multidisciplinary and longer with a set goal as well which falls under the characteristics of project-based learning.

Step by Step

I have found specific steps versus general steps benefit nearly all sixth-grade designers and specific steps are more associated with problem-based learning. Each pedagogy can be tailored to create high-interest topics for learners to develop 21st-century skills and both MYP Design and STEAM learning easily lend themselves to being assessed via performance tasks that facilitate deeper understanding by students.

MYP Design Cycle Basics

The MYP Design Cycle (sometimes referred to as the IB Design Cycle) provides students with a sequential framework to guide them to identify and solve a problem for a target audience.

The cycle is divided into four broad parts called criteria which are briefly:

A – Inquiring and Analyzing – Define and research a design problem
B – Developing Ideas – Brainstorm and refine ideas to solve the problem
C – Creating the Solution – Plan and build a prototype sufficient for testing and evaluation
D – Evaluating – Test and evaluate a solution to determine the effectiveness of the solution for the target audience

MYP Design Cycle with Animated Criteria A, B, C, and D
MYP Design Cycle with Animated Criteria

Each of these criteria is broken down into four parts which are called “strands”. The International Baccalaureate (IB) refers to a strand as “an aspect or indicator of the learning expectation”. To make connections to standards-based systems (which can be helpful), I think of strands along a standards-competencies continuum, with strands closer to the competencies end.

You could think of this entire problem-solving cycle as having 16 steps in total. Design problem topics may vary with regard to the depth each strand is explored, engaged with, and processed.

Designing with 11- and 12-year Olds

In the most current and commonly used MYP Design Cycle, the flow arrows do not suggest a sequential beginning-to-end process from Criterion A to B to C and finally to D. Each criterion has an arrow from it to the other three criteria. Why? Problem-solving can be messy and nonlinear–there will be a natural jumping around to and from the different criteria in the MYP Design Cycle as ideas are brainstormed and negotiated into a testable solution. Hence the inclusive nature of the process arrows.

With sixth graders, I found that their learning and problem solving progressed more coherently when I did not formally encourage free associations from criterion to criterion. This additional structure choice was especially beneficial for lower-achieving students.

We did do full-on brainstorming, but within the boundaries of a slightly modified Criterion B. References to other criteria did occur wherever we were in the cycle, but this was done verbally through small-group and classroom discussions for the most part.

One caveat to stricter sequencing in the MYP Design Cycle is the importance of referencing the design specifications from Criterion B with the evaluation of the success of the solution in Criterion D: The more specific the design specifications in B the deeper and richer the analysis of success will be in D.

Design Specifications in MYP

Design specifications are essential to developing an effective solution in MYP Design but, for sixth graders, a slightly different path to get to them may be more beneficial for the age group. A small change to the cycle that may facilitate greater engagement by students is within Criterion B.

Consider flipping the first two strands so that the student ideas generated to solve the problem are created and processed before getting into the rules to constrain the possible solutions. Why make this minor change? The reordering of the sequence takes advantage of the age group’s tendency to come up with non-traditional suggestions (as one colleague once remarked: “Sixth graders will say anything.”) while promoting healthy risk-taking through brainstorming among peers. Creativity first before all those persnickety design specifications!

Final Modified MYP Design Cycle - Four Criteria: A, B, C and D. Sixteen strands total.
Final Modified MYP Design Cycle with Labeled Strands (and B.1 and B.2 Switched)

MYP Design for Understanding

Apart from some of the word choices tweaked for the criteria and strands, another modification to the MYP Design Cycle to consider is a more intuitive and less cumbersome labeling of its parts. This change is especially helpful for the age group.

The four criteria from A to D with their brief and descriptive titles work well for reference, navigation, and understanding; and are consistent with other cycles used in the IB Program. The strands, however, lacked a simple visual and verbal identifier and needed to be more or less referenced fully by name. I prefer prefacing each strand with the respective criteria letter, a period, then the number of the strand within the criterion (1, 2, 3, or 4). The four strands in Criteria A, for example, would be named:

A.1 – Explain and Justify the Need
A.2 – Identify and Prioritize the Research
A.3 – Analyze Existing Products
A.4 – Develop a Design Brief

It becomes easier to reference each strand, especially verbally, via its letter-number prefix. After a unit or less, it can eventually become natural to make reference to a strand by its prefix only. You might remind a student, “Don’t forget, we’re continuing with A.3 today,” or say something like, “After we finish A.4, we will start to develop ideas in Criterion B.”

Finally, via another post, I reviewed some changes in the MYP Design Assessment and Criteria A, B, C and D that I felt would benefit student learning.

Is Design Always Cycle?

An optimal approach as a designer would include multiple trips around the MYP Design Cycle to get at the best solution for the target audience. However, time, resources, student interest, and other factors relevant to learning can limit the repetitive benefit of a problem-solving cycle. For my sixth graders, we completed one cycle per unit. Our discussions in Criterion D included how to improve the solution (which would be a natural setup for Criterion A).

There are possible ways to optimize the benefits of exploring the MYP Design Cycle more than once for the same topic. Some examples are: Explore topics quickly. Facilitate speed by covering the spirit of each criterion (rather than digging into each strand).

Promote rapid prototyping and possibly design sprinting where applicable.

Repeat a high-interest mini-lesson that uses quantifiable data after substantial time has passed from the first time doing the lesson. My teaching evolved into warming up with a short unit at the beginning of semester one and repeating the same unit at the beginning of semester two. Teachers can leverage student-generated data from the first unit (e.g., averages of students’ paper plane flight data from semester one) to determine the success of the solution for the second unit. By trying to “beat their old mark” the second time around, friendly competition is encouraged which can help meaningful engagement and learning as well.

Final Thoughts About MYP Design

A helpful infrastructure piece I eventually adopted involved the sequence of the units. Each school year, we completed four units–four long-term projects after warming up at the beginning of each semester with a hands-on mini-unit. Essentially, we went around the MYP Design Cycle once for each unit, four times total in a school year.

Briefly, here’s how I organized the units:

Semester 1

  1. Physical Solution – Engineering
  2. Digital Solution – Cybersafety

Semester 2

  1. Physical Solution – Upcycling
  2. Digital Solution – 3D Design

Why organize design learning this way? The semester break was as long as a U.S. summer break. Many students were probably spending their vacation time on devices for extended periods. So, starting with physical units made sense to move students away from screens and into hands-on experiences with tangible engagement. Also, physical materials had a greater chance of being cared for and returned to their proper place (a good thing) because behavior tended to be better at the beginning of a semester than at the end!

MYP has much to offer learners. It shares characteristics with STEAM learning, offers interdisciplinary power, facilitates project- and problem-based learning, and promotes 21st Century skills. MYP Design for my sixth graders evolved gradually to be more procedural so that all students would always have more explicit learning targets. The adjustments I made to the MYP Design Cycle over time provided needed clarity to ensure success while keeping an eye on global perspectives.

If you’re new to MYP Design, try thinking about design problem by focusing on the four criteria before going deep into the strands. This approach can be helpful for your students’ design thinking as well, whether you make adjustments to the MYP Design Cycle or not. Good luck!

Paper Airplane Design, Data, and Discovery

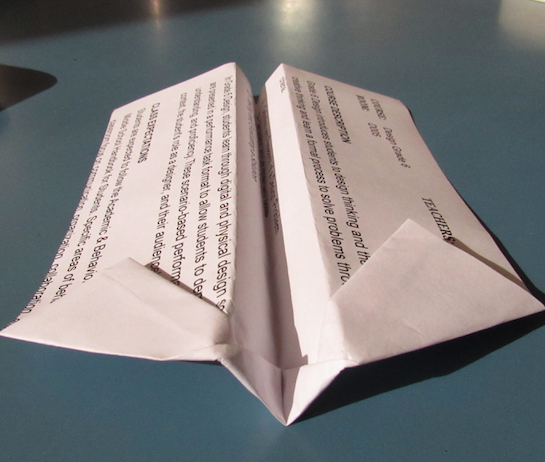
teacher-made paper airplane  from a 1/2 piece of letter paper. Used to gather flight data
Paper Airplane from Recycled Paper

Paper Airplane Introduction

This short lesson was created to provide grade 6 students with a brief introduction to the design cycle. The ideas here can be used for a paper airplane science fair project. The goal of the lesson was to create a paper airplane that would fly as straight and as far as possible. Basically, students investigated how to make a successful paper airplane. This design goal easily adapts to paper airplane design and testing in a classroom setting. Design, data, and discovery can happen with simple paper planes!

Paper airplanes were used since they are familiar to most students, the materials are readily available to teachers, and data are easy to generate and analyze. Project design ideas such as those using paper airplanes can be engaging, fun, and relevant for learning. MYP Design ideas can also come directly from science experiments.

The lesson came about at the beginning of the school year when students did not yet have access to their laptops. Individual digital projects were therefore out of the question and at this point in the school year, grade 6 students had not yet formally experienced a sequential design process.

September 2018 was the first time for the lesson–it did not have the benefit of a previous school year to improve upon, so keep that in mind if you try this out. For classes of about 20 sixth grade students, three sessions were needed (about one hour each) to complete the setting-the-stage/introduction, writing, sketching, data analysis, and reflection; however, there was some practice sketching done as well done as warm-ups at the beginning of each class.

If you want a longer lesson plan or MYP unit planner examples, look over Water Tank Engineering with Newspaper, Part 1, and Part 2.

GRASPS Scenario for Paper Planes

The purpose of the lesson was grounded in the relevant aspects of the GRASPS model by Wiggins and McTighe to provide a meaningful context for the student designers. A GRASPS context sets the design problem-solving stage for students within an authentic performance task. Specifically for our paper airplane lesson, the GRASPS looked like this:

  • Goal – Design, build, and launch a paper plane to fly as far and as straight as possible.
  • Role – Student engineer at [SCHOOL NAME].
  • Audience – Your design teacher!
  • Situation – Your teacher wants to know how you think about design:
  • how you brainstorm ideas, and chose the best one; then gather test data, and use the data to improve your design.
  • Product – A paper airplane shall be made from 1⁄2 of a piece of letter paper (8.5 x 11 inches, cut along the width) that flies as far and as straight as possible.
  • Standards (and Criteria for Success) – The paper airplane shall fly as far as possible and as straight as possible.

An example of how you might introduce the lesson is available via this Google slide presentation template (slides 1-7): https://goo.gl/i7yUWu
The images should be replaced as needed.

Since this was an introductory lesson, the role and audience were standardized to be the student and the teacher respectively. Not only does the GRASPS ground students into the context of the learning to make the project-based experience more relevant and meaningful, but teachers can also benefit as well. For example, when creating a design lesson—creating a learning experience around solving a problem for someone — teachers might benefit from writing the GRASPS first to frame their thinking and planning.

Variables and Flight Data

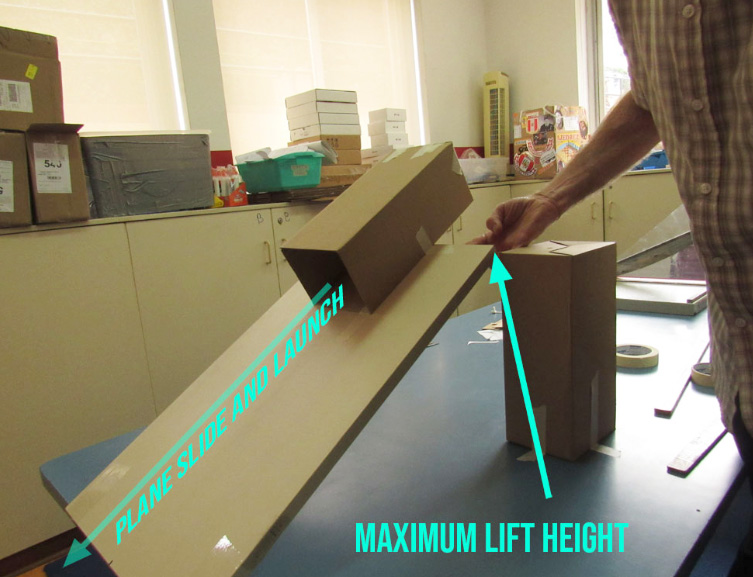
plastic shelf taped to edge of table is the paper airplane launcher. Standardized set up to gather paper airplane flight data.
Airplane Launcher with Control Tower

If the standards and criteria for success are to be honored, students need a valid and reliable way to accurately and fairly measure how far and how straight each airplane flies.

For more advanced students, consider a brainstorm of all of the variables that can be defined for paper airplane design and data gathering. This way, you can gauge prior knowledge. Then have the students decide which variables should be controlled. Finally, ask students which variables should be allowed to change so that the standards and criteria are best achieved for all designers.

If more guidance is needed for the paper airplane design and data lesson, present a list of all of the variables involved and their roles in the process. Here are some examples: launch force, distance from the launch point, distance from the intended flight path (error), paper size, paper mass, airplane shape, launcher surface friction, etc.

The time available to complete the lesson and the experience of the students with the data gathering process should factor into how the specifics of the variables should be presented. In the case of my sixth graders, they came with little science background knowledge and our time didn’t allow for a deeper exploration into the nature of variables and their role in the design process. Therefore, what was being controlled and what was being measured was simply communicated by the teacher (me).

Test Set Up for Airplane Launch

Consider reviewing the “How to Launch” slides (8-15) and query students about the set up with questions like:
– Why is the maximum lift height the same for every plane?
– How should the launcher be lifted for each test flight?
– Why should the back of all planes be even with the back of the launcher?

Test the launcher a few times to ensure that at the maximum height all the student planes will slide off. By being prepared, you can minimize unforeseen glitches. A hard, durable plastic laminate shelf worked well for this example. Plastic packing tape was used to make the hinge–where the shelf meets the table. The vertical box (“control tower”) in
slides 12 and 13 is about 30 cm high. The table is 74 cm high, and the launcher shelf is 60 cm long. The “control tower” provides an easy way to measure the maximum height to raise the launcher for each test flight. The rate of lifting the launcher should be the same for each test, and therefore one person should do this (probably the teacher) .

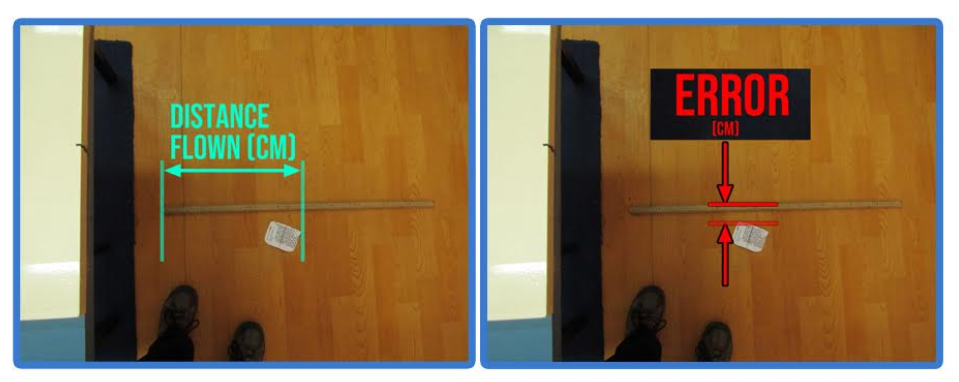
airplane distance flown and error graphically illustrated. Precision helps with paper airplane design and data gathering.
Distance Flown and Error

Pose this question to your students: How shall flight distance and straightness be measured? As a result, you will promote deeper thinking. For my sixth graders, we did consider using a rate as the metric to measure success. That is, we were thinking of using the maximum distance flown divided by the distance away from the flight path (error). In the end, the error was subtracted from the distance flown and determined to be 90 degrees from the flight path. Review slides 17-21 to learn how we measured distance flown and error.

Two plane shapes were emphasized–see slide 16. Students defined in their table groups the final plane as either triangular or square/rectangular. This request was to provide additional data for analysis, but at the end of the lesson, we did not disaggregate data by plane shape due to lack of time.

Paper Airplane Design Activity Sheet

This lesson’s brief introduction to design follows the four criteria of the MYP Design Cycle (note that Criterion B is slightly modified from the official version). This cycle is sometimes referred to as the IB Design Cycle. Students worked individually in Criteria A and B and partially in a table group in Criteria C and D to show their learning.

myp design cycle four color graphic with develop a design specification and develop design ideas switched. original image found at: http://anwatindesign.weebly.com/
MYP Design Cycle (slightly modified for Year 1)
Image Credit: http://anwatindesign.weebly.com/

The activity sheet was developed while our design department was rethinking the titles of the four criteria to improve student understanding. Therefore, the labels in the student process sheet are slightly different than the labels in the MYP Design Cycle; however, the essence of each criterion/step remained the same. Each criterion was assessed formatively only since this was an introductory lesson.

Paper Airplane Flight Data

Six sections of design classes produced 42 pieces of paper airplane data. Table groups were made up of two to three students each. The averages of the distance flown, error from the flight path, and the distance flown minus the error, were calculated for each section of students.

After each group tested their plane, students entered the data into a Google Sheet which was projected onto the classroom whiteboard from the teacher computer. We did gather hypotheses as well before each test to promote greater engagement into the learning.

Engineering Design Standards and More

An engineering-focused design lesson like this one naturally offers students opportunities to explore and, in time, master many of the NGSS Science and Engineering Practices (e.g., 1 to 6) and the NGSS Cross-Cutting Concepts (e.g., 2, 4 and 6).

What might not be obvious are the connections to other standards. The lesson does strengthen certain English Language Arts Standards (Science & Technical Subjects – Grade 6-8), such as:

  • CCSS.ELA-LITERACY.RST.6-8.3
    Follow precisely a multistep procedure when carrying out experiments, taking measurements, or performing technical tasks.

The ISTE Standards for Students have evolved as well to include an emphasis on design. At the time of this blog post, the 2016 version was the most recent and included a standard dedicated to designing with and without digital tools:

  • Innovative Designer
    Students use a variety of technologies within a design process to identify and solve problems by creating new, useful or imaginative solutions.

Paper Airplane Design and Data – Reflection and Next Steps

Top Three Student Airplanes – Distance Minus Error

Paper airplanes are familiar. In this example, with distance and error, the activity offered students different ways to collect data. The fact that the materials were very accessible also allowed for easy ways to collect data in the classroom and methods to collect data for research as well.

Quick and easy STEM activities for middle school can include paper airplane design and data gathering! However, if I were to revisit this activity, I would dig deeper into the data. I might ask the grade 6 students to sort the flight data in Google Sheets on their laptops and to calculate averages as well. The students would examine the best-designed planes in terms of the design goal, quantitatively define a successful solution based on the data based on the 42 test flights, and go through the design process once more to improve and reflect on their design.

MYP Design Assessment Criteria Modified

Why modify the original MYP Design Assessment Criteria? You may be like some schools that are moving away from the MYP. Your school may be headed towards a more standards-driven curriculum of instruction and assessment. If so, you have an opportunity to keep what works and improve what may not in terms of student understanding and achievement. For example, design learning expectations are made more transparent for students by modifying content and layout.

Young Man Thinking at Computer
Young Designer

The Basics – Layout

The original MYP Design Achievement Levels are ranked from lowest to highest. These Modified MYP Design Assessment Criteria (A, B, C, and D) start with the higher achievement levels at the top of each document. Why? Well, where is the first place a student will probably look? Most students tend to start scanning for information at the top of a paper or web resource. As students reference these Modified MYP Design Assessment Criteria, they will naturally and more frequently be exposed to the 5, 6, and 7 level descriptors rather than the 1, 2, 3.

The Basics – Color

An internet search for the MYP Design Cycle produces many examples with this color arrangement:
Criterion A – Inquiring and Analyzing – Blue
Criterion B – Developing Ideas – Orange
Criterion C – Creating the Solution – Green
Criterion D – Evaluating – Red

Note: The MYP Design Cycle is sometimes called the IB Design Cycle.

Note: From Chirag Mehta’s site, the Name that Color Project produced these color names (the hex values were determined with Adobe Photoshop):

Criterion A – Inquiring and Analyzing – Cornflower Blue – #3ac5d6
Criterion B – Developing Ideas – Cream Can – #f1c953
Criterion C – Creating the Solution – Mantis – #6ebf58
Criterion D – Evaluating – Carnation – #f44a58

Each modified MYP Design Assessment Criterion(A, B, C, and D) displays small amounts of each of these colors to easily associate them with the proper part of the design cycle.

MYP Grade Boundaries – From 0-8 to 1-7

Our middle school changed from a 0-8 MYP grading scale to a 1-7 scale. This fact combined with the tendency of students to score on the higher end of the scale prompted the modification of the grade boundaries and descriptors to fall into these areas:

  • 7
  • 6
  • 5
  • 3 to 4
  • 1 to 2
  • NA

Design Thinking Assessment Criteria

The MYP Design Assessment Cycle and the MYP Design Assessment Criterion share commonalities with design thinking. For example, designers solve problems for an audience. Certain aspects of design thinking language can enhance MYP (e.g., an emphasis on empathy). Each modified MYP Design Assessment Criteria is available as a PDF file download and summarized as follows:

Criterion A – Define and Research a Design Problem
Students define and research a problem to be solved according to the needs of a specific audience. These needs are based on how the audience might be perceiving a problem, circumstance, or situation. By empathizing with their audience, designers are more able to fully justify the need to solve the problem.

Criterion B – Develop Ideas
Students brainstorm possibilities to solve the problem then refine these ideas with design specifications to guide the creation of a solution. Design specifications connect with the audience’s needs and adhere to realistic constraints. This process develops the best idea to become the chosen solution.

Criterion C – Plan and Create a Solution
Students plan the steps to create the solution based on the best idea, build the solution while documenting the process, and identify and justify any modifications to the plan.

Criterion D – Test and Evaluate a Solution
Students evaluate the solution against the design specifications to determine its success.

Final Modified MYP Design Cycle - Four Criteria: A, B, C and D. Sixteen strands total.
Final Modified MYP Design Cycle with Labeled Strands (B.1 and B.2 Switched for Year 1)

Final Essentials and Other Elements

The score, characteristics of the score (one word, at-a-glance language), and level descriptors are the headers in each of the four resources. Brainstorming is emphasized before design specifications, in Criterion B – Developing Ideas. At the younger ages, it may be more prudent to encourage and solicit creative responses before establishing the rules (i.e., design specifications). This approach may encourage students to be more inclined to buy into the lesson if possibilities seem more open at the start.

Out-of-the-box thinking and conventional methods are encouraged to develop a wide range of ideas. Why include conventional thinking too? These routine solutions may be the best design for a particular problem and audience! It’s important to encourage openness to a broad range of possible ideas regardless of a designer’s desire to produce a creative solution–a focus on the problem and audience is key. In fact with so much emphasis on innovation, pragmatic solutions may even be perceived as thinking that came from outside of the box!

The focus of these design assessment modifications are for students ages 11 to 14; however, these resources may be used for other age groups as appropriate:

Criterion A – Define and Research a Design Problem
Criterion B – Develop Ideas
Criterion C – Plan and Create a Solution
Criterion D – Test and Evaluate a Solution

Design Sketch Checklist

Product sketching. Photo by Andrea Piacquadio.
Product Sketching

What Is a Design Sketch Checklist?

A design sketch checklist helps students organize and improve their drawings of objects, scenes, or products. It’s like a set of rules or reminders that guide students to make their ideas clearer, neater, and easier to understand.

Why Use a Sketching Checklist in MYP Design?

In the MYP Design class, students must visually represent their ideas and concepts. This checklist helps them focus on the most essential parts of a good sketch. It also supports students in developing their drawing skills and improving their communication.

8 Key Elements of a Strong Product Sketch

These eight elements evolved based on what I observed and needed in my MYP Design classes. I saw the value of giving students structured guidance so they could produce their best visual representations possible. Each element reflects a specific aspect that supports clarity, neatness, and thoughtful design.

1. Neatness

Use clean and clear lines. Try to avoid smudges or extra marks. Erase gently if needed.

2. Space Management

Ensure your sketch fits neatly on the page. Don’t make it too small or too big.

3. Contrast

Use a dark pencil so your lines stand out on the paper. It should be easy to see.

4. Line Thickness

Use light, thin lines to guide your sketch. Use thicker, darker lines for the final drawing.

5. Lighting and Shading

Show where the light is coming from. Add shadows and highlights to make your drawing look more real.

6. Positions and Proportions

The parts of your drawing should work together to make sense. For example, avoid drawing a pencil that appears larger than a backpack.

7. Essential Sketch Details

Include important parts that show what your drawing is about. Focus on what makes the design unique.

8. Annotations

Add short labels or notes. These help explain how things work or what the design is made of.

Student using the design sketch checklist for their product sketch in MYP Design
Student using a checklist to improve their MYP Design sketch.

How to Use This Checklist With Students

For students in grades 4 to 7, focus on just 3 or 4 checklist items at first. This practice keeps the task simple and less stressful. Over time, encourage students to try all eight items.

Teachers can use this checklist for both practice and assessment. It’s like a sketch version of the Six Traits Writing rubric.

Download the Free Checklist PDF

👉 Download the Design Sketch Checklist PDF

This one-page printable version is great for classroom use. Keep it handy during sketching lessons.

Related Resources